

Introduction
Welcome to the second (and most likely, the last) installment of my resizing Drawn objects series. In Part 1, “Creating Resizable Drawings in Visual Basic.NET, Part 1: Rectangles,” I covered how to set things up nicely so that you have a resizable Rectangular object. Today, I will take it a step further and show you how to resize circular shapes and odd shapes.
Luckily, there are a lot of similarities from the previous installment, but obviously there is still some work ahead. Let’s get started!
If you haven’t yet read the first part, please do so. The first part also contains all the code as well as a downloadable file containing the code. You will need this project for this article.
Let’s start with the new design. Design your project to resemble Figure 1.
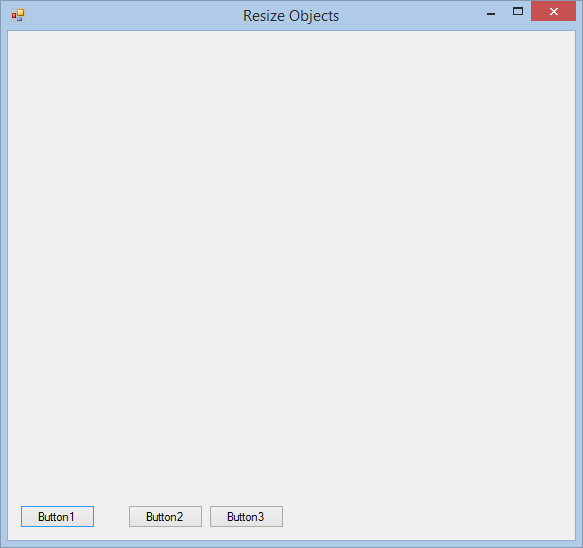
Figure 1: New Design
I have enlarged the PictureBox area and added three buttons. The buttons will be used for Rectangle, Circle, and Odd Shape, respectively.
Add a new Component to your project. Name it something practical, such as clsMain, for instance. Add the following code into clsMain:
   Public Enum Shape
      Rect
      Circle
      Odd

   End Enum
This Enum simply represents the type of object to be drawn. Move the NodePos Enum from clsObject to clsMain:
   Public Enum NodePos

      TopLeft
      TopMiddle
      TopRight

      BottomLeft
      BottomMiddle
      BottomRight

      LeftMiddle
      RightMiddle

      None

   End Enum
This identifies the position of the Nodes on the drawn object. Your whole clsMain now should look like the following:
Public Class clsMain
   Public Enum Shape
      Rect
      Circle
      Odd

   End Enum

   Public Enum NodePos

      TopLeft
      TopMiddle
      TopRight

      BottomLeft
      BottomMiddle
      BottomRight

      LeftMiddle

      RightMiddle

      None

   End Enum


End Class
The move was needed because these two Enums will be used from within the Object class as well as the form.
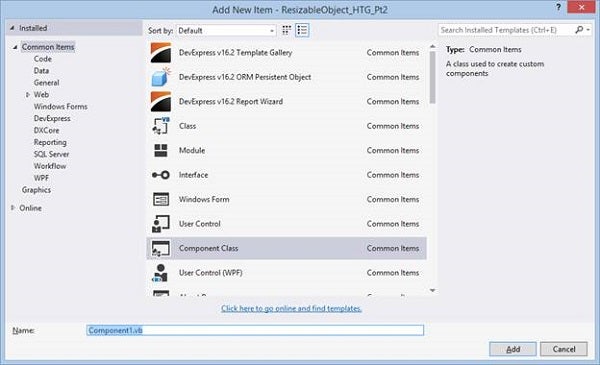
Figure 2: Add Component
You now need to import this class into both:
clsObject
Imports ResizableObject_HTG.clsMain
All the imports for clsObject should include the following:
Imports System.Drawing.Drawing2D
Imports ResizableObject_HTG.clsMain
frmResizeObject
Imports ResizableObject_HTG.clsMain
Add the following variables to clsObject:
   Private shShape As Shape
   Private grShape As Graphics
shShape will identify the shape you want to draw, and grShape is a Graphics object to draw with. Edit your clsObject’s constructor to include more parameters:
Public Sub New(ByVal rctTemp As Rectangle, ByVal sh As Shape, _
      ByVal pic As PictureBox)

   rectObject = rctTemp
   shShape = sh
   blnClick = False

   Me.picObject = pic

   AddHandler picObject.MouseDown, AddressOf picObject_MouseDown
   AddHandler picObject.MouseMove, AddressOf picObject_MouseMove
   AddHandler picObject.MouseUp, AddressOf picObject_MouseUp
   'AddHandler picObject.Paint, AddressOf picObject_Paint'

   Try
      grShape = pic.CreateGraphics()

      Create(grShape, shShape)

   Catch ex As Exception

      MessageBox.Show(ex.Message)

   End Try

End Sub
I have added the Shape so that it can be instantiated when this class gets called. Also, I have removed the Paint event handler, because you will be using the grShape graphics object to draw. Edit the Create Sub to also include the Shape parameter:
   Public Sub Create(ByVal g As Graphics, sh As Shape)


      Select Case sh
         Case Shape.Rect

            g.DrawRectangle(New Pen(Color.Green), rectObject)
         Case Shape.Circle

            g.DrawEllipse(New Pen(Color.Orange), rectObject)
         Case Shape.Odd
            DrawSpiral(g)
      End Select

      For Each npPos As NodePos In
            [Enum].GetValues(GetType(NodePos))

         g.DrawRectangle(New Pen(Color.Blue), GetObject(npPos))

      Next

   End Sub
You also will notice the Select statement to determine which shape has been chosen. If it is a Rectangle, draw a rectangle using the built-in Graphics capabilities; the same holds true with a circle that will draw an Ellipse. With the Odd shape, a sub named DrawSpiral gets called that draws a spiral, which follows next:
   Public Sub DrawSpiral(ByVal g As Graphics)

      Dim PI As Double = 3.14159265358979
      'Dim Orientation As Double = 3.356987413'
      '2.718281828 orientation'
      Dim Orientation As Double = 2.718281828    'orientation'

      Dim penSpiral As New Pen(Color.Maroon)

      Dim cx As Integer
      Dim x As Integer
      Dim cy As Integer
      Dim y As Integer

      Dim rectSprial As New Rectangle(10, 10, 250, 250)

      cx = rectSprial.Width / 2
      cy = rectSprial.Height / 2

      Dim a As Single
      Dim b As Single
      Dim i As Long
      Dim ang As Double

      a = 0.15    'shape'
      b = 0.15    'shape'

      For i = 0 To 10000    'size of spiral'

         ang = (PI / 720) * i

         x = cx + (a * (Math.Cos(ang)) *
         (Orientation ^ (b * ang)))
         y = cy - (a * (Math.Sin(ang)) *
         (Orientation ^ (b * ang)))

         'The higher the + number, the thicker the lines'
         g.DrawLine(penSpiral, x, y, x + 1, y + 1)

      Next i

   End Sub
I also have commented out the Paint event for the PictureBox. You already will be using a Graphics object to draw with:
   'Private Sub picObject_Paint(ByVal sender As Object,'
   'ByVal e As PaintEventArgs)'

      'Try'

         'Create(e.Graphics, shShape)'

      'Catch ex As Exception'

         'MessageBox.Show(ex.Message)'

      'End Try'

   'End Sub'
The rest of the code in clsObject remains the same. Add the following variable to frmResizeObject:
Private shShape As Shape
Add the following code to all three buttons:
   Private Sub Button1_Click(sender As Object, e As EventArgs) _
         Handles Button1.Click

      objRect = Nothing
      shShape = Shape.Rect
      objRect = New clsObject(New Rectangle(5, 5, 350, 350), _
                shShape, picCanvas)

   End Sub

   Private Sub Button2_Click(sender As Object, e As EventArgs) _
         Handles Button2.Click
      objRect = Nothing
      shShape = Shape.Circle
      objRect = New clsObject(New Rectangle(5, 5, 350, 350), _
                shShape, picCanvas)

   End Sub

   Private Sub Button3_Click(sender As Object, e As EventArgs) _
         Handles Button3.Click
      objRect = Nothing
      shShape = Shape.Odd
      objRect = New clsObject(New Rectangle(5, 5, 350, 350), _
                shShape, picCanvas)
   End Sub
That’s it! It is not perfect, but it works and can be made even more flexible. Running the program results in the following outputs:
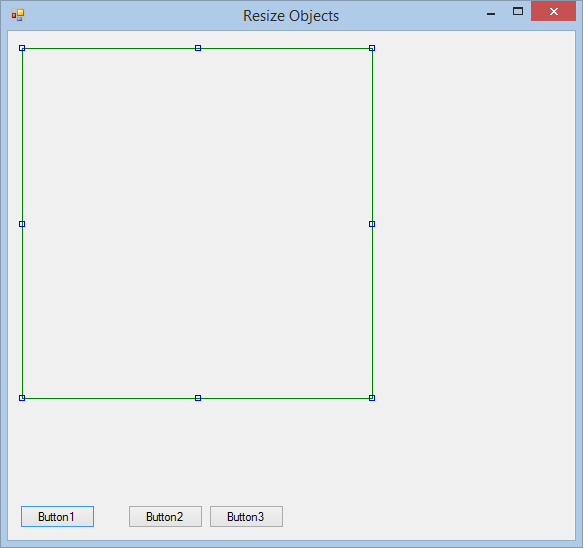
Figure 3: Rectangle
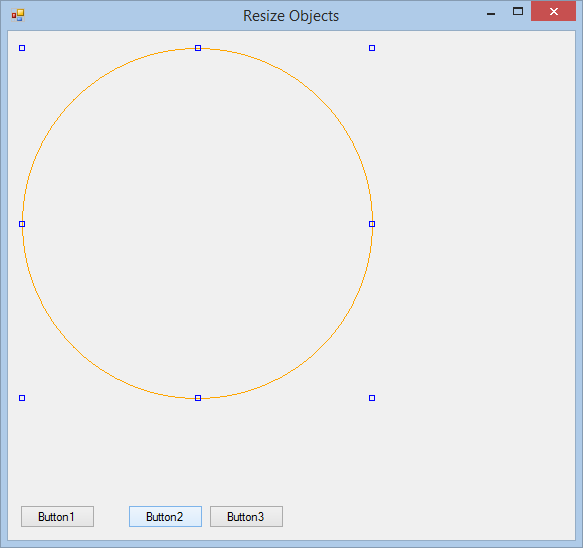
Figure 4: Circle
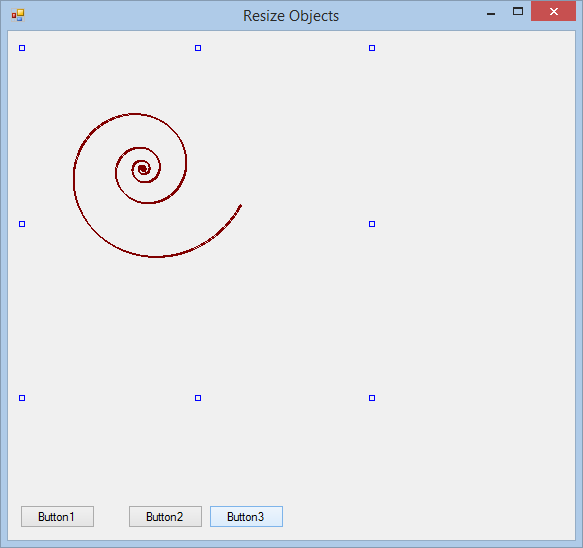
Figure 5: Spiral
The code for this article is available on GitHub.
Conclusion
As you can see: If you have set up your application properly the first time, it is easy to expand and build onto it to provide better functionality. Enjoy playing around with your drawing application programming skills!