


Drawing with the .NET Framework is very easy. There are numerous namespaces that allow you to draw any shape imaginable. A few years ago, I wrote a number of articles on how to create a drawing application, but I never got around to adding some more features into them. This is where this article comes in. This article will show you how to create a rectangle shape that is resizable. I have also decided to create a series for this topic, so in the future you can expect to be able to resize round shapes and odd shapes.
There is a lot of work, so let’s get started straight-away!
Practical
Open Visual Studio and create a new Visual Basic Windows Forms project. Name it anything you desire. Once the project has loaded, add one picturebox onto the form. Your design should resemble Figure 1.
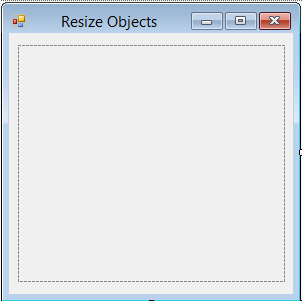
Figure 1: Design
For now, the form is complete; we will continue with it a bit later. Add a class to your project and give it a descriptive name. I have named mine clsObject (because it will get extended later). Add the following fields to your class:
   Private picObject As PictureBox

   Public rectObject As Rectangle

   Private blnClick As Boolean = False
   Private blnMove As Boolean = False

   Private intPrevX As Integer
   Private intPrevY As Integer
   Private intNode As Integer = 5
A dynamic Picturebox gets created as well as a Rectangle object. The next two flags will determine whether or not the user is clicking or moving; this helps with keeping track of the resizing handles you will create later. X and Y get stored and the size of your resizing node will be 5 pixels by 5 pixels. Add the Enum:
   Private intSelNode As NodePos = NodePos.None

   Private Enum NodePos

      TopLeft
      TopMiddle
      TopRight

      BottomLeft
      BottomMiddle
      BottomRight

      LeftMiddle

      RightMiddle

      None

   End Enum
The NodePos enum provides the settings for the display of the resizing handles. Add the constructor:
   Public Sub New(ByVal rctTemp As Rectangle)

      rectObject = rctTemp

      blnClick = False

   End Sub
This initializes the class. Add the Create method that creates the resizable rectangle:
   Public Sub Create(ByVal g As Graphics)

      g.DrawRectangle(New Pen(Color.Green), rectObject)

      For Each npPos As NodePos In _
            [Enum].GetValues(GetType(NodePos))

         g.DrawRectangle(New Pen(Color.Green), GetObject(npPos))

      Next

   End Sub
The Create sub creates the Rectangle object; it also creates the sizing handles so that you are able to grab on to them and resize the Rectangle. You will call the Create Sub a bit later. You must add events to your dynamic picturebox; otherwise, you will not be able to handle any mouse clicks or movements.
   Public Sub AddPicEvents(ByVal pic As PictureBox)

      Me.picObject = pic

      AddHandler picObject.MouseDown, AddressOf picObject_MouseDown
      AddHandler picObject.MouseMove, AddressOf picObject_MouseMove
      AddHandler picObject.MouseUp, AddressOf picObject_MouseUp
      AddHandler picObject.Paint, AddressOf picObject_Paint

   End Sub
Event handlers for the Mouse are added as well as the very, extremely important Paint event. The Paint event is responsible for, well, painting the drawing. You will call the Create sub from the Paint event, as you will see now.
   Private Sub picObject_Paint(ByVal sender As Object, _
         ByVal e As PaintEventArgs)

      Try

         Create(e.Graphics)

      Catch ex As Exception

         MessageBox.Show(ex.Message)

      End Try

   End Sub
Add the mouse events:
   Private Sub picObject_MouseDown(ByVal sender As Object, _
         ByVal e As MouseEventArgs)

      blnClick = True

      intSelNode = NodePos.None

      intSelNode = SelectableNode(e.Location)

      If rectObject.Contains(New Point(e.X, e.Y)) Then

         blnMove = True

      End If

      intPrevX = e.X
      intPrevY = e.Y

   End Sub

   Private Sub picObject_MouseUp(ByVal sender As Object, _
         ByVal e As MouseEventArgs)

      blnClick = False
      blnMove = False

   End Sub

   Private Sub picObject_MouseMove(ByVal sender As Object, _
         ByVal e As MouseEventArgs)

      ChangeCursor(e.Location)

      If blnClick = False Then

         Return

      End If

      Dim rctTemp As Rectangle = rectObject

      Select Case intSelNode

         Case NodePos.TopLeft

            rectObject.X += e.X - intPrevX
            rectObject.Width -= e.X - intPrevX
            rectObject.Y += e.Y - intPrevY
            rectObject.Height -= e.Y - intPrevY

         Case NodePos.LeftMiddle

            rectObject.X += e.X - intPrevX
            rectObject.Width -= e.X - intPrevX

         Case NodePos.BottomLeft

            rectObject.Width -= e.X - intPrevX
            rectObject.X += e.X - intPrevX
            rectObject.Height += e.Y - intPrevY

         Case NodePos.BottomMiddle

            rectObject.Height += e.Y - intPrevY

         Case NodePos.TopRight

            rectObject.Width += e.X - intPrevX
            rectObject.Y += e.Y - intPrevY
            rectObject.Height -= e.Y - intPrevY

         Case NodePos.BottomRight

            rectObject.Width += e.X - intPrevX
            rectObject.Height += e.Y - intPrevY

         Case NodePos.RightMiddle

            rectObject.Width += e.X - intPrevX

         Case NodePos.TopMiddle

            rectObject.Y += e.Y - intPrevY
            rectObject.Height -= e.Y - intPrevY

         Case Else

            If blnMove Then

               rectObject.X = rectObject.X + e.X - intPrevX
               rectObject.Y = rectObject.Y + e.Y - intPrevY

            End If

      End Select

      intPrevX = e.X
      intPrevY = e.Y

      If rectObject.Width < 5 OrElse rectObject.Height < 5 Then

         rectObject = rctTemp

      End If

      ObjHitTest()

      picObject.Invalidate()

   End Sub
The mouse events set the Click and Move flags, depending on the state of the mouse. In the MouseMove event, you determine the direction in which the user is moving and update the size of the rectangle as well as the placements of the sizing handles.
   Private Sub ObjHitTest()

      If rectObject.X < 0 Then rectObject.X = 0
      If rectObject.Y < 0 Then rectObject.Y = 0

      If rectObject.Width <= 0 Then rectObject.Width = 1
      If rectObject.Height <= 0 Then rectObject.Height = 1

      If rectObject.X + rectObject.Width > picObject.Width Then

         rectObject.Width = picObject.Width - rectObject.X - 1

      End If

      If rectObject.Y + rectObject.Height > picObject.Height Then

         rectObject.Height = picObject.Height - rectObject.Y - 1

      End If

   End Sub

   Private Function SizeNode(ByVal x As Integer, _
         ByVal y As Integer) As Rectangle

      Return New Rectangle(x - intNode / 2, y - intNode / 2, _
         intNode, intNode)

   End Function

   Private Function GetObject(ByVal pos As NodePos) As Rectangle

      Select Case pos

         Case NodePos.TopLeft

            Return SizeNode(rectObject.X, rectObject.Y)

         Case NodePos.TopMiddle

            Return SizeNode(rectObject.X + rectObject.Width / 2, _
               rectObject.Y)

         Case NodePos.TopRight

            Return SizeNode(rectObject.X + rectObject.Width, _
               rectObject.Y)

         Case NodePos.BottomLeft

            Return SizeNode(rectObject.X, rectObject.Y + _
               rectObject.Height)

         Case NodePos.BottomMiddle

            Return SizeNode(rectObject.X + rectObject.Width / 2, _
               rectObject.Y + rectObject.Height)

         Case NodePos.BottomRight

            Return SizeNode(rectObject.X + rectObject.Width, _
               rectObject.Y + rectObject.Height)

         Case NodePos.LeftMiddle

            Return SizeNode(rectObject.X, rectObject.Y + _
               +rectObject.Height / 2)

         Case NodePos.RightMiddle

            Return SizeNode(rectObject.X + rectObject.Width, _
               rectObject.Y + rectObject.Height / 2)

         Case Else

            Return New Rectangle()

      End Select

   End Function
Ensure that the Sizing handle you click is indeed selectable and responsive:
   Private Function SelectableNode(ByVal pnt As Point) As NodePos

      For Each pos As NodePos In [Enum].GetValues(GetType(NodePos))

         If GetObject(pos).Contains(pnt) Then

            Return pos

         End If

      Next

      Return NodePos.None

   End Function
Polishing off the class is changing the mouse cursor according to which sizing handle it is placed on:
   Private Sub ChangeCursor(ByVal pnt As Point)

      picObject.Cursor = GetCursor(SelectableNode(pnt))

   End Sub

   Private Function GetCursor(ByVal p As NodePos) As Cursor

      Select Case p

         Case NodePos.TopLeft

            Return Cursors.SizeNWSE

         Case NodePos.TopMiddle

            Return Cursors.SizeNS

         Case NodePos.TopRight

            Return Cursors.SizeNESW

         Case NodePos.BottomLeft

            Return Cursors.SizeNESW

         Case NodePos.BottomMiddle

            Return Cursors.SizeNS

         Case NodePos.BottomRight

            Return Cursors.SizeNWSE

         Case NodePos.LeftMiddle

            Return Cursors.SizeWE

         Case NodePos.RightMiddle

            Return Cursors.SizeWE

         Case Else

            Return Cursors.[Default]

      End Select

   End Function
Add the following code to your form:
   Private objRect As clsObject

   Public Sub New()

      InitializeComponent()

      objRect = New clsObject(New Rectangle(5, 5, 230, 230))
      objRect.AddPicEvents(picCanvas)

   End Sub
This instantiates the clsObject object and activates it on your form’s picturebox. When run, you should have a Rectangle that you can resize dynamically, as shown in Figure 2.
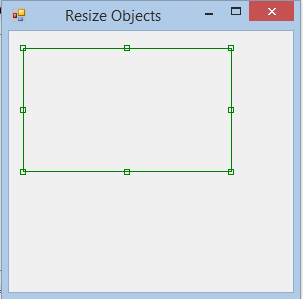
Figure 2: Runtime
The code for this article is available on GitHub.
Conclusion
Drawing in .NET is extremely powerful. Stay tuned for the next article in this series, where you can resize round shapes.