


Introduction
I have always been curious; curiosity might one day be the end of me…. Today, I will cover a fun and exciting topic that is also a tad complicated. Today, you will learn how to change your screen’s wallpaper, screensaver, and its settings as well as change your screen’s resolution. We have a lot of work, so let’s get started.
Design
Start Visual Basic and create a new Windows Forms Project. Design your form to resemble Figure 1.
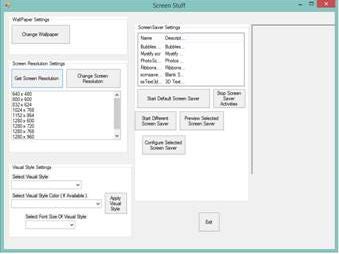
Figure 1: Our Busy design
Code
Add the required namespaces to your project:
Imports System.Runtime.InteropServices
Imports System.IO   'Import System.IO For File Operations
Imports Microsoft.Win32
The first Namespace enables us to properly work with APIs. If you do not know what APIs are, I suggest you read the following articles:
System.IO enables us to properly work with Files; here is more information on files:
The last Namespace, Micorsoft.Win32, enables you to work with your system, such as the Registry. Seeing the fact that all of these screen settings are stored in and read from the Registry, I suggest that you read up on the Registry here:
Add the following fields to your project:
   Dim ChangeRes As Resolution.CResolution
   Private FixHeight As Integer   '= 1024 'default height
   Private FixWidth As Integer    '= 768 'default width
   Dim XRes As Short
   Dim YRes As Short
   Dim DidResChange As Boolean
   Private DirName As String = "C:\WINDOWS\system32\"
   Private StyleDir As String = "C:\WINDOWS\Resources\Themes"
   Private StyleColorDir As String
   Private ScreenNames() As String
   Private StyleNames() As String

   Private StyleFont As String
   Private StyleColor As String
   Private StyleDisplayName As String
The first few variables deal with the screen resolution settings; for example, the width of the screen as well as the height of the screen. The next few variables will be used with changing of the visual Styles of your screen. I will go into greater detail as this article progresses.
Add the following APIs and their associated System Constants to your project:
   Declare Function IsThemeActive Lib "UxTheme.dll" _
      () As Boolean
   Declare Function EnableTheming Lib "UxTheme.dll" _
      (ByVal b As Boolean) As Long
   Declare Function IsAppThemed Lib "UxTheme.dll" _
      () As Boolean
   Private mouse_offset As Point

   <DllImport("UxTheme.DLL", BestFitMapping:=False, _
      CallingConvention:=CallingConvention.Winapi, _
      CharSet:=CharSet.Unicode, EntryPoint:="#65")> _
      Shared Function SetSystemVisualStyle(ByVal _
      	pszFilename As String, _
      ByVal pszColor As String, ByVal pszSize As String, _
      ByVal dwReserved As Integer) As Integer
   End Function

   <DllImport("user32.dll")> _
   Private Shared Function SendMessage(ByVal hwnd As Int32, _
      ByVal wMsg As Int32, ByVal wParam As Int32, _
      ByVal lParam As Int32) As Int32
   End Function

   <DllImport("user32", EntryPoint:="SystemParametersInfo", _
      CharSet:=CharSet.Auto, SetLastError:=True)> _
   Private Shared Function SystemParametersInfo(ByVal uAction As Integer, _
      ByVal uParam As Integer, ByVal lpvParam As String, _
      ByVal fuWinIni As Integer) As Integer
   End Function   'API Used for System Settings

   Private Const SPI_SETDESKWALLPAPER = 20    'Set WallPaper
   Private Const SPIF_UPDATEINIFILE = &H1     'Update The INI File
   Private Const WM_SYSCOMMAND As Integer = &H112
   Private Const SC_SCREENSAVE As Integer = &HF140
   Private key As Microsoft.Win32.RegistryKey = _
      Microsoft.Win32.Registry.CurrentUser.OpenSubKey("Control Panel", True)
IsThemeActive determines whether of not a theme is currently present on your display settings. EnableTheming enables theming capabilities on your screen. IsAppThemed determines whether or not a specific application is allowed to associate itself with a system theme.
SetSystemVisualStyle physically sets the Visual Style you may have selected. SendMessage sends a system message. Read this article to get more information regarding the SendMessage API:
SystemParametersInfo is responsible for system settings. Here is more information regarding this API:
The constants all make these APIs work. Later on, you will see how they are implemented.
Changing the Wallpaper
Double-click the Button labeled ‘Change Wallpaper’ and add the following code behind it:
   Private Sub btnWall_Click(ByVal sender As System.Object, _
          ByVal e As System.EventArgs) Handles btnWall.Click
      Dim ImagePath As String = Application.StartupPath & _
          "\CurrentWall.bmp"
      'Set Parameters To Change The Wallpaper & To Update
      'The Windows Setting
      SystemParametersInfo(SPI_SETDESKWALLPAPER, 0, ImagePath, _
         SPIF_UPDATEINIFILE)

      'Open Wallpaper Registry key
      key = key.OpenSubKey("Desktop", True)
      'Save New Wallpaper Location
      key.SetValue("Wallpaper", ImagePath)
   End Sub
As easy as that! First, we determine where our picture that we want to set as the wallpaper is, then we use the SystemParametersInfo API to physically set the wallpaper. Now, this change is not really permanent. If you were to run your app now, you will see the wallpaper change, but tomorrow when you switch on your computer, your old screensaver will appear again. You have to save the associated information in the registry as well; that is what the last two lines of code do. They basically set the Desktop\Wallpaper setting to your specified Image source.
Getting Screen Resolution
Add the following code behind the ‘Get Screen Resolution‘ button:
   Private Sub btnGetRes_Click(ByVal sender As System.Object, _
         ByVal e As System.EventArgs) Handles btnGetRes.Click
      'CHECK SCREEN RESOLUTION
      XRes = System.Windows.Forms.Screen.PrimaryScreen.Bounds.Width
      YRes = System.Windows.Forms.Screen.PrimaryScreen.Bounds.Height
      MessageBox.Show("Horizontal Resolution = " & XRes.ToString() _
         & Environment.NewLine & "Vertical Resolution = " _
         & YRes.ToString)
   End Sub
No need for APIs here; the Screen object in the .NET Framework contains the capability to determine this. Here, we simply get the X and Y resolution settings and display them inside a picture box.
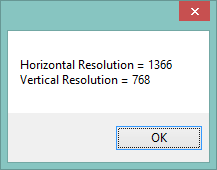
Figure 2: Current Screen resolution
Changing the Screen Resolution
Before we can change the screen’s resolution, we have to determine what option has been selected inside the Listbox named lstResolution, (Note: Your objects’ names might differ from mine.) Add the following code inside the lstResolution_SelectedIndexChanged event:
   Private Sub lstResolution_SelectedIndexChanged(ByVal sender _
         As System.Object, ByVal e As System.EventArgs) _
         Handles lstResolution.SelectedIndexChanged
      Dim ListSel As Integer
      If lstResolution.SelectedIndex > -1 Then
         ListSel = lstResolution.SelectedIndex
      End If

      Select Case ListSel
         Case 0   '640 x 480
            FixWidth = 640
            FixHeight = 480
         Case 1   '800 x 600
            FixWidth = 800
            FixHeight = 600
         Case 2
            FixWidth = 832
            FixHeight = 624
         Case 3   '1024 x 768
            FixWidth = 1024
            FixHeight = 768
         Case 4   '1152 x 864
            FixWidth = 1152
            FixHeight = 864
         Case 5   '1280 x 600
            FixWidth = 1280
            FixHeight = 600
         Case 6
            FixWidth = 1280
            FixHeight = 720
         Case 7
            FixWidth = 1280
            FixHeight = 768
         Case 8
            FixWidth = 1280
            FixHeight = 960
         Case 9
            FixWidth = 1280
            FixHeight = 1024
      End Select

   End Sub
What you do here is simply determine which option has been selected and set the appropriate objects to the selected Height and Width values. Now, add the following code behind the ‘Change Resolution‘ button:
   Private Sub btnChangeRes_Click(ByVal sender As System.Object, _
         ByVal e As System.EventArgs) Handles btnChangeRes.Click
      'CHECK SCREEN RESOLUTION
      XRes = System.Windows.Forms.Screen.PrimaryScreen.Bounds.Width
      YRes = System.Windows.Forms.Screen.PrimaryScreen.Bounds.Height

      If XRes <> 1024 And YRes <> 768 Then
         'Me.WindowState = System.Windows.Forms.FormWindowState.Minimized
         ChangeRes = New Resolution.CResolution(FixWidth, FixHeight)
         'Me.WindowState = System.Windows.Forms.FormWindowState.Maximized
         DidResChange = True
      End If

   End Sub
Again, we do a check on the current resolution. If it isn’t 1024 x 768, call the CResolution class inside the Resolution class, which looks like this:
Imports System
Imports System.Windows.Forms
Imports System.Runtime.InteropServices
Public Class Resolution

   <StructLayout(LayoutKind.Sequential)> _
   Public Structure DEVMODE1
      <MarshalAs(UnmanagedType.ByValTStr, _
         SizeConst:=32)> _
      Public dmDeviceName As String
      Public dmSpecVersion As Short
      Public dmDriverVersion As Short
      Public dmSize As Short
      Public dmDriverExtra As Short
      Public dmFields As Integer
      Public dmOrientation As Short
      Public dmPaperSize As Short
      Public dmPaperLength As Short
      Public dmPaperWidth As Short
      Public dmScale As Short
      Public dmCopies As Short
      Public dmDefaultSource As Short
      Public dmPrintQuality As Short
      Public dmColor As Short
      Public dmDuplex As Short
      Public dmYResolution As Short
      Public dmTTOption As Short
      Public dmCollate As Short
      <MarshalAs(UnmanagedType.ByValTStr,  _
         SizeConst:=32)> _
      Public dmFormName As String
      Public dmLogPixels As Short
      Public dmBitsPerPel As Short
      Public dmPelsWidth As Integer
      Public dmPelsHeight As Integer
      Public dmDisplayFlags As Integer
      Public dmDisplayFrequency As Integer
      Public dmICMMethod As Integer
      Public dmICMIntent As Integer
      Public dmMediaType As Integer
      Public dmDitherType As Integer
      Public dmReserved1 As Integer
      Public dmReserved2 As Integer
      Public dmPanningWidth As Integer
      Public dmPanningHeight As Integer
   End Structure

   Class User_32

      <DllImport("user32.dll")> _
      Public Shared Function EnumDisplaySettings(ByVal _
         deviceName As String, ByVal modeNum As Integer, _
         ByRef devMode As DEVMODE1) As Integer
      End Function

      <DllImport("user32.dll")> _
      Public Shared Function ChangeDisplaySettings(ByRef _
         devMode As DEVMODE1, _
         ByVal flags As Integer) As Integer
      End Function
      Public Const ENUM_CURRENT_SETTINGS As Integer = -1
      Public Const CDS_UPDATEREGISTRY As Integer = 1
      Public Const CDS_TEST As Integer = 2
      Public Const DISP_CHANGE_SUCCESSFUL As Integer = 0
      Public Const DISP_CHANGE_RESTART As Integer = 1
      Public Const DISP_CHANGE_FAILED As Integer = -1
   End Class

   Class CResolution

      Public Sub New(ByVal a As Integer, ByVal b As Integer)
         Dim screen As Screen = screen.PrimaryScreen
         Dim iWidth As Integer = a
         Dim iHeight As Integer = b
         Dim dm As DEVMODE1 = New DEVMODE1
         dm.dmDeviceName = New String(New Char(32) {})
         dm.dmFormName = New String(New Char(32) {})
         dm.dmSize = CType(Marshal.SizeOf(dm), Short)
         If Not (0 = User_32.EnumDisplaySettings(Nothing, _
               User_32.ENUM_CURRENT_SETTINGS, dm)) Then
            dm.dmPelsWidth = iWidth
            dm.dmPelsHeight = iHeight
            Dim iRet As Integer = User_32.ChangeDisplaySettings(dm, _
               User_32.CDS_TEST)
            If iRet = User_32.DISP_CHANGE_FAILED Then
               MessageBox.Show("Unable to process _
                  your request")
               MessageBox.Show("Description: Unable To Process _
                  Your Request. Sorry For This Inconvenience.", _
                  "Information", MessageBoxButtons.OK, _
                  MessageBoxIcon.Information)
            Else
               iRet = User_32.ChangeDisplaySettings(dm, _
                  User_32.CDS_UPDATEREGISTRY)
               Select Case iRet
                  Case User_32.DISP_CHANGE_SUCCESSFUL
                     ' break
                  Case User_32.DISP_CHANGE_RESTART
                     MessageBox.Show("Description: You Need To _
                        Reboot For The Change To Happen." & _
                        Microsoft.VisualBasic.Chr(10) & _
                        " If You Feel Any Problem After Rebooting _
                        Your Machine" & Microsoft.VisualBasic.Chr(10) _
                        & "Then Try To Change Resolution _
                        In Safe Mode.", _
                        "Information", MessageBoxButtons.OK, _
                        MessageBoxIcon.Information)
                        ' break
                  Case Else
                     MessageBox.Show("Description: Failed To Change The _
                        Resolution.", "Information", _
                        MessageBoxButtons.OK, MessageBoxIcon.Information)
                        ' break
               End Select
            End If
         End If
      End Sub
   End Class
End Class
Here is more information regarding the DEVMODE1 structure:
More information on EnumDisplaySettings & ChangeDisplaySettings:
Changing Visual Styles
Add the following subs to load all the Style Information into the associated Visual Style comboboxes:
   Private Sub LoadStyles()
      Dim FilePath As String   'File Path
      Dim Xtension As String   'File Extensions
      Dim FolderPath As String 'Folder Path
      'Dim DisplayName As String
      Dim NumFiles As Integer
      Dim TruncName As String

      'Search Sub Folders In DirName
      For Each FolderPath In _
         Directory.GetDirectories(StyleDir, "*")

         'Search Files Within Sub Folders
         For Each FilePath In Directory.GetFiles(FolderPath)
            'Identify File Extension
            Xtension = IO.Path.GetExtension(FilePath)
            If Xtension = ".msstyles" Then

               TruncName = FilePath.Substring(FilePath.LastIndexOf _
                  ("\") + 1)
               ' StyleColorDir = FilePath.Substring(0,
               ' FilePath.LastIndexOf("\"))
               StyleDisplayName = TruncName.Substring(0, _
                  TruncName.LastIndexOf("."))
               cboStyles.Items.Add(StyleDisplayName)
               ReDim Preserve StyleNames(NumFiles)
               StyleNames(NumFiles) = FilePath
               NumFiles = NumFiles + 1    'Increment File Count
            End If
         Next
      Next
   End Sub

   Private Sub LoadStyleColors()
      Dim CurrentStyle As String
      cboStyleColor.Items.Clear()
      If cboStyles.SelectedIndex > -1 Then
         CurrentStyle = cboStyles.SelectedItem.ToString()
         StyleColorDir = StyleDir & "\" _
            & CurrentStyle & "\Shell"
      End If

      Dim FolderPath As String   'Folder Path
      Dim TruncName As String

      'Search Sub Folders In DirName
      For Each FolderPath In Directory.GetDirectories(StyleColorDir, _
         "*")

         TruncName = FolderPath.Substring(FolderPath.LastIndexOf("\") + 1)

         cboStyleColor.Items.Add(TruncName)
      Next
   End Sub
Add the following events when an item has been selected in the associated Visual Styles comboboxes:
   Private Sub cboStyleFonts_SelectedIndexChanged(ByVal sender As Object, _
      ByVal e As System.EventArgs) Handles cboStyleFonts.SelectedIndexChanged
   'HKEY_CURRENT_USER\Software\Microsoft\Windows\CurrentVersion\ThemeManager\SizeName
      Dim i As Short
      If cboStyleFonts.SelectedIndex > -1 Then i = cboStyleFonts.SelectedIndex

      Select Case i
         Case 0
            StyleFont = "NormalSize"
         Case 1
            StyleFont = "LargeFonts"
         Case 2
            StyleFont = "ExtraLargeFonts"
      End Select
   End Sub

   Private Sub cboStyleColor_SelectedIndexChanged(ByVal sender As Object, _
      ByVal e As System.EventArgs) Handles cboStyleColor.SelectedIndexChanged
   'HKEY_CURRENT_USER\Software\Microsoft\Windows\CurrentVersion\ThemeManager\ColorName

      'For example, Homestead = Olive Green, Metallic = Silver etc.

      'If not all settings are set for the theme ( Themename, color, font -
      'it will show Theme name ( Modified ) in themes of display props
      If cboStyleColor.SelectedIndex > -1 Then
         StyleColor = cboStyleColor.SelectedItem.ToString()
      End If

   End Sub

   Private Sub cboStyles_SelectedIndexChanged(ByVal sender As Object, _
      ByVal e As System.EventArgs) Handles cboStyles.SelectedIndexChanged
   'HKEY_CURRENT_USER\Software\Microsoft\Windows\CurrentVersion\ThemeManager\DllName

   LoadStyleColors()

   End Sub
Finally, add the code to set the Visual Style with the selected settings:
   Private Sub btnSetStyle_Click(ByVal sender As System.Object, _
      ByVal e As System.EventArgs) Handles btnSetStyle.Click

      ' SetSystemVisualStyle("C:\WINDOWS\resources\Themes\Luna\Luna.msstyles",
      ' "Metallic", "NormalSize", 0)
      SetSystemVisualStyle(StyleNames(cboStyles.SelectedIndex), _
         StyleColor, StyleFont, 0)

End Sub
Starting the Default Screensaver
Add the following code to start the default screensaver:
   Private Sub btnScreen_Click(ByVal sender As System.Object, _
         ByVal e As System.EventArgs) Handles btnDefScreen.Click
      Dim result As Int32
      result = SendMessage(Me.Handle.ToInt32, WM_SYSCOMMAND, _
         SC_SCREENSAVE, 0)

   End Sub
Here, you have to use the SendMessage API to send a system message to start the set screensaver.
Starting a Different Screensaver
Before we can start a screensaver that is not currently in use, we have to load all the installed screensavers into a listview. Do that now:
   Private Sub LoadScreenSavers()
      Dim FilePath As String   'File Path
      Dim Xtension As String   'File Extensions
      Dim NumFiles As Integer
      Dim TruncName As String

      'Search Files Within Sub Folders
      For Each FilePath In Directory.GetFiles(DirName)
      'Identify File Extension
         Xtension = IO.Path.GetExtension(FilePath)

         If Xtension = ".scr" Then

            TruncName = FilePath.Substring(FilePath.LastIndexOf _
               ("\") + 1)
            lvScreen.Items.Add(TruncName)
            lvScreen.Items(NumFiles).SubItems.Add(FileVersionInfo._
               GetVersionInfo(FilePath).FileDescription)
            ReDim Preserve ScreenNames(NumFiles)
            ScreenNames(NumFiles) = FilePath
            NumFiles = NumFiles + 1   'Increment File Count
         End If
      Next

   End Sub
This sub is responsible for loading all the files ending with the .scr extension into the listview, as shown in Figure 3:
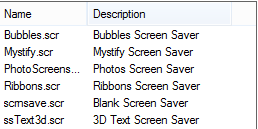
Figure 3: Installed Screensavers
Now that we have a list of installed screensavers, let’s add the code to change the system’s screensaver to the one that we have selected inside the listview:
   Private Sub btnDiffScreen_Click(ByVal sender As System.Object, _
         ByVal e As System.EventArgs) Handles btnDiffScreen.Click
      Dim LVSel As Integer
      If lvScreen.SelectedItems.Count > 0 Then
         LVSel = lvScreen.SelectedIndices(0)
      End If
      Process.Start(ScreenNames(LVSel))
   End Sub
Here, I simply made use of the Process object to start the selected screensaver.
Setting Screensaver Settings
   Private Sub btnConfScreen_Click(ByVal sender As System.Object, _
         ByVal e As System.EventArgs) Handles btnConfScreen.Click
      Dim LVSel As Integer
      If lvScreen.SelectedItems.Count > 0 Then
         LVSel = lvScreen.SelectedIndices(0)
      End If
      Dim ScreenProc As New Process
      ScreenProc.StartInfo.FileName = ScreenNames(LVSel)
      ScreenProc.StartInfo.Arguments = "/c"
      ScreenProc.StartInfo.UseShellExecute = False
      ScreenProc.Start()
   End Sub
Again, I made use of the Process object, but here I sent the /c argument that allows you to configure the selected screensaver
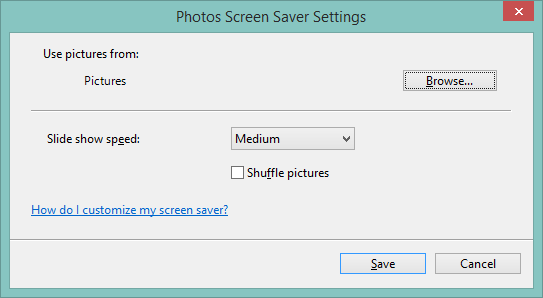
Figure 4: Screensaver settings
Previewing a Screensaver
   Private Sub btnPreviewScreen_Click(ByVal sender As System.Object, _
         ByVal e As System.EventArgs) Handles btnPreviewScreen.Click
      Dim LVSel As Integer
          If lvScreen.SelectedItems.Count > 0 Then
          LVSel = lvScreen.SelectedIndices(0)
      End If
      Dim ScreenProc As Process
      Dim psi As New ProcessStartInfo(ScreenNames(LVSel), _
         "/p " & picPreviewScreen.Handle.ToString())
      psi.UseShellExecute = False
      ScreenProc = Process.Start(psi)

   End Sub
Here, I sent the /p argument and the window into which the preview should display, in this case a picturebox:
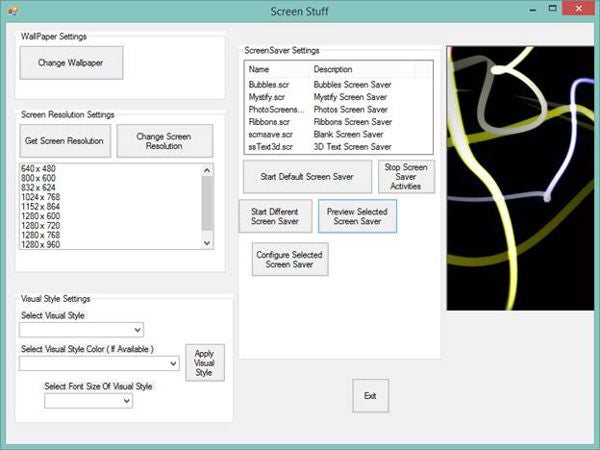
Figure 5: Preview screensaver
Conclusion
I hope you have enjoyed today’s article on how to set the screen settings with Visual Basic. Until next time, cheers!