


Introduction
Lately, it seems as if I am out to prove that things that look simple and straightforward really aren’t. Today’s topic is no exception, especially if you are a beginner. When I just started out on this path of developing, the world was a very different place; technology was different. Things weren’t as easy as it is today (thank you, Microsoft!). I learnt everything I know myself; it wasn’t easy and I wanted to give up so many times.
It was the little things that got me down, literally. I remember my very first book I had to learn (remember: without help!). I remember the very first error I got and how I spent hours not understanding why the error occurred. This sucked. I will get to the point soon, I promise! It is not often I get to pour my heart out to strangers. In any case, a simple thing such as the Enabled property let my mind wonder a lot, and no I do not have ADHD, and I thought about what makes some Properties tick.
Enough about me. Let’s talk about overriding disabled properties of some controls.
I will not explain control properties. Even as a novice, this should be one of the very first things you learn about programming.
I mentioned a term earlier: Overriding. Overriding is the process of changing the default method or property of an object. Here is more information regarding Overriding object methods. Although I mention the word overriding, you will not really do it in a similar fashion as you may have learned from the previous link, or as you may already know. The object of today’s little exercise is to change the default behaviour of an object when that object has been disabled.
Start Visual Basic and create a new Windows Forms project. You may name it anything you like. Add a Component to your project by selecting Project, Add Component, as shown in Figure 1.
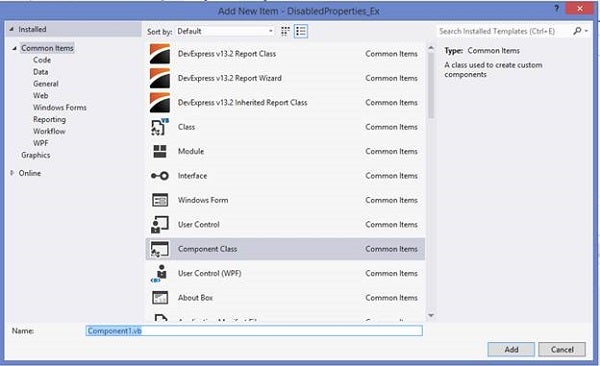
Figure 1: Our Design
Add the following code to your newly created Component:
Public Class CustomLabel_1
   Inherits Label

   Protected Overrides Sub OnPaint(ByVal e As PaintEventArgs)

      If Not Enabled Then

         Dim sbColor As New SolidBrush(Color.PaleVioletRed)

         e.Graphics.DrawString("Test 1", New Font("IMPACT", 8, _
            FontStyle.Underline), sbColor, 0, 0)

      Else

         MyBase.OnPaint(e)

      End If

   End Sub
End Class
This component Inherits the capabilities from a standard Windows Forms Label. The On_Paint method you see here is the default painting event of the control. This event physically paints the shape of the label as it should look. This is the perfect place to override what the label should look like. You can probably see that I did a small test to see if the label is Enabled or not. If it is not enabled, make use of the built-in System.Drawing methods to draw the label as you want it. You still need to edit the label component’s constructor. Open the Designer’s code file and edit the Constructor to:
   <System.Diagnostics.DebuggerNonUserCode()> _
   Public Sub New()
      MyBase.New()

      'This call is required by the Component Designer.'
      InitializeComponent()
      Me.SetStyle(ControlStyles.UserPaint, True)
   End Sub
UserPaint means that the control should paint itself rather than having the operating system do it.
If you build your application now, there should not be any errors. After the Build, navigate back to your form’s design view and have a look at the Toolbox. Your newly created component should now be listed, as shown in Figure 2. Add this component to your form. Feel free to set any properties of it; it is, after all, still a label.
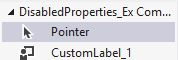
Figure 2: Label Component 1
Add another Component to your project by following the same steps outlined earlier. Name this one CustomLabel_2, for instance, and add the following code into it:
Public Class CustomLabel_2
   Inherits Label

   Protected Overrides Sub OnPaint(ByVal e As PaintEventArgs)

      If Not Enabled Then

         Using lblCurrent As New Label()

            Using bmpBitmap As New Bitmap(Width, Height)

               lblCurrent.BackColor = BackColor
               lblCurrent.AutoSize = AutoSize
               lblCurrent.Size = Size

               lblCurrent.Text = "Test 2"
               lblCurrent.Font = New Font("COMIC SANS MS", _
                  8, FontStyle.Bold)

               lblCurrent.ForeColor = Color.DarkOrange

               lblCurrent.DrawToBitmap(bmpBitmap, _
                  lblCurrent.ClientRectangle)

               e.Graphics.DrawImage(bmpBitmap, Point.Empty)

            End Using

         End Using

      Else

         MyBase.OnPaint(e)

      End If

   End Sub

End Class
This code is quite simple. It creates an in-memory Bitmap (picture) of the label, according to our specifications. I edited the font and the back color, and then tested again whether or not the label is Enabled.
Build your application again, and add this component from your toolbox onto your Form.
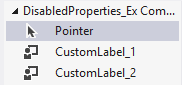
Figure 3: Label Component 2
Add a button to your Form, as shown in Figure 4:
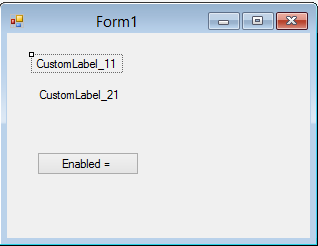
Figure 4: Form Design
Add the following code behind the Button:
   Dim blnEnabled As Boolean = True

   Private Sub Button1_Click(sender As Object, e As EventArgs) _
         Handles Button1.Click
      blnEnabled = Not blnEnabled

      CustomLabel_11.Enabled = blnEnabled
      CustomLabel_21.Enabled = blnEnabled

      Button1.Text = "Enabled = " & blnEnabled.ToString()
   End Sub
This checks to see if our Boolean flag is True or False. Based on this answer, it updates the display of the two labels accordingly.
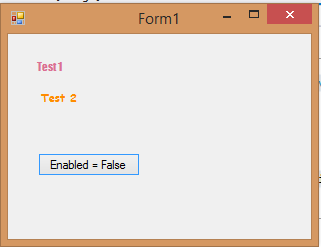
Figure 5: Labels in action
Conclusion
A supposedly simple task can sometimes be much more effort than what it needs to be. Yes, it is not too complicated to override the disabled properties, but it’s still a tedious amount of work.