


Getting started with programming in general can be a daunting task. I remember way back in the stone age when I started with programming. I was quite scared and didn’t know where to start and what to do. Luckily, Visual Basic is a very easy language to know.
On the other hand, knowing all the concepts of programming along with an understanding of all the terms but not knowing how to put this knowledge to use was a huge stepping stone for me. As I used to tell all my students: The best way to do programming is by doing programming. I know it sounds like an oxymoron, but it is a fact.
Before you continue with this article, have a read through this article just to sharpen up your knowledge of Visual Basic a bit.
Once you have started your particular version of Visual Studio, click File, New. This will produce a screen similar to Figure 1.
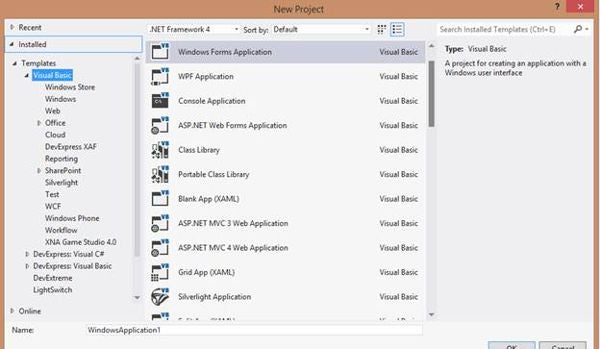
Figure 1: Project Types
As you can see, there are several project types that can be created with Visual Basic. For the purposes of this article, select Windows Forms Application, give it a proper name, and select OK.
This will produce a screen similar to Figure 2.
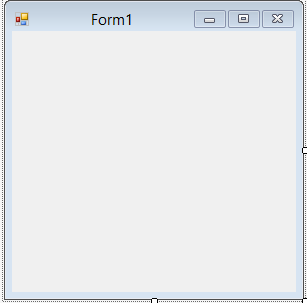
Figure 2: Form Design View
This is where all the magic happens! You can deduce from the screen that you are in that this ‘Form’ represents a Window. You can obviously resize this form or window according to your needs as well as change the title of the window.
The Properties Window
All these properties can be changed inside the Properties Window. Look closely; you will notice that the Properties Window is on the right-hand side of your screen. If it is not open yet, just click it and it will expand to show all the available properties for the form, as shown in Figure 3.
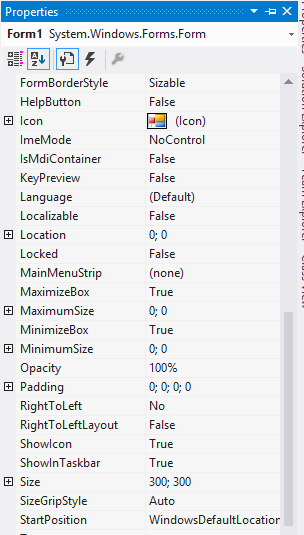
Figure 3: Properties Window
The Properties Window will quickly become your best friend. Play around with the various properties until your form is customized according to your needs.
Other Windows
Inside your IDE (integrated Development Environment), you will notice other Windows.
The Solution Explorer
A project shown in bold font is selected as the Startup Project for running and debugging purposes. If there is more than one startup project, the solution node in the tree view is shown in a bold font. Startup projects run automatically when you start the Visual Studio debugger. By default, the first project created in the solution is designated as the startup project, but you can easily change which projects run first when you Build or Run your solution.
You can open files, add and remove items, and perform other management tasks. Each project template provides its own folders and icons for indicating the nature of the items in the project. You can add folders and items to meet the needs of your individual development project. The icons can indicate a variety of information about an item. For example, depending on the project, you might see an icon indicating that an item is an HTML file or that a file is under source control. Each project template also determines which tools and designers are associated with a file type as well as the commands available for item management.
You can select multiple items in a single project or multiple items spanning several projects. Select multiple items when you want to perform batch operations (simultaneously opening multiple files for editing, for example) or when you want to determine or edit the intersecting properties of two or more solution items. When you select multiple items, the available commands represent the intersection of commands common to all selected items.
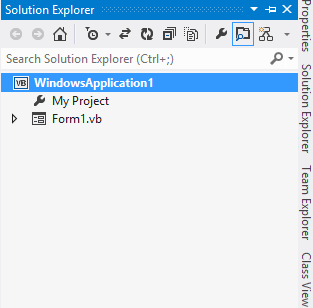
Figure 4: Solution Explorer
The Toolbox
The Toolbox needs little introduction, thanks to its name. The Toolbox contains all the controls that you can put on your form to design your window as you need it. You can click Toolbox in the IDE to open it and it will resemble Figure 5.
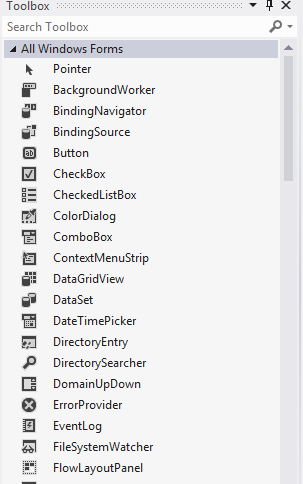
Figure 5: The Toolbox
Designing Your Form
Let us play around a bit!
To add a control from the Toolbox, you could either double-click the desired control, or drag the desired control to the form. Add the following controls to your form:
- Button
- Label
- Textbox
- Checkbox
- RadioButton
Your form should resemble Figure 6.
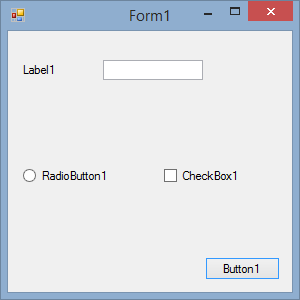
Figure 6: Design
These are just some of the most commonly used controls. Use your Properties Window to set different properties for each of the objects on your form. Mine looks like Figure 7.
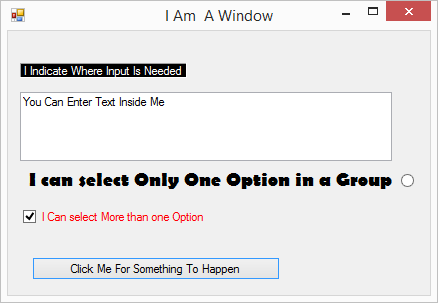
Figure 7: My own design
Code
Now that I have shown you how to design your windows, we can have a look at getting some code to make this simple program do something productive. Just one thing: Let us not get too far ahead of ourselves; this will be a simple program just to introduce you to some coding concepts.
Double-click your form, or press F7, to open the code window.
The Code window has two drop-down menus, as shown in Figure 8. The left menu displays the objects, whereas the right menu displays the associated events for the selected object.

Figure 8: Code Window
Add the following code behind Button1’s click event. If you are not sure how to find this event, refer to Figure 8 to see what the Code window should look like for you to add code behind the Button’s click event:
Private Sub Button1_Click(sender As Object, e As EventArgs) Handles Button1.Click
   Label1.Visible = False
   TextBox1.Text = "This is my new text, thank you Hannes!"
   CheckBox1.Checked = False
   RadioButton1.Location = New Point(200, 200)
   Button1.Size = New Size(100, 100)
End Sub
This Code hides the label from view, replaces the text in the Textbox, takes away the checkmark from the checkbox, sets a new location for the radiobutton, and resizes the button. Click the Green Start button or press F5 to run your program. Once run, click the button to see what the above code does.
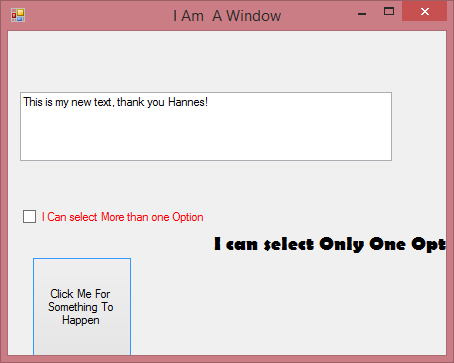
Figure 9: Our running program
Conclusion
As you can see, creating applications with Visual basic is quite easy. Here’s wishing you much luck with all your Visual Basic endeavors.