


Introduction
The MonthCalendar control is actually a little gem hidden away in the deepest closets of many a programmer. Trouble is: How to get the secrets of the inner workings out of them…. As usual, I had to have a look at it myself and try to figure out precisely what can be done with a MonthCalendar control. In today’s article, I will explain all (well, most) of the little secrets of this control.
MonthCalendar
Simply put, the name says it all. It is a control that enables calendar-like capabilities and that looks like a visual representation of a month. You can find all of its Properties and Methods here.
Practical Example
You learn by example. Start a new VB.NET Windows Forms project and add one MonthCalendar control to your form. You can name the objects in your project anything you like, but keep in mind that I stuck with the default names to make it simpler for you to follow.
Coding
Let me start with a simple functionality. Add the following code inside your Form’s Load event:
Private Sub Form1_Load(sender As Object, e As EventArgs) Handles MyBase.Load
   'Highlight Important Dates
   Dim dtArrSpecialDates() As Date = New Date() {#7/27/2014#, #8/24/2014#, #10/17/2014#}
   MonthCalendar1.BoldedDates = dtArrSpecialDates
End Sub
With this code, I created an array to host all the important dates I’d like to highlight inside the MonthCalendar control. The first date is my birthday, then my wife’s, and finally my daughter’s. The next line of code enables the MonthCalendar to make those dates bold, as in Figure 1.
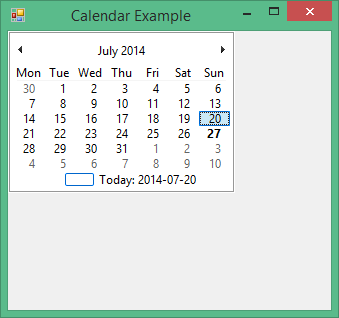
Figure 1: Bolded date
Although having a Bolded date is quite nice and will usually suit your purpose, you can take it a step further. Add this next sub:
Private Sub HighlightDates()  'Draw Borders Around Dates
   Dim gMonthCalendar As Graphics = MonthCalendar1.CreateGraphics()   'Enable Drawing Capabilities
   Dim oHTIMonths As MonthCalendar.HitTestInfo   'Get HitTestInfo
   Dim arrDates As New ArrayList()   'ArrayList For Dates
   For intRows As Integer = 1 To MonthCalendar1.Size.Width - 1   'Loop Through Width ( Rows )
      For intCols As Integer = 1 To MonthCalendar1.Size.Height - 1   'Loop Through Columns
         oHTIMonths = MonthCalendar1.HitTest(intRows, intCols)   'Get Hit Info
         If oHTIMonths.HitArea = MonthCalendar.HitArea.Date Then   'Is It A Date That Was Clicked On?
            If Not arrDates.Contains(oHTIMonths.Time) Then
               arrDates.Add(oHTIMonths.Time)
               gMonthCalendar.DrawRectangle(New Pen(Brushes.Blue, 2), intRows, intCols, 24, 15)   'Draw Rectangle Around
            End If
         End If
      Next intCols
   Next intRows
End Sub
Add a button to your form, and add this code:
Private Sub Button1_Click(sender As Object, e As EventArgs) Handles Button1.Click
    HighlightDates()
End Sub
This draws a blue rectangle around each day, as shown in Figure 2:

Figure 2: Highlighted Date
Add the following line of code inside your Form_Load event:
' Show 4 Rows of 3 Months
MonthCalendar1.CalendarDimensions = New System.Drawing.Size(4, 3)
This will show all the months, 4 Rows and 3 Columns, as in Figure 3:
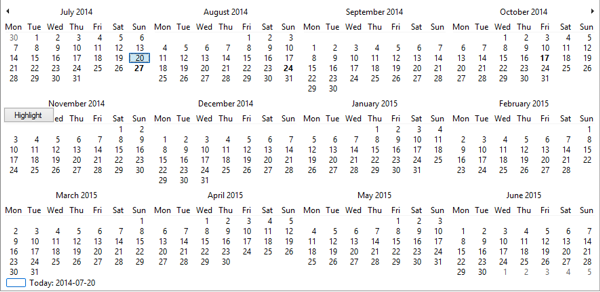
Figure 3: 4 x 3 Months
Add the next code:
      ' Hide Today
      Me.MonthCalendar1.ShowToday = False

      ' Hide Circle Around today's date.
      Me.MonthCalendar1.ShowTodayCircle = False
This hides the bottom part that shows today’s date as well as hides the circle that usually surrounds the current date, as you can see in Figure 4.
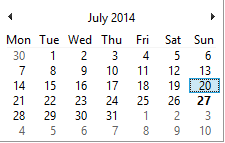
Figure 4: Hide Today
Add the next code:
      ' Show Week Numbers
      Me.MonthCalendar1.ShowWeekNumbers = True
This shows the week numbers to the left of each week, as illustrated in Figure 5.
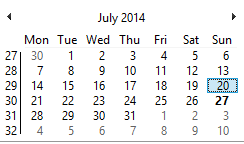
Figure 5: Show Week Numbers
Add the next event:
   Private Sub MonthCalendar1_DateSelected(ByVal sender As Object, _
           ByVal e As System.Windows.Forms.DateRangeEventArgs) Handles MonthCalendar1.DateSelected

      ' Show selected Date
      MessageBox.Show("Date Selected: " & e.Start.ToShortDateString())

   End Sub
This simply shows the selected date in a MessageBox.
Add the next event:
   Private Sub MonthCalendar1_DateChanged(ByVal sender As Object, _
           ByVal e As System.Windows.Forms.DateRangeEventArgs) Handles MonthCalendar1.DateChanged

      ' Show New Date
      MessageBox.Show("Date Changed: " & e.Start.ToShortDateString())

   End Sub
This shows the new date you have selected via the DateChanged event.
Add the next lines of code:
      ' Start of Week is Monday
      MonthCalendar1.FirstDayOfWeek = System.Windows.Forms.Day.Monday
This simply sets Monday as the week’s starting point, instead of Sunday.
Add the final piece of code:
      ' Sets the maximum visible date
      MonthCalendar1.MaxDate = New System.DateTime(2014, 12, 31, 0, 0, 0, 0)

      ' Sets the minimum visible date
      MonthCalendar1.MinDate = New System.DateTime(2013, 1, 1, 0, 0, 0, 0)
This limits the user’s ability to select a date range. In the preceding code, I have only allowed selection and displaying of dates for the past two years.
Conclusion
Well, that’s it. Obviously, there is much more to the MonthCalendar control, but now at least, you will be able to use it more productively. Until next time, cheers!