An Azure Synapse Dedicated SQL Pool (previously known as Azure SQL Data Warehouse), is a massively parallel processing database. It is a Big Data solution that stores information in a relational table format with columnar storage. It also uses a Massive Parallel Processing (MPP) architecture to leverage up to 60 nodes to run queries. Once you have your data in a Dedicated SQL Pool you can leverage this for historical analysis from a dashboard, use it as a dataset for Machine Learning, and any other data goals you might have for a massive dataset.
In this database development tutorial, we will explain the step-by-step process used to create a dedicated SQL Pool in Microsoft’s Azure Synapse Analytics.
How to Create a Dedicated SQL Pool
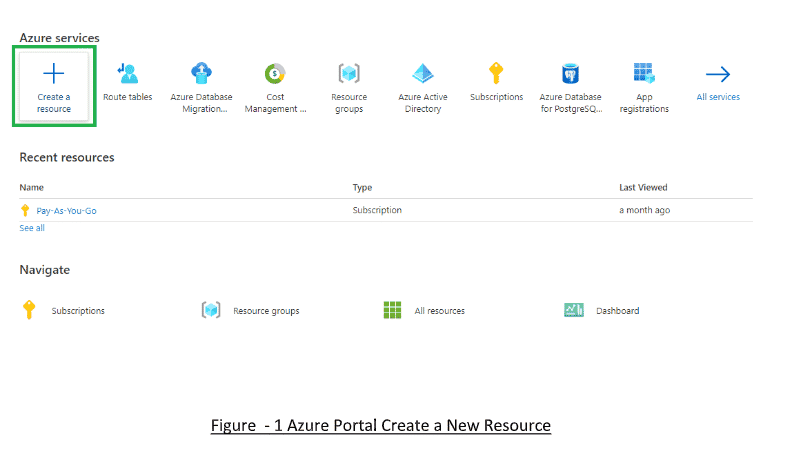
To start, we want to create a dedicated SQL Pool in Azure. Log into the Azure Portal with your free or paid subscription. Then click on Create a Resource.
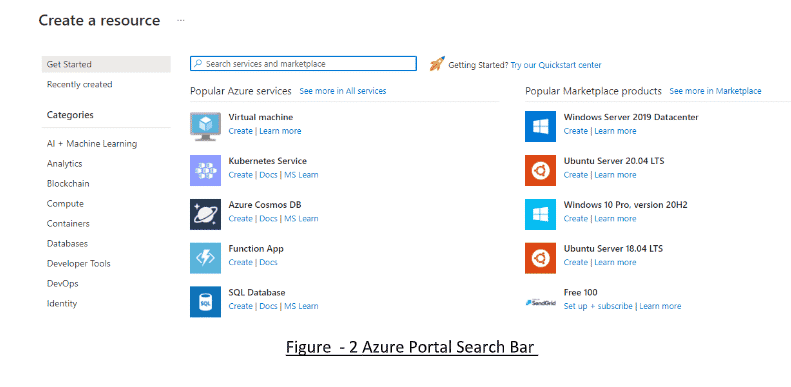
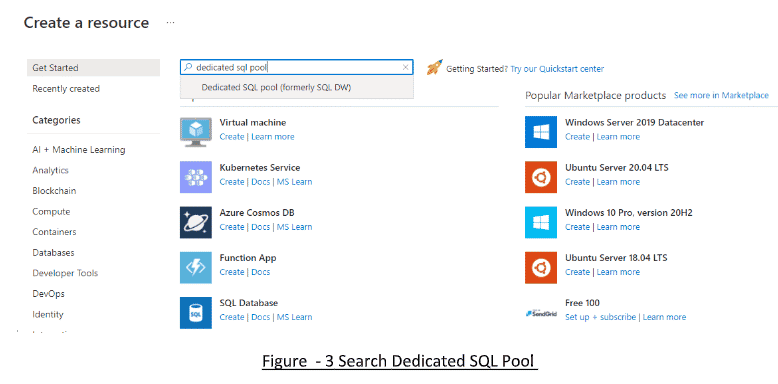
Next, in the Search Bar of Azure Portal, type Dedicated SQL Pool.
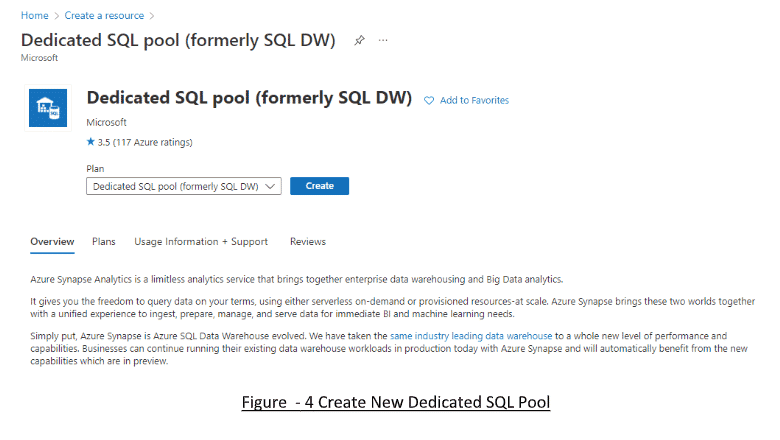
Choose Dedicated SQL Pool (Formerly SQL DW) and create a new Dedicated SQL Pool by clicking on the Create button.
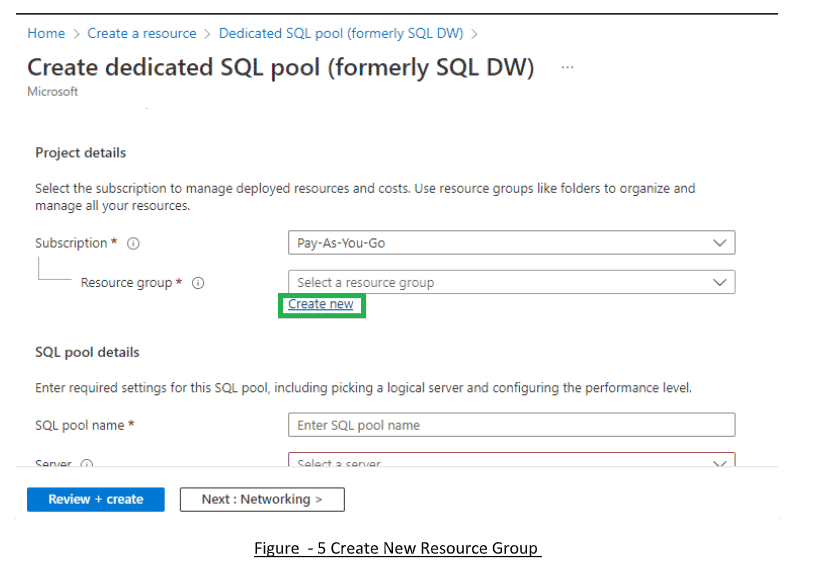
Next, we need to either create a new Resource Group or select an existing one.
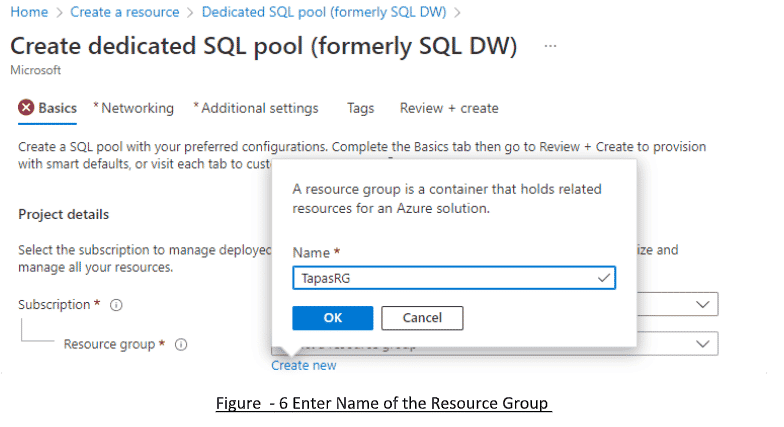
Enter the name of the new Resource Group and click Ok.
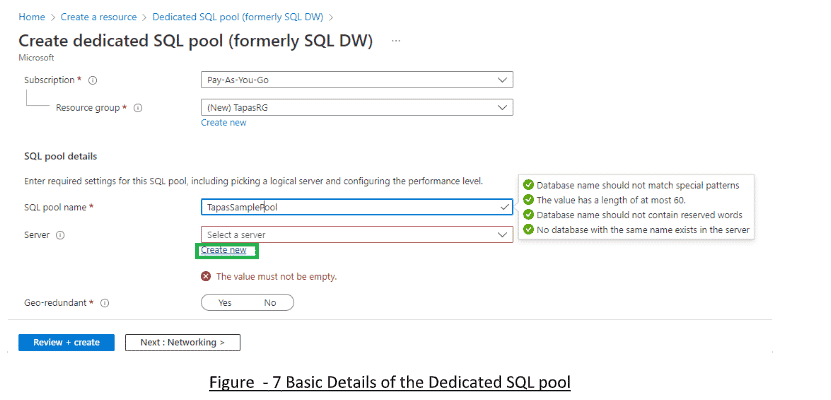
Now, fill in the basic details of the Dedicated SQL Pool.
Read: How to Migrate On-premise SQL Database to Azure
How to Create a New SQL Server in Azure
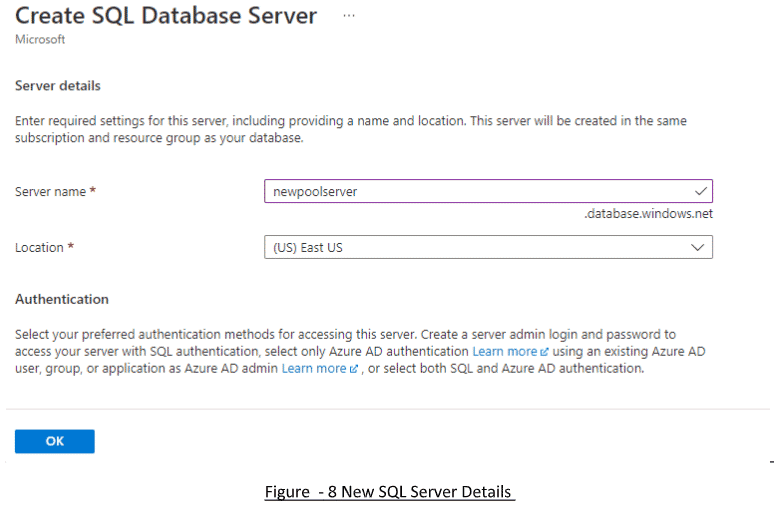
At this point, a new SQL Server needs to be created If you do not have a server setup already. If you do, you can skip this part. To create the new SQL Server, click on Create New and enter the Server Name and Location. If you already have an SQL Server, you can enter that information here.
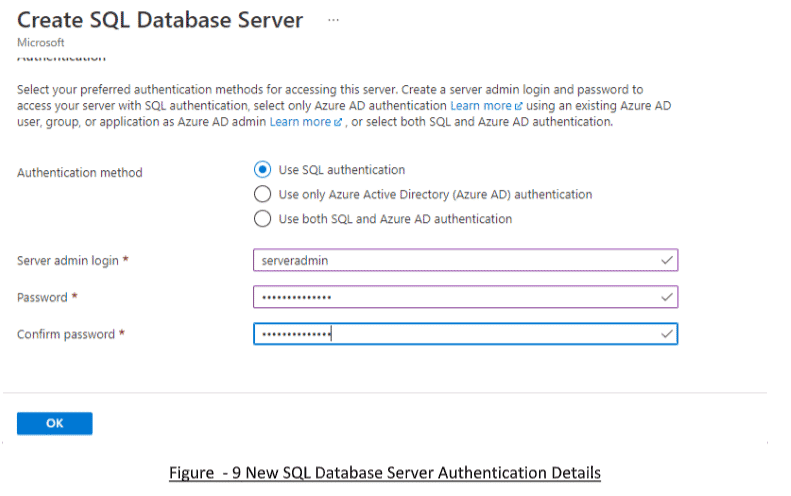
Next, for now, you can simply use SQL Authentication. Enter in your Server Admin Login details and a secure password. Once finish, click OK.
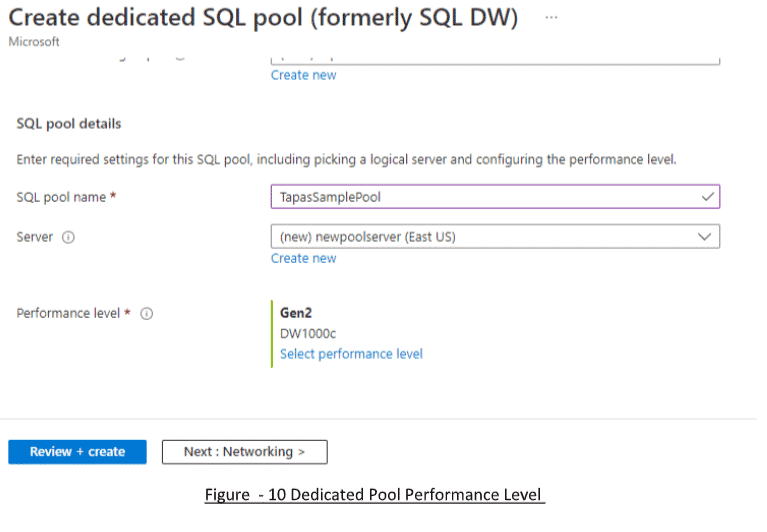
Now, after you have entered the SQL Pool details with your SQL Pool Name and set the server, you also need to choose your performance level – choose wisely, as per your project needs.
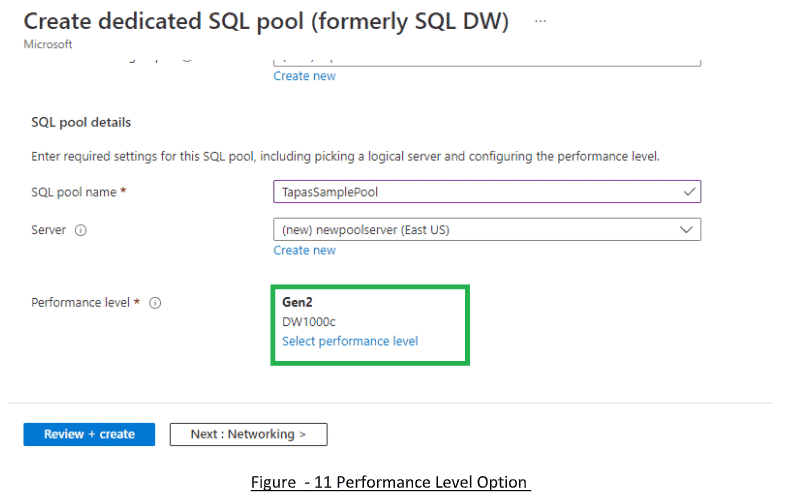
Select the Performance Level and you will be prompted with a new Configuration option.
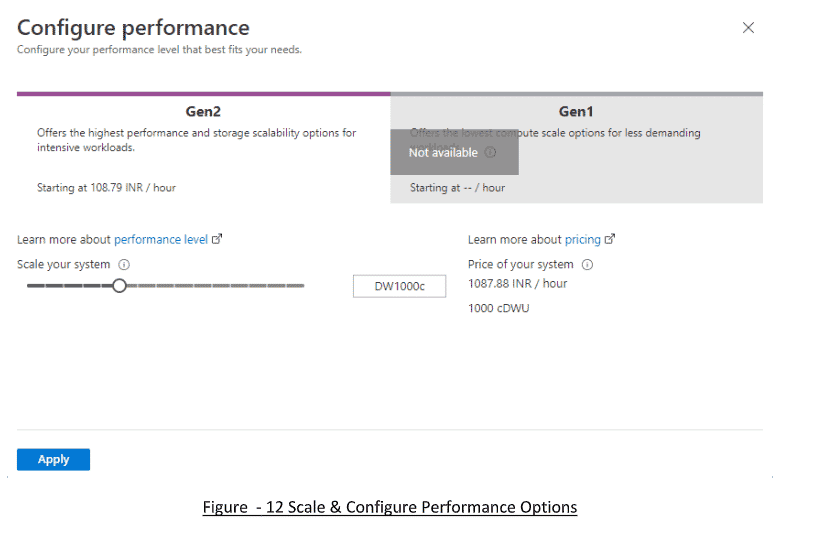
In the Performance Level screen, you can scale your system per your performance and storage scalability needs. Once set, click on Apply.
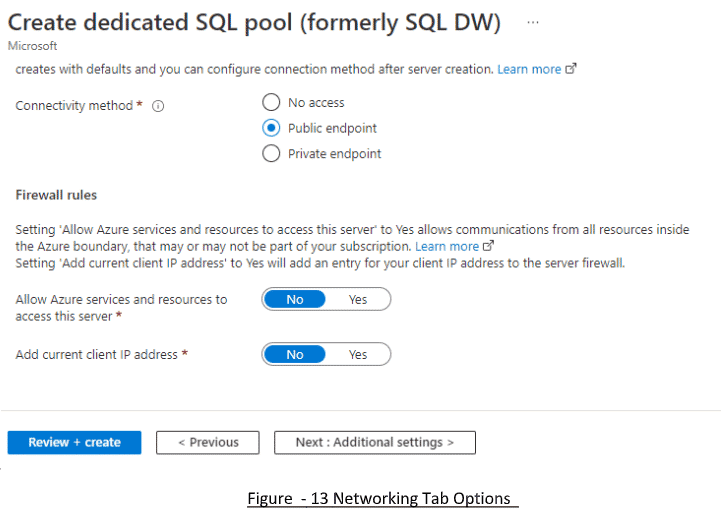
Next, click on the Networking tab. Select the appropriate options and then click on the Additional Settings tab.
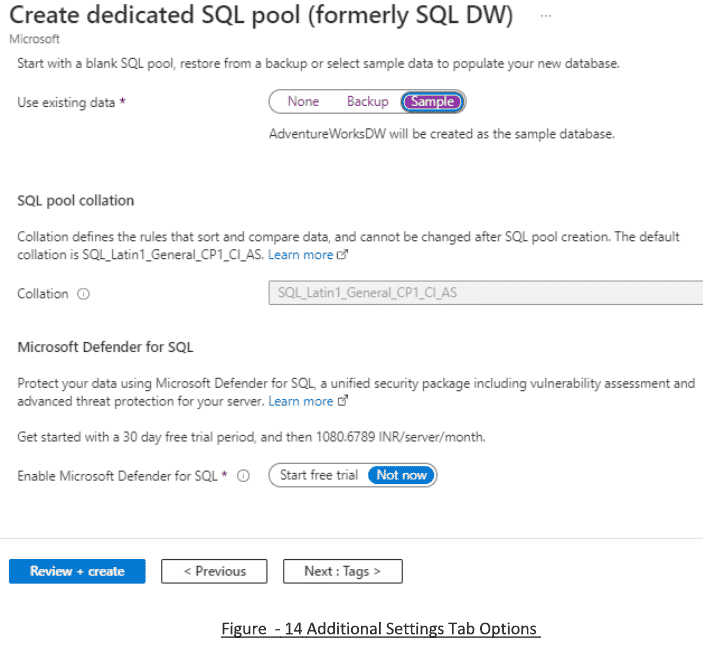
Make sure you choose the Sample under the Use Existing Data section, which will create a sample database named AdventureWorksDW.
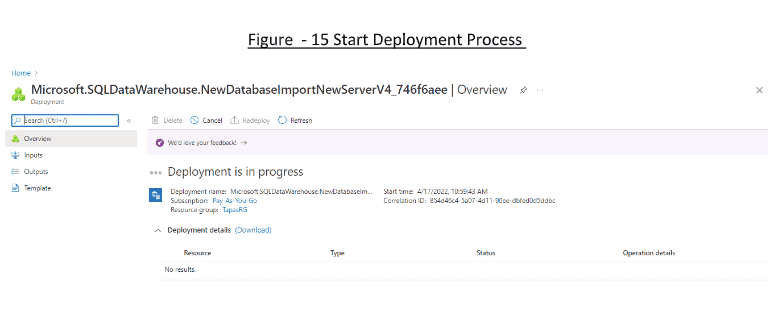
Then, click on Review + Create. Finally, click on Create to initiate the deployment process.
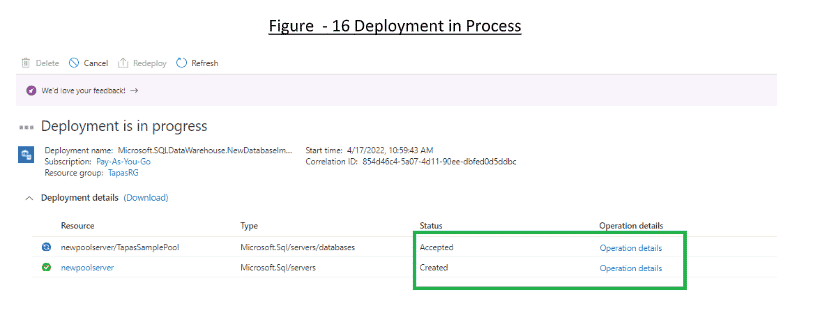
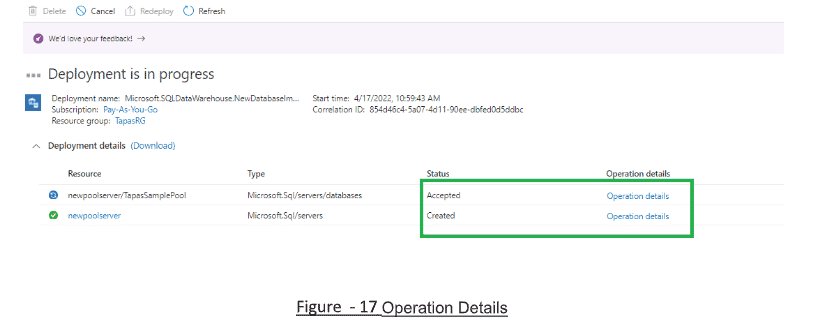
A notification will pop on the screen as the deployment is in progress; you can see the resources that will be created in real-time.
During deployment, you can also click on the Operation Details to learn about the operation which contains data from Operation ID, Timestamp, Duration, and more.
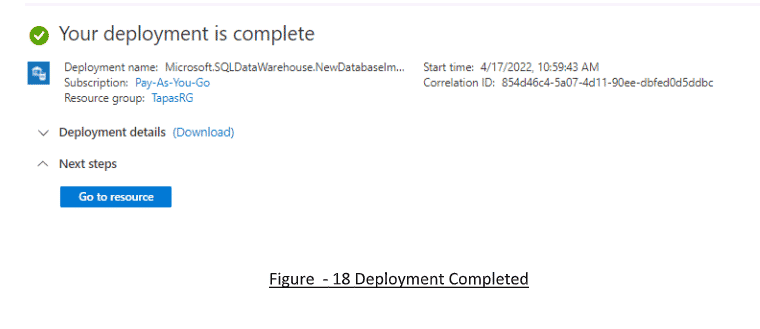
Once the deployment is complete, you will be provided with a Go to Resource link.
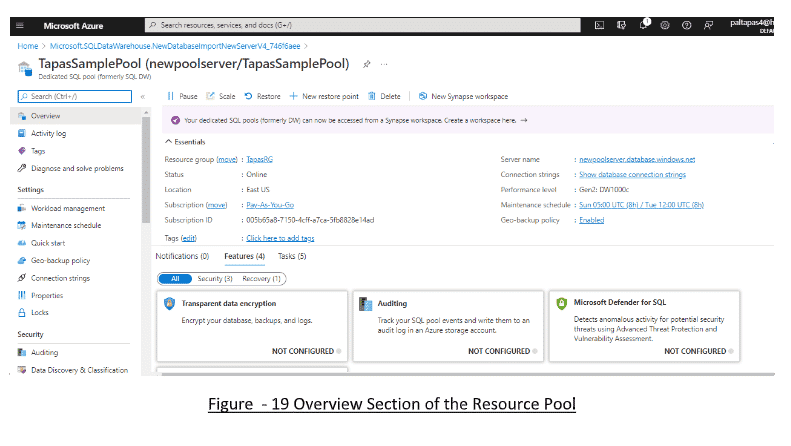
In the Resource Overview section, you can learn more about the Resource Sample Pool that was created. The server’s name, connection strings, and performance levels are all detailed here. Developers can also check out the metrics visualization of the DWU Usage that we just created.
Read more database programming and database administration tutorials.


