


Design
Start Visual Studio 2013 and create a new Windows Phone VB application, by clicking File, New Project, Windows Phone Apps, Blank App, as shown in Figure 1:
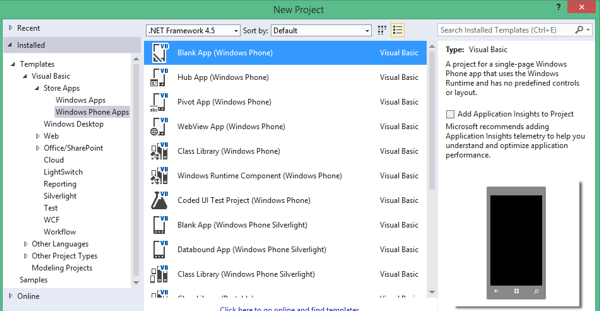
Figure 1: New Windows Phone app
Once the framework has been created, add the following onto your MainPage.xaml page:
- One list box with the following items:
- Button with a Content value of Tone 1
- Button with a Content value of Tone 2
- Button with a Content value of Tone 3
- Media Element named Player
Your page should resemble Figure 2:
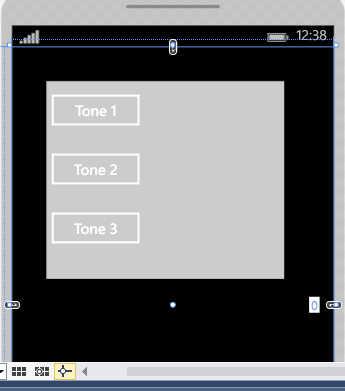
Figure 2: Our Design
Code
Now that the page is set up, we can add the necessary code to add new ringtones to our application.
Add the following Namespaces to the top of your form:
Imports Microsoft.Phone.Tasks
Imports System.IO
Imports System.IO.IsolatedStorage
Imports System.Windows.Resources
Imports Microsoft.Xna.Framework
Imports Microsoft.Xna.Framework.Media
These enable us to work with media elements, such as music, and manipulate the Storage area of our Windows Store applications. Add the next fields to your application:
   Private ToneChooser As SaveRingtoneTask

   Private strPath As String = "Ringtones/"


   Private timer As GameTimer

   Private resumeP As Boolean = False
I created an object named ToneChooser that will enable me to save a ringtone via the SaveRingtoneTAsk interface. I created a string variable to identify the location of my ringtones. If you haven’t already done so, add three music (preferably .wma files) to your project as shown in Figure 3:
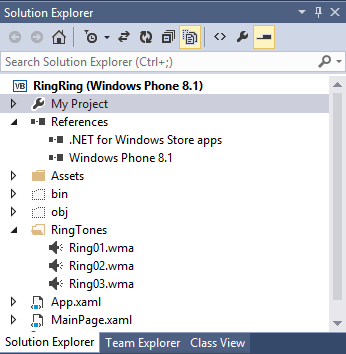
Figure 3: Solution Explorer with added music files
The rest of the objects will allow me to play these files. Now, let me get down to business!
Add the constructor:
   Public Sub New()

      timer = New GameTimer()
      timer.UpdateInterval = TimeSpan.FromTicks(333333)
      AddHandler timer.Update, AddressOf timer_Update

      ' Start the timer
      timer.Start()


      ToneChooser = New SaveRingtoneTask()
      AddHandler ToneChooser.Completed,
         AddressOf ToneChooser_Completed

      InitializeComponent()
   End Sub
Here, I created a new GameTimer object that will regularly update the display. I also initialized a SaveRingtoneTask object so that I can save a ringtone to the Windows Store.
Add the Timer Update event:
   Private Sub timer_Update(ByVal sender As Object,
      ByVal e As GameTimerEventArgs)
      FrameworkDispatcher.Update()
    End Sub
Add the following code for the MediaElement:
   Private Sub media_CurrentStateChanged(ByVal sender As Object,
      ByVal e As RoutedEventArgs)

      If resumeP Then
         Player.Play()
      End If

   End Sub
This simply checks to see if the player has been paused or not. If it was paused, the player must be playing again.
Now, that the basics are done, let me start getting more complicated…. Add the following three methods:
   Private Sub ToneChooser_Completed(ByVal sender As Object,
      ByVal e As TaskEventArgs)
      If e.TaskResult = TaskResult.OK Then
         tb1.Text = "Save completed."
      ElseIf e.TaskResult = TaskResult.Cancel Then
         tb1.Text = "Save cancelled."
      End If

   End Sub

   Private Function GetRingtonePath() As String
      Dim strMsg As String = String.Empty
      Dim ringtonePath As String = Nothing

      Dim selection As ListBoxItem = CType(lstTonez.SelectedItem,
         ListBoxItem)

      If Nothing IsNot selection Then

         Dim filename As String = selection.Name & ".wma"

         ringtonePath = strPath & filename
      Else
         strMsg = "Nothing selected"
      End If


      Return ringtonePath
  End Function

   Private Sub SaveToStore(ByVal fileName As String, ByVal data() As Byte)
      Dim strBase As String = String.Empty
      Dim strDelimiter As String = "/"
      Dim delimiter() As Char = strDelimiter.ToCharArray()
      Dim dirsPath() As String = fileName.Split(delimiter)


      Dim isoStore As IsolatedStorageFile =
         IsolatedStorageFile.GetUserStoreForApplication()


      For i = 0 To dirsPath.Length - 2
         strBase = System.IO.Path.Combine(strBase, dirsPath(i))

         If Not isoStore.DirectoryExists(strBaseDir) Then
            isoStore.CreateDirectory(strBaseDir)
         End If
      Next i


      ' Write the file
      Using bw As New BinaryWriter(isoStore.CreateFile(fileName))
         bw.Write(data)

      End Using
   End Sub
The first event simply shows us that a selection has been made. The second sub, GetRingtonePath, simply gets the associated ringtone’s path. The last sub, SaveToStore, saves the selected item to the Windows Store, inside your app’s isolated storage area, after some manipulation of the filename(s).
I am attaching a working sample.
Conclusion
Short and sweet. I hope you have enjoyed today’s quick tip. Until next time, cheers!