


Introduction
In certain cases, you must be able to read your own application’s metadata in search of a property or a method. Today, I will show you how to do this in four different ways.
Reflection
Reflection provides objects that describe assemblies, modules, and types. Reflection can be used to dynamically create instances of types, and to get types from existing objects as well as invoking their methods and accessing their fields and properties.
Our Project
In this project you will create today, you will learn four different ways to read Property Information from one of your your project’s classes. Use Visual Studio to create either a Visual Basic.NET or C# Windows Forms application. Design the Form as shown in Figure 1.
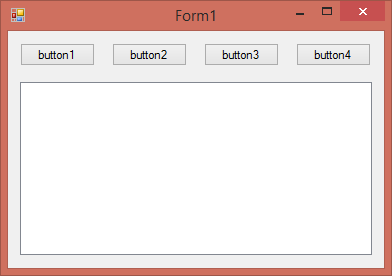
Figure 1: Design
Add a class to your project and name the Class clsStudent. Add the following code for clsStudent:
C#
   class clsStudent
   {

      private string StuName;
      private string StuSurname;
      private int StuAge;
      public string StudentName
      {

         get
         {

            return StuName;

         }

         set
         {

            StuName = value;

         }

      }


      public int Age
      {

         get
         {

            return StuAge;

         }

         set
         {

            StuAge = value;

         }

      }

      public string Surname
      {

         get
         {

            return StuSurname;

         }

         set
         {

            StuSurname = value;

         }

      }
   }
VB.NET
Class clsStudent

   Private StuName As String
   Private StuSurname As String
   Private StuAge As Integer

   Public Property StudentName As String

      Get

         Return StuName

      End Get

      Set(ByVal value As String)

         StuName = value

      End Set

   End Property

   Public Property Age As Integer

      Get

         Return StuAge

      End Get

      Set(ByVal value As Integer)

         StuAge = value

      End Set

   End Property

   Public Property Surname As String

      Get

         Return StuSurname

      End Get

      Set(ByVal value As String)

         StuSurname = value

      End Set

   End Property

End Class
You created a very basic class. The clsStudent class contains three Properties: StudentName, Surname, and Age. The object of this project is to not only show the Property name, but also its current value inside a ListBox. Add the necessary namespaces to your Form1 class.
C#
using System.ComponentModel;
System.Reflection;
VB.NET
Imports System.ComponentModel
Imports System.Reflection
Let’s create the Student object on Form1 now.
C#
clsStudent Student = new clsStudent();
VB.NET
Private Student As clsStudent = New clsStudent()
Initialize the Student object in the Constructor of Form1, and give the properties initial values.
C#
   public Form1()
   {
      InitializeComponent();

      Student.StudentName = :TestName:;
      Student.Surname = :TestSurname:;
      Student.Age = 71;

   }
VB.NET
   Public Sub New()

      ' This call is required by the designer.'
      InitializeComponent()

      ' Add any initialization after the InitializeComponent()'
      ' call.'

      Student.StudentName = :TestName:
      Student.Surname = :TestSurname:
      Student.Age = 71

   End Sub
Add the following code behind the first button.
C#
   private void button1_Click(object sender, EventArgs e)
   {

      Type type = Student.GetType();
      PropertyInfo[] properties = type.GetProperties();

      foreach (PropertyInfo property in properties)
      {

         listBox1.Items.Add(:Name: : + property.Name + :, Value: :
            + property.GetValue(Student, null));

      }

   }
VB.NET
   Private Sub button1_Click(ByVal sender As Object, _
         ByVal e As EventArgs) Handles button1.Click

      Dim type As Type = Student.[GetType]()
      Dim properties As PropertyInfo() = type.GetProperties()

      For Each [property] As PropertyInfo In properties

         listBox1.Items.Add(:Name: : & [property].Name & :, _
            Value: : & [property].GetValue(Student, Nothing))

      Next

   End Sub
In the preceding code, a PropertyInfo object is created, then the Type’s GetProperties method is used to get a list of properties for the supplied object. Lastly, you loop through each of the Properties and add the names and values to the ListBox. Add the code for the next button.
C#
   private void button2_Click(object sender, EventArgs e)
   {

      foreach (PropertyDescriptor prop in
         TypeDescriptor.GetProperties(Student))
      {

         listBox1.Items.Add(prop.Name + : = :
            + prop.GetValue(Student));

      }

   }
VB.NET
   Private Sub button2_Click(ByVal sender As Object, _
         ByVal e As EventArgs) Handles button2.Click

      For Each prop As PropertyDescriptor In _
            TypeDescriptor.GetProperties(Student)

         listBox1.Items.Add(prop.Name & : = : & _
            prop.GetValue(Student))

      Next

   End Sub
Inside the previous button’s code, you created a PropertyDescriptor object to get access to the Student Class’ Properties. Add the code for the next button.
C#
   private void button3_Click(object sender, EventArgs e)
   {

      Student.GetType().GetProperties().ToList().ForEach(x =>
         listBox1.Items.Add($:{x.Name} = {x.GetValue(Student,
         null)}:));

   }
VB.NET
   Private Sub button3_Click(ByVal sender As Object, _
         ByVal e As EventArgs) Handles button3.Click

      Student.[GetType]().GetProperties().ToList().ForEach _
         (Function(x) listBox1.Items.Add($:{x.Name} = _
         {x.GetValue(Student, Nothing)}:))

   End Sub
Here, you made use of LINQ to loop through the class and get access to its properties. Before adding the code for the last button, you have to make your Student class IEnumerable. Do this now by adding code similar to the following:
C#
   class clsStudent
   {
      List<Student> Students;
      public IEnumerator<Student> GetEnumerator()
      {
         foreach (var student in Students)
            yield return student;
      }
   }
VB.NET
   Class clsStudent
      Private Students As List(Of clsStudent)
      Public Iterator Function GetEnumerator() As _
            IEnumerator(Of clsStudent)
         For Each student In Students
            Yield student
         Next
      End Function
   End Class
By making the clsStudent Class IEnumerable, you can get read-only access to a collection and loop through its methods similarly to the next code for Button4.
C#
   private void button4_Click(object sender, EventArgs e)
   {

      if (Student is IEnumerable)
      {

         foreach (object o in Student as IEnumerable)
         {

            listBox1.Items.Add(o.ToString());

         }

      }

   }
VB.NET
   Private Sub button4_Click(ByVal sender As Object, _
         ByVal e As EventArgs) Handles button4.Click

      If TypeOf Student Is IEnumerable Then

         For Each o As Object In TryCast(Student, IEnumerable)

            listBox1.Items.Add(o.ToString())

         Next

      End If

   End Sub
Figure 2 shows a running program.
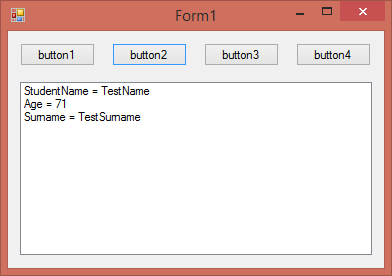
Figure 2: Running your app
Conclusion
Using System.Reflection is quite easy; the classes inside it are quite powerful. This is only the tip of the iceberg—the onus is now on you to explore it further.