

Introduction
Git is the most popular open-source, Cloud-based version control system. Git was started by Linus Trovalds (Founder of Linux) of in 2005; recently, Microsoft has acquired it. Git is the preferred version control system of most developers and enterprises because it stores file changes more efficiently and better ensures better file integrity. Git also allows developers to easily collaborate; they can download a new version of the software, make changes, and upload the newest revision. In this article, I will demonstrate how to integrate Git with Visual Studio so that you can create local branch and push changes, and also pull requests.
Features of Git
- An open source version control system that keeps track of the code and document changes made by the developers.
- A collaborative, Cloud-based version control system. Every developer can see these latest changes, download them, and contribute.
- Git stores the file system more efficiently and it ensures file integrity.
Required Software and Configurations
Following is a list of software and configurations that are required to set up GitHub source code management with Visual Studio Community.
- Visual Studio Community Version
- .NET Framework 4.6.2
Follow these steps to accomplish your installation:
- Install the GitHub extension for Visual Studio
- Create your GitHub account & login
- Create a GitHub repository
- Create a MVC project for the repository
- Add MVC Application source code to GitHub
The preceding GitHub setup should work with Visual Studio 2015 and Visual Studio 2017.
Configure GitHub for Visual Studio
To check in your MVC Project code changes, you need the Git extension for Visual Studio. To install the extension in Visual Studio, select Tools -> Extensions and Updates; this opens the window shown in Figures 1 and 2. Download and install the extension; then, restart Visual Studio.
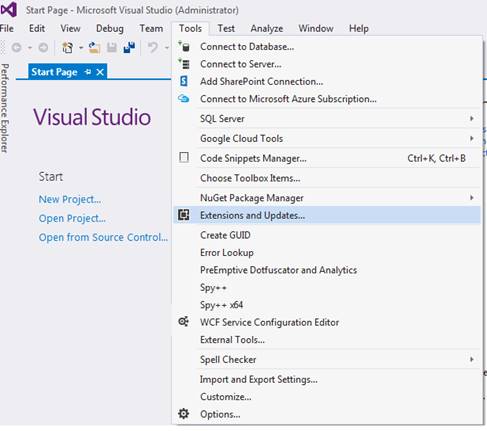
Figure 1: Visual Studio Extension and Update
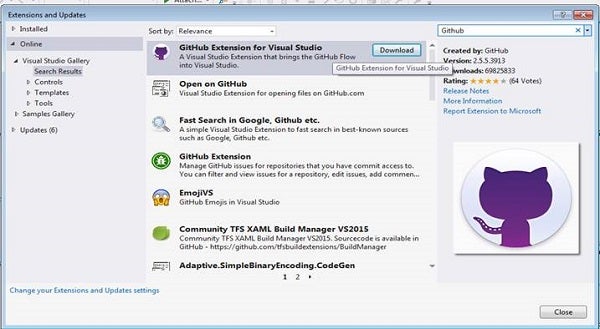
Figure 2: Download and Install GitHub Extension
Accept the license agreement, as shown in Figure 3, and click Install.
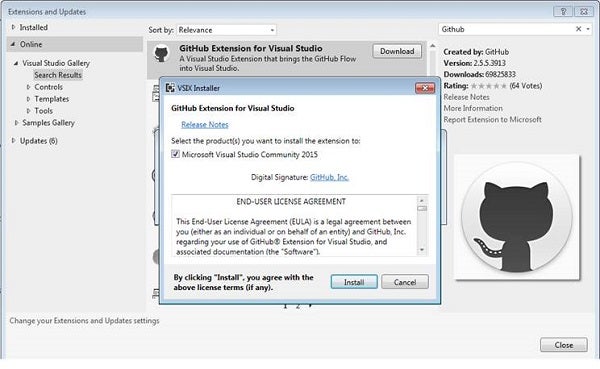
Figure 3: Accept License Agreement
Next, you have to create a GitHub account If you do not have an account on GitHub.com. I already had an account, so I’m not creating that. Create it and then come back to this point. Once created, use the credentials to log in to your GitHub account from Visual Studio Team explorer (see Figure 4).
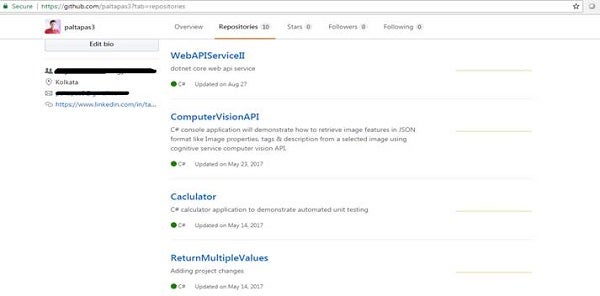
Figure 4: GitHub.com account and repository
Now, let’s create a GitHub repository by selecting the Create button on the Team Explorer tab in Visual Studio. Figure 5 shows the repository I have already created.
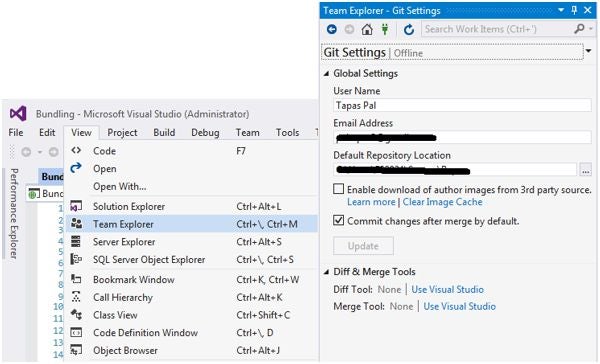
Figure 5: Local Repository in Visual Studio
Next, to demonstrate the integration of ASP.NET MVC with GitHub, create a MVC project by clicking the Create button. I already had a MVC project named “Bundling” (see Figure 6), so I have opened that in Visual Studio.
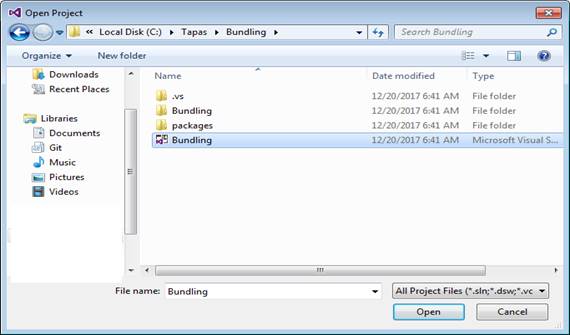
Figure 6: Visual Studio Open Project Window
The “Bundling” MVC application was created on the ASP.NET MVC platform using the .NET 4.6.2 framework. It demonstrates the bundling and minification features of MVC. You can observe this in Figure 7.
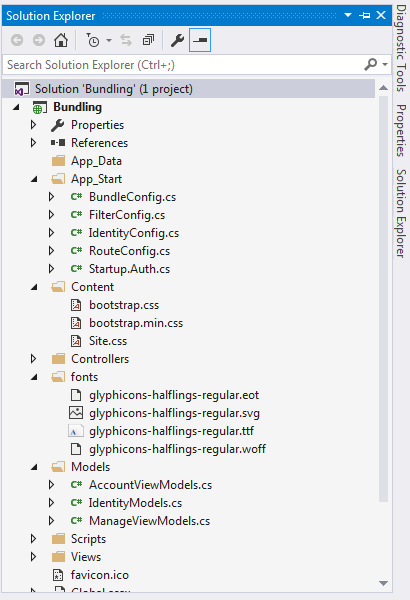
Figure 7: Visual Studio with the Opened “Bundling” Project
Once the project is created, click the Team Explorer tab, and expand the Project. Right-click the solution and select Add Solution to Source Control, as depicted in Figure 8.
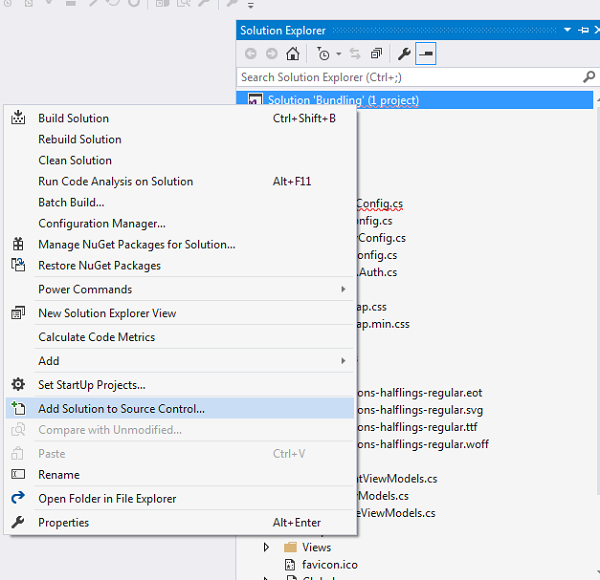
Figure 8: Visual Studio Add Solution to the Source Control
Once the change window opens, it will ask for committing changes and you can synchronize the locally committed source code to the public source hosted on GitHub. Add detail comments and click “Commit & Sync,” as shown in Figure 9. After the commit is complete, it will Sync the changes. You also can Sync the changes after commit.
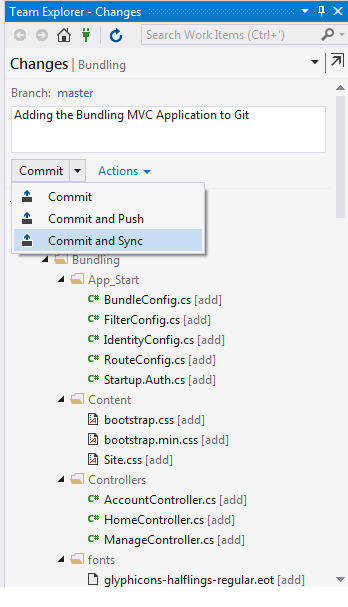
Figure 9: Commit & Sync with GitHub Source Control
During commit, I have gotten the error shown in Figure 10 because my Git public URL was not configured properly. I have updated that and published the changes.
During publishing, Git will ask you for your GitHub credentials, if they were not provided earlier. On successful publishing of all the files and folders, this project will appear under GitHub in the name of the MVC Application. You can see the code on the GitHub site by using a browser.
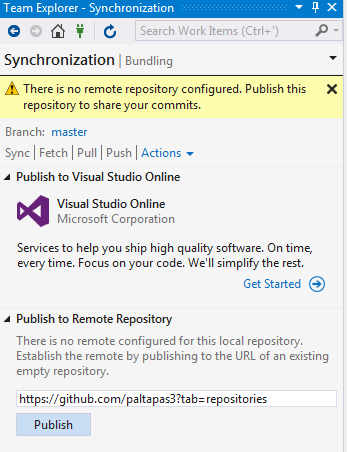
Figure 10: GitHub Public Repository Publish
All commit changes/history could be validated from Visual Studio, too. Right-click Solution -> Source Control -> View History, as you can see in Figure 11. It will open all the commit and rollback changes (see Figure 12).

Figure 11: GitHub Check-in History
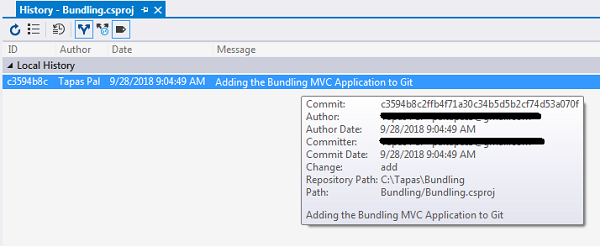
Figure 12: Last Commit to Git Details
Conclusion
Hopefully, this article has adequately explained about the Git Source Control integration with Visual Studio.
That’s all for today. Happy coding!