


Introduction
I love graphics and effects, and I love writing about them. Today is no exception. In this article, you will see how easy it is to create a Fade in and Fade out effect with images. It is not a whole lot of work, but quite fun, I promise.
Start Visual Studio and create a Windows Forms project in either C# or VB.NET. Add two buttons to your form, and one Timer. Set the Timer’s Interval to 500 (every half-second) and make your form bigger. The Design part is now done, but before we start coding, ensure that you have at least two images saved in a Folder named Test on your C Drive.
My images are named Img_1.jpg and Img_2.jpg. The two pictures are of the Burke’s Luck Potholes in Mpumalanga, South Africa. I took it in 2018. After the setup for the project has been done, we can start coding!
As usual, let us start with the necessary Namespaces.
C#
using System.Drawing.Imaging;
VB.NET
Imports System.Drawing.Imaging
We will be doing Image manipulation. This is where this Namespace helps, especially when it comes to pixel colors and Image Attributes.
Add the following fields.
C#
   private Bitmap imgSource = new Bitmap("Img_1.jpg");
   private Bitmap imgTarget = new Bitmap("Img_2.jpg");

   private List<Bitmap> lstFade = new List<Bitmap>();

   private int intCount = 0;
VB.NET
   Private imgSource As New Bitmap("Img_1.jpg")
   Private imgTarget As New Bitmap("Img_2.jpg")

   Private lstFade As New List(Of Bitmap)

   Private intCount As Integer
The first two objects are the pictures that will be used for the Fading process. They are aptly named Source and Target. lstFade will contain a list of Bitmaps, which we will save to disk to see the fading process clearly. intCount is a Counter we will use in the Timer.
Add the Form_Load event.
C#
   private void Form1_Load(object sender, EventArgs e)
   {
      BackgroundImageLayout = ImageLayout.Zoom;
      DoubleBuffered = true;

      int intX = 0;
      int intY = 0;

      int intAmount = 10;

      Rectangle rctDest = new Rectangle(intX, intY,
         imgTarget.Width, imgTarget.Height);

      using (Bitmap tmpBitMap = new Bitmap(imgSource))
      using (Graphics gTemp = Graphics.FromImage(tmpBitMap))

      for (int i = 0; i <= intAmount; i++)
      {
         gTemp.DrawImage(imgSource, intX, intY);

         ColorMatrix cmColors = new ColorMatrix();

         cmColors.Matrix33 = System.Convert.ToSingle(i /
            (double)intAmount);

         ImageAttributes iaAttributes = new ImageAttributes();
         iaAttributes.SetColorMatrix(cmColors);

         gTemp.DrawImage(imgTarget, rctDest, intX, intY,
            imgTarget.Width, imgTarget.Height, GraphicsUnit.Pixel,
            iaAttributes);

         lstFade.Add((Bitmap)tmpBitMap.Clone());
      }

      BackgroundImage = lstFade[0];
   }
VB.NET
   Private Sub Form1_Load(sender As Object, e As EventArgs) _
         Handles MyBase.Load

      BackgroundImageLayout = ImageLayout.Zoom
      DoubleBuffered = True

      Dim intX As Integer = 0
      Dim intY As Integer = 0

      Dim intAmount As Integer = 10

      Dim rctDest As New Rectangle(intX, intY, imgTarget.Width, _
         imgTarget.Height)

      Using tmpBitMap As New Bitmap(imgSource), gTemp As Graphics _
            = Graphics.FromImage(tmpBitMap)

         For i As Integer = 0 To intAmount

            gTemp.DrawImage(imgSource, intX, intY)

            Dim cmColors As New ColorMatrix

            cmColors.Matrix33 = CSng(i / intAmount)

            Dim iaAttributes As New ImageAttributes
            iaAttributes.SetColorMatrix(cmColors)

            gTemp.DrawImage(imgTarget, rctDest, intX, intY, _
               imgTarget.Width, imgTarget.Height, _
               GraphicsUnit.Pixel, iaAttributes)

            lstFade.Add(CType(tmpBitMap.Clone, Bitmap))

         Next

      End Using

      BackgroundImage = lstFade(0)

   End Sub
The Form Load event draws the Images in memory. What Images? Well, the For Loop draws 10 images, each Fading out more and fading in more than the next. It is the sequence, if you may, in which the images are faded. The first image is set as the background of the form.
Now, we haven’t seen much, except for the Background image that displays when the Form loads, as shown in Figure 1.
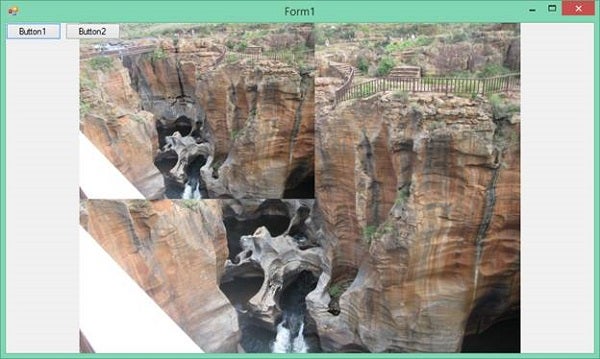
Figure 1: Start
Add the Button1_Click event, and then the Timer’s Tick event.
C#
   private void tmrFade_Tick(object sender, EventArgs e)
   {
      intCount += 1;

      if (intCount > 10)
      {
         tmrFade.Stop();
      }
      else
      {
         BackgroundImage = lstFade[intCount];

      }
   }


   private void Button1_Click(object sender, EventArgs e)
   {
      intCount = 0;
      tmrFade.Interval = 500;
      tmrFade.Start();
   }
VB.NET
   Private Sub Button1_Click(sender As Object, e As EventArgs) _
         Handles Button1.Click

      intCount = 0
      tmrFade.Interval = 500
      tmrFade.Start()

   End Sub
   Private Sub tmrFade_Tick(sender As Object, e As EventArgs) _
         Handles tmrFade.Tick

      intCount += 1

      If intCount > 10 Then

         tmrFade.Stop()

      Else

         Me.BackgroundImage = lstFade(intCount)

      End If

   End Sub
Clicking Button1 starts the Timer. The Timer sets the Background Image of the Form to each of the in-memory images that were created upon Form_Load every 500 milliseconds. When the transition is complete, your Form will resemble Figure 2.
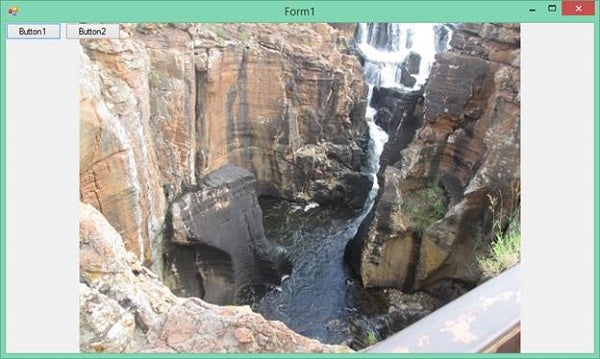
Figure 2: End Image
We now can clearly see that the one image morphed into the other image. To save the in-memory bitmaps to disk, add the following code for Button2.
C#
   private void Button2_Click(object sender, EventArgs e)
   {
      for (int i = 0; i <= lstFade.Count - 1; i++)
      {
         lstFade[i].Save(@"c:\test\test_" + i.ToString() + ".jpg");
      }
   }
VB.NET
      For i As Integer = 0 To lstFade.Count - 1

         lstFade(i).Save("c:\test\test_" & i.ToString & ".jpg")

      Next

   End Sub
This saves the 10 steps in the fading transition process, as shown in Figure 3.
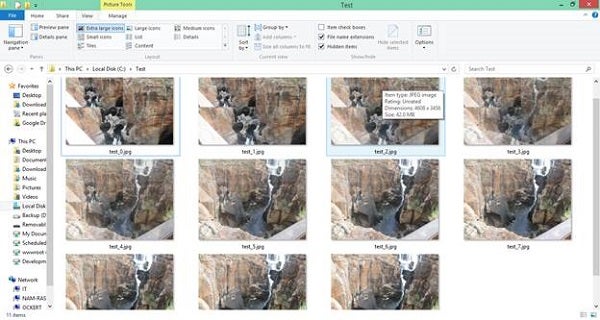
Figure 3: Steps
Conclusion
Graphics must be my utmost favorite aspect of .NET to play with; many of my previous articles may also attest to that. I hope this article was interesting and has taught you how to play with graphics in .NET.