A mock API imitates a real API call by providing a realistic JSON or XML response to the requester. Mock APIs can be designed on a developer’s computer or in the cloud. Responses of mock API can be static or dynamic, which simulates the data the real API world send as a response. Mock APIs are very useful for parallel development when APIs are still being developed and developers want to test expected behaviors simultaneously. Mock APIs can save a lot of time as API calls can help programmers use valuable unit tests and make it easier to identify problems.
In this article, I will demonstrate mock API responses using the Azure API management portal.
Prerequisites for Creating Mock API Responses:
- To set up the development environment, ensure that you have.
- Azure Free Subscription Azure APIM Knowledge
How to Mock API Responses in Azure
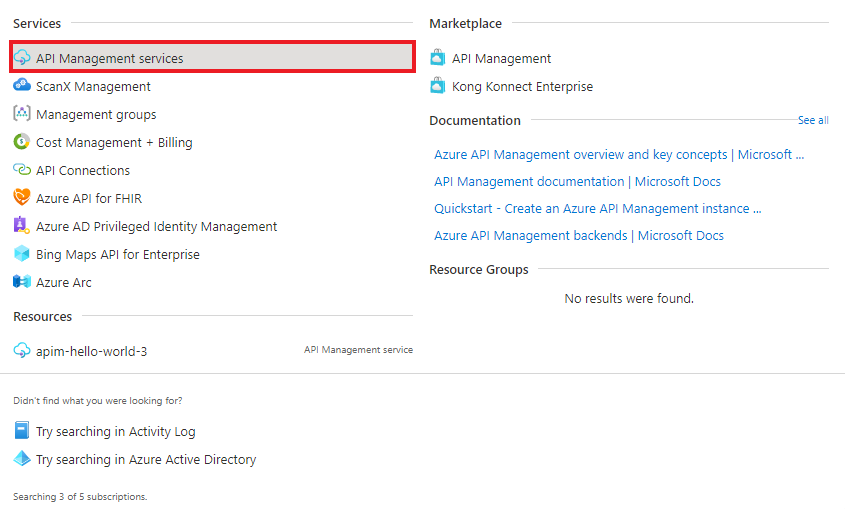
To get started, log in to the Azure portal, search for API Management services and select it. Refer to the figure below:
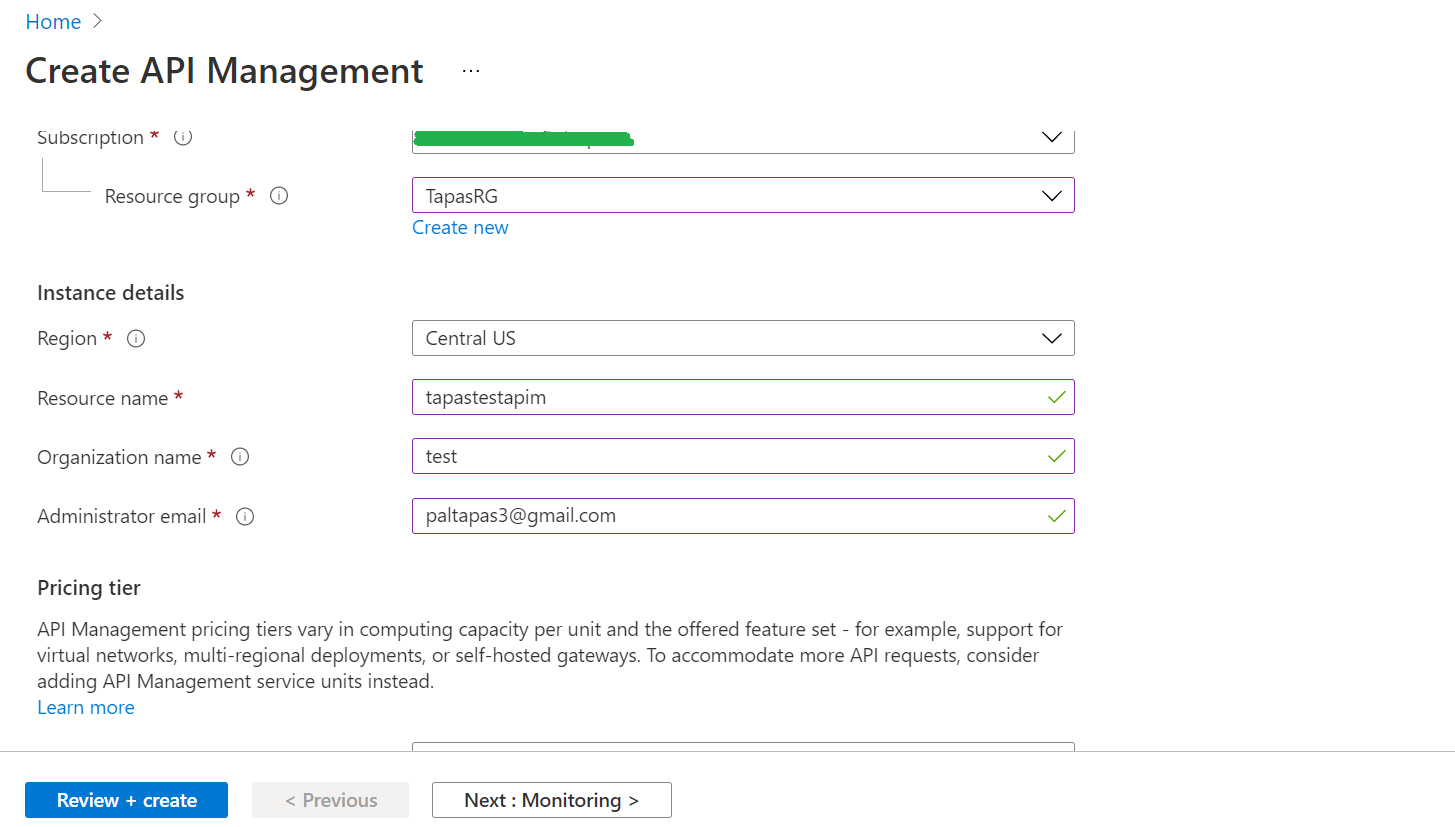
Next, provide a name for the service, select the subscription, and select the resource group (create a new resource group if no resource group is available). Next, select the Region. Provide the organization name and an Administrator Email ID.
Select Review + Create to create a Service. Refer to the figure below if you get lost. It will take 30-45 minutes to create the APIM instance.
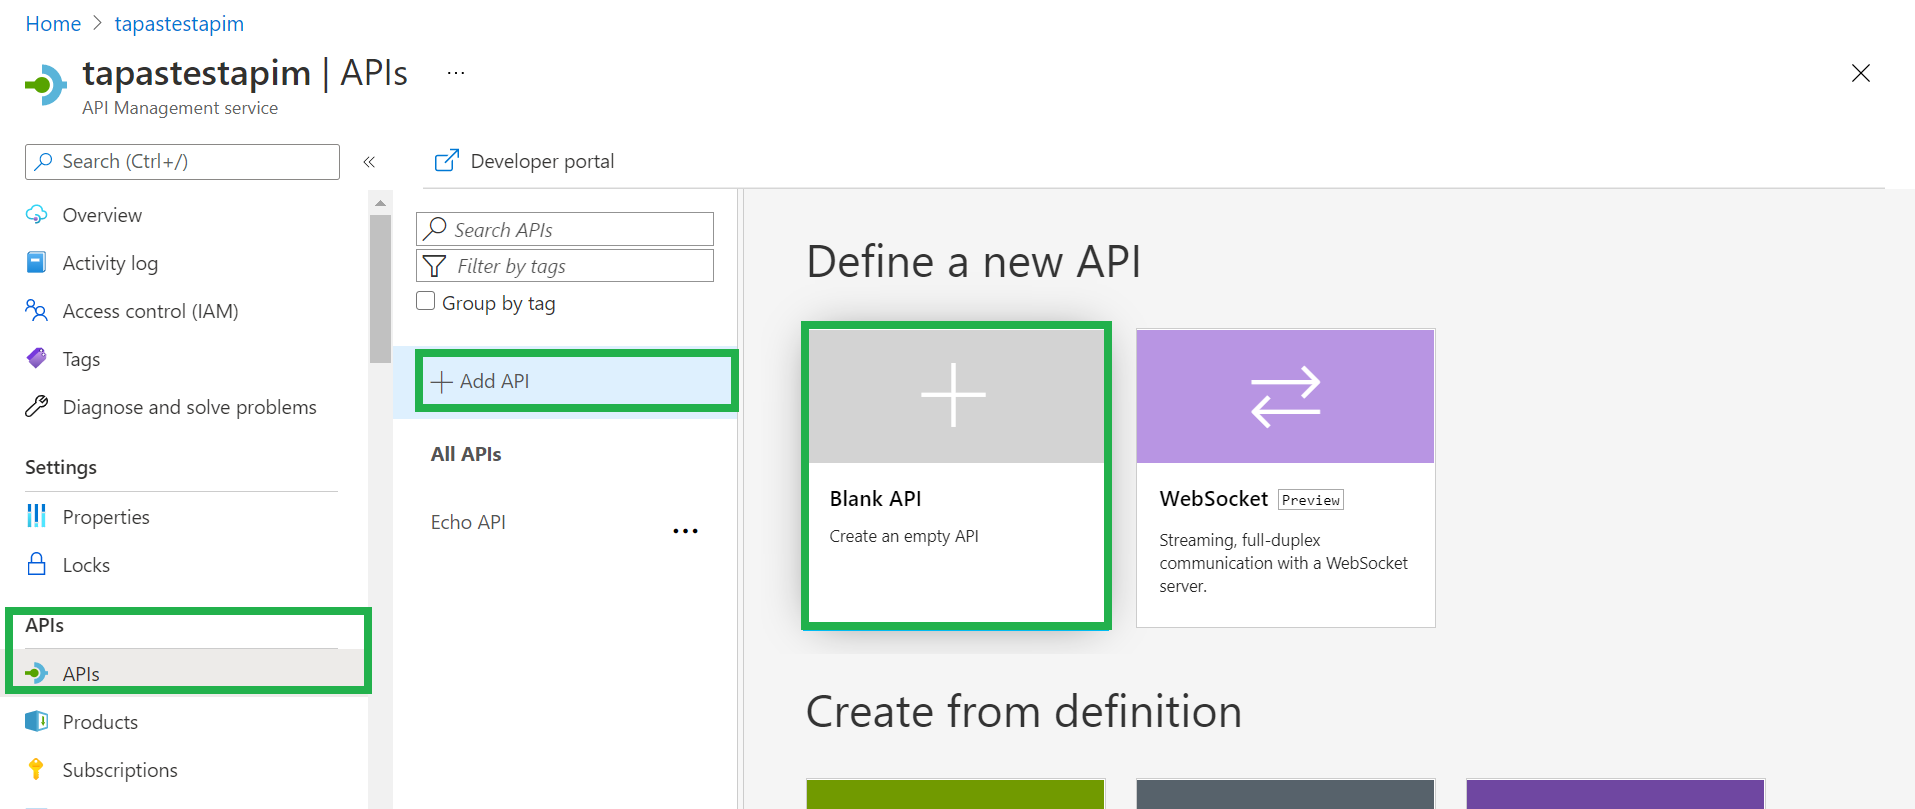
Once the APIM service is up, navigate to APIs from the API Management Service window & select + Add API from the left side menu. Next, select Blank API from the list. Refer to the figure below for more:
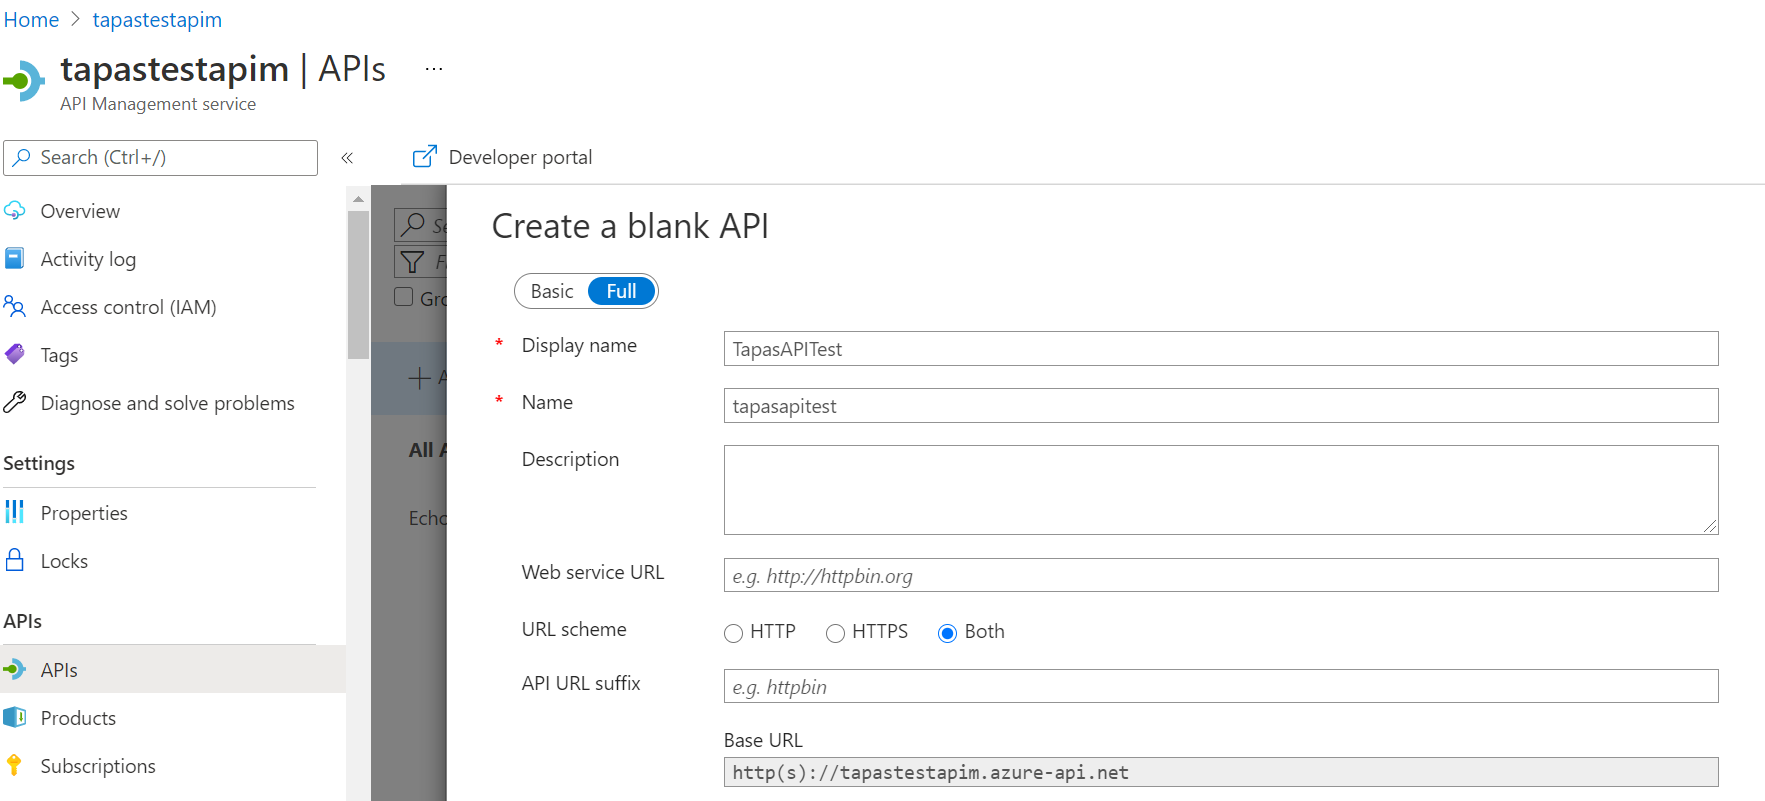
Next, a developer can provide a user-defined name for the display name, and the display name will be automatically reflected in the name field too. In the URL schema, select Both. Notice the base URL created. See the figure below for an example:
In the Products and Gateways fields, enter Unlimited. Now, select Create to create a test API with no backend. See the figure below:

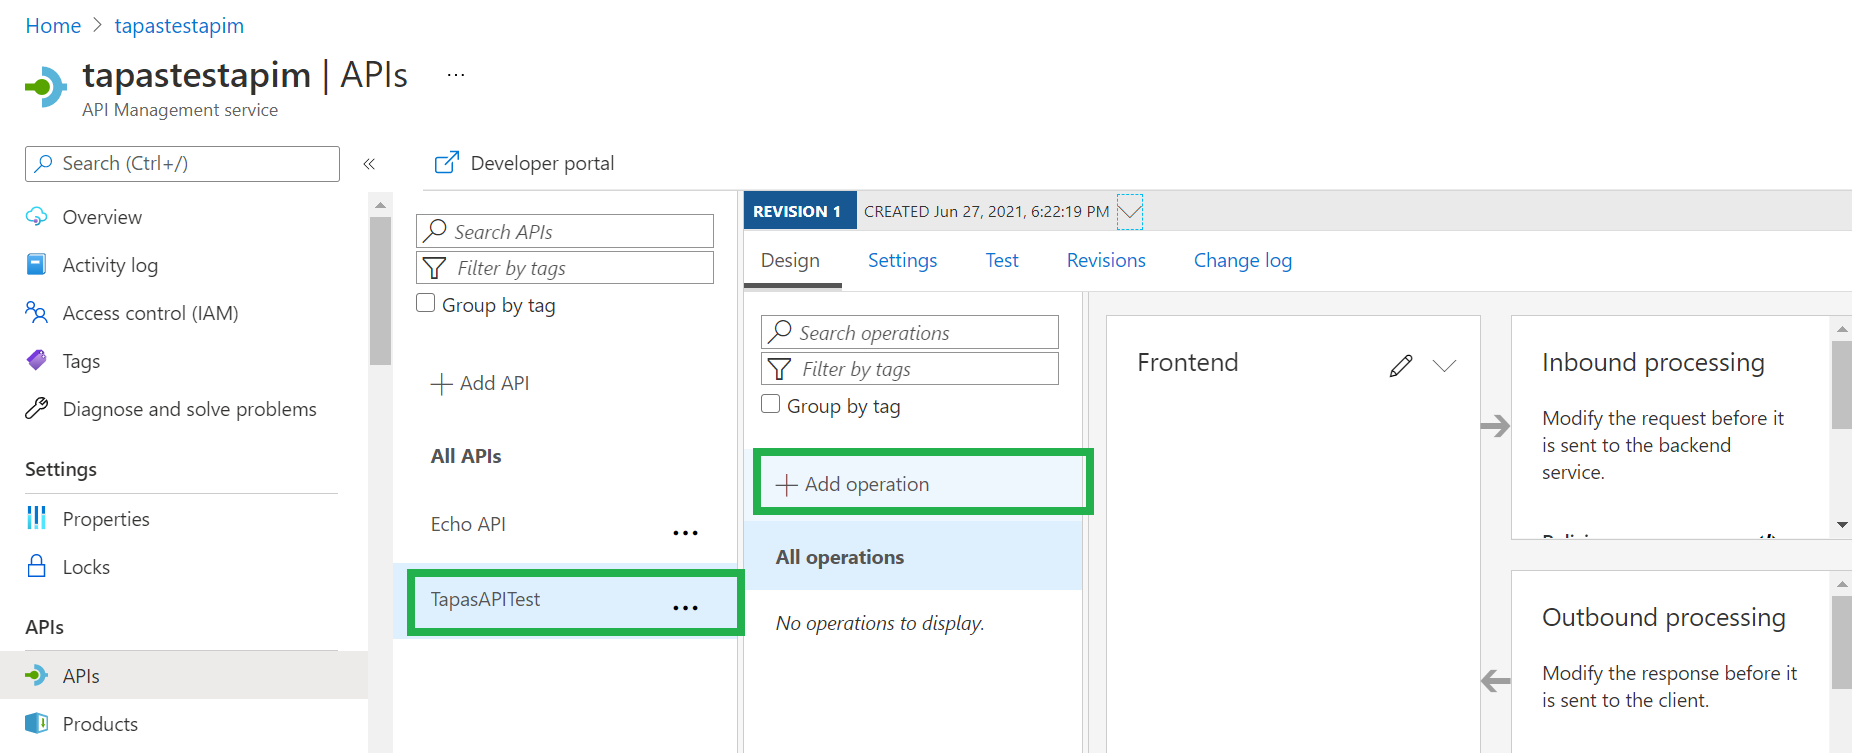
Moving to the next step, the developer needs to add an operation for testing the API. From the API created in the last step, just select + Add operation. See the figure below:
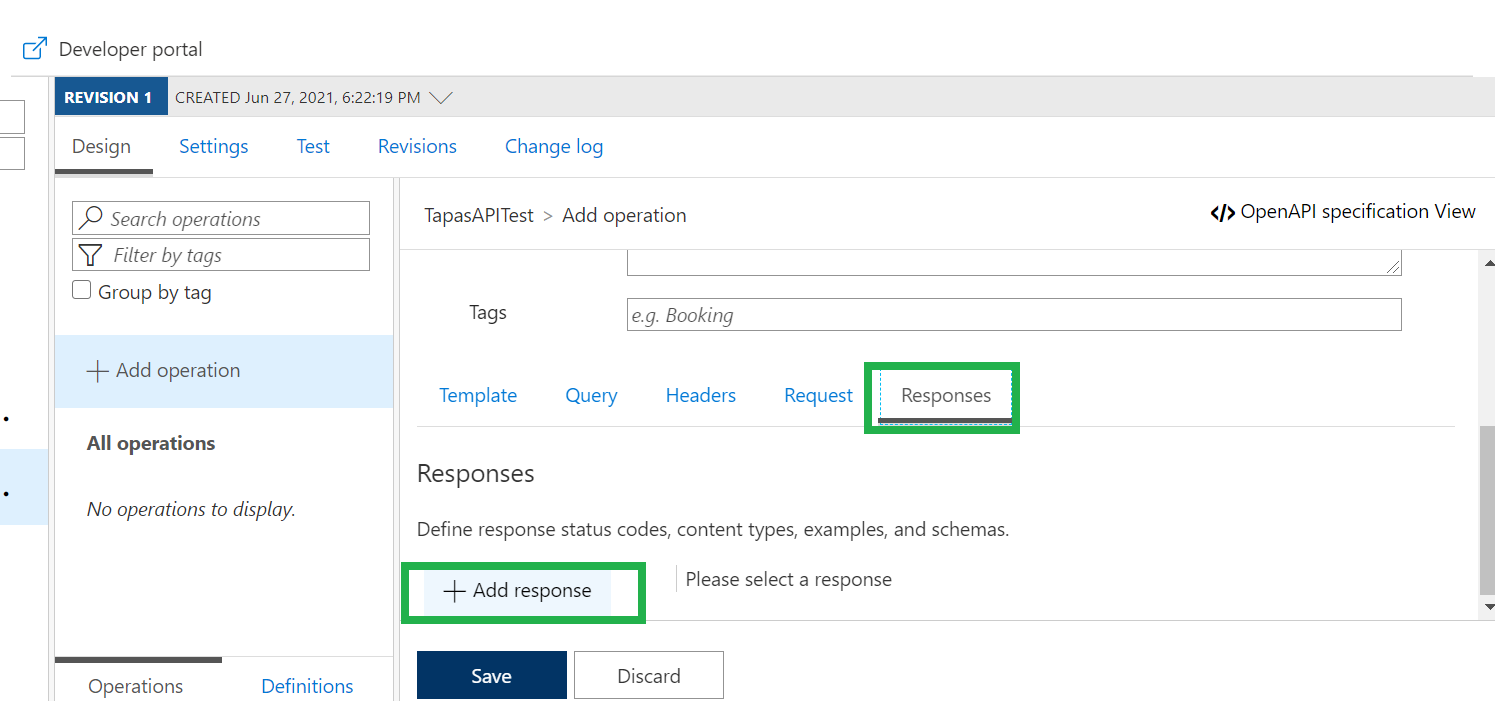
Now, enter the following values of the operation and click Save. See the figure below for more: Display Name: User-defined operation name. Name: The same name will be reflected that was entered in the Display Name. URL: The URL for the API. Description: A description of the API. 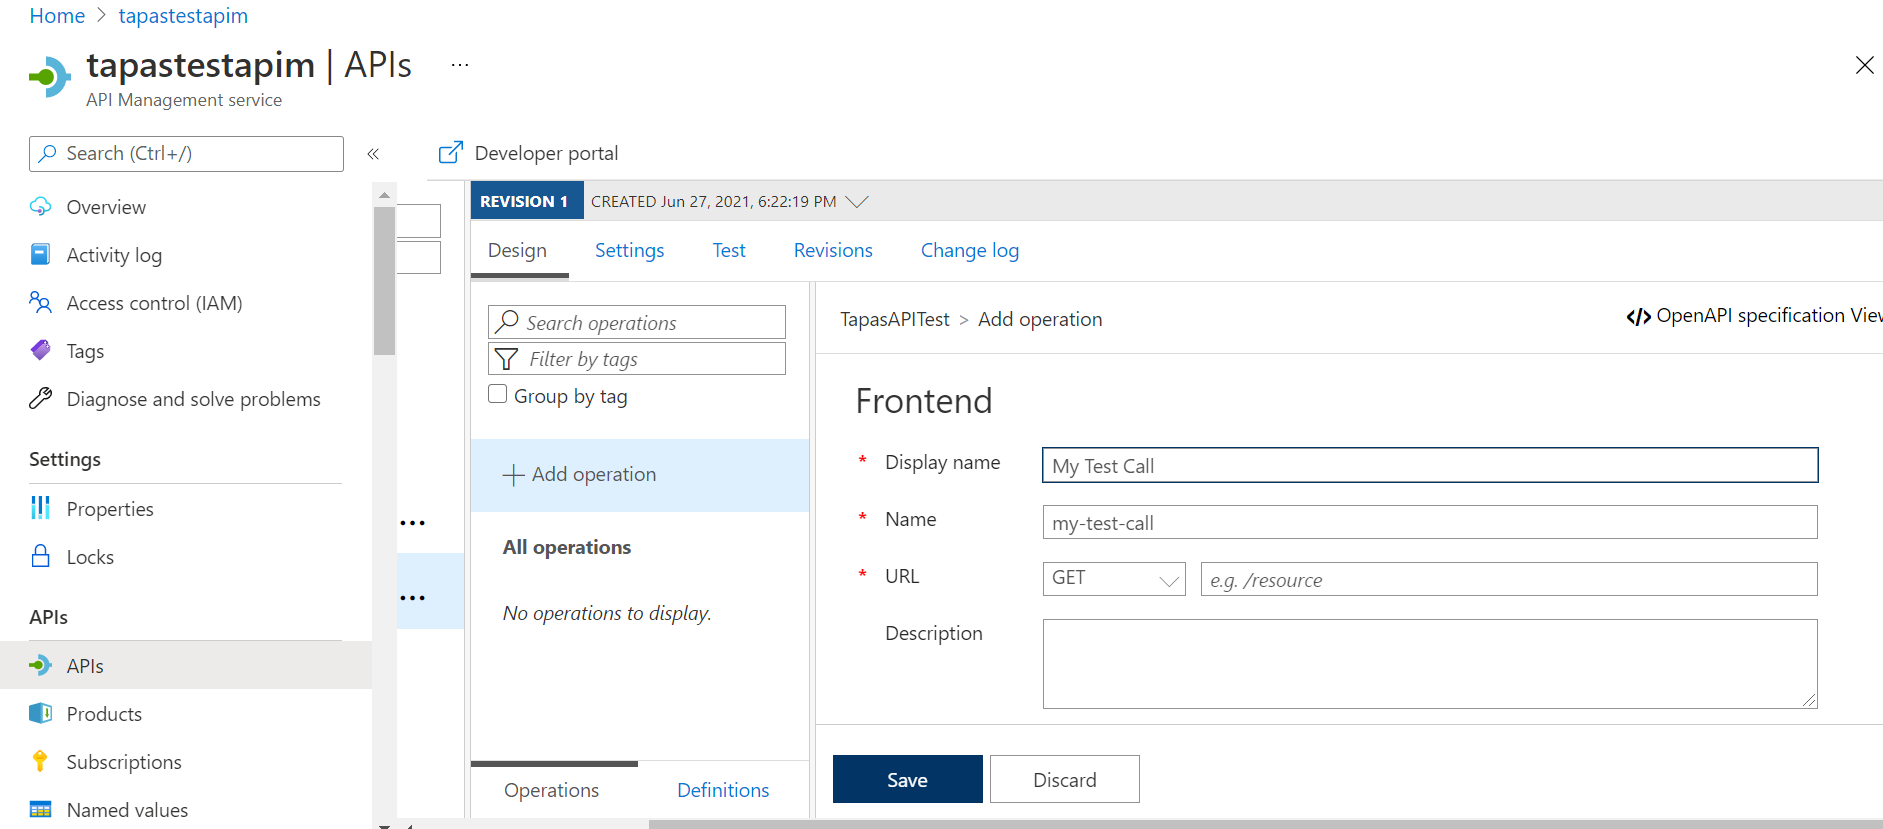 Next, the developer needs to select the Responses tab. Choose + add response, and select 200 OK from the list. Under the Representations heading on the right, select + Add representation. Enter application/json into the search box and select the application/json content type. Add a sample response in the text box by entering { “sampleField” : “test” } and select Save. See the next two figures below for more:

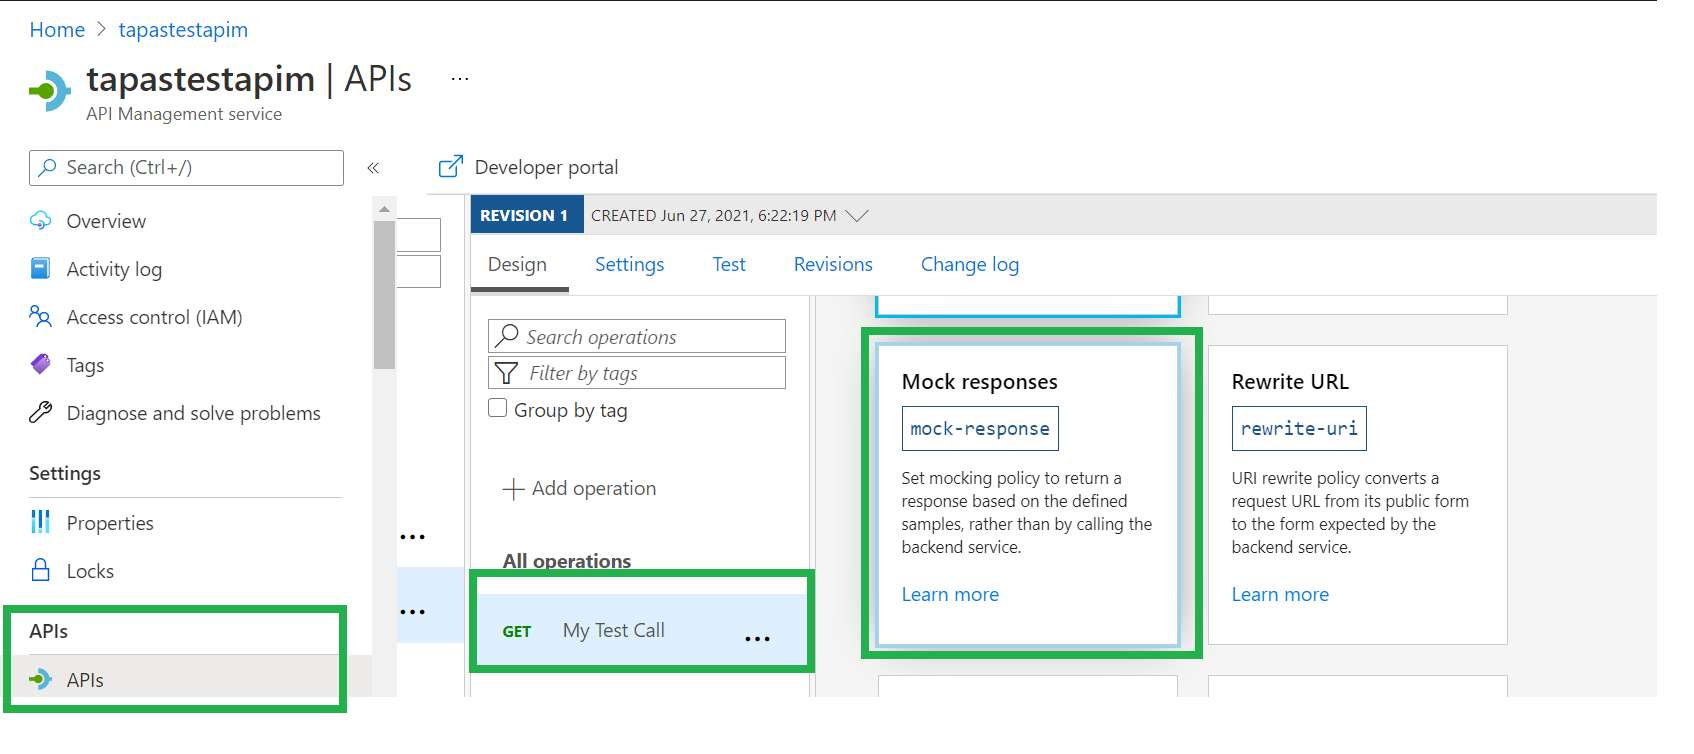
The next step would be to enable the mock response. Navigate to the API, which we created in the previous step. Select My Test calling in all operations. Then the next step is to select +Add policy from the Inbound Processing window.
Next select Mock responses tile in the Gallery.
From the API Management Response textbox, enter 200 OK, application/json and then select Save. Refer to the figures below if you get lost:

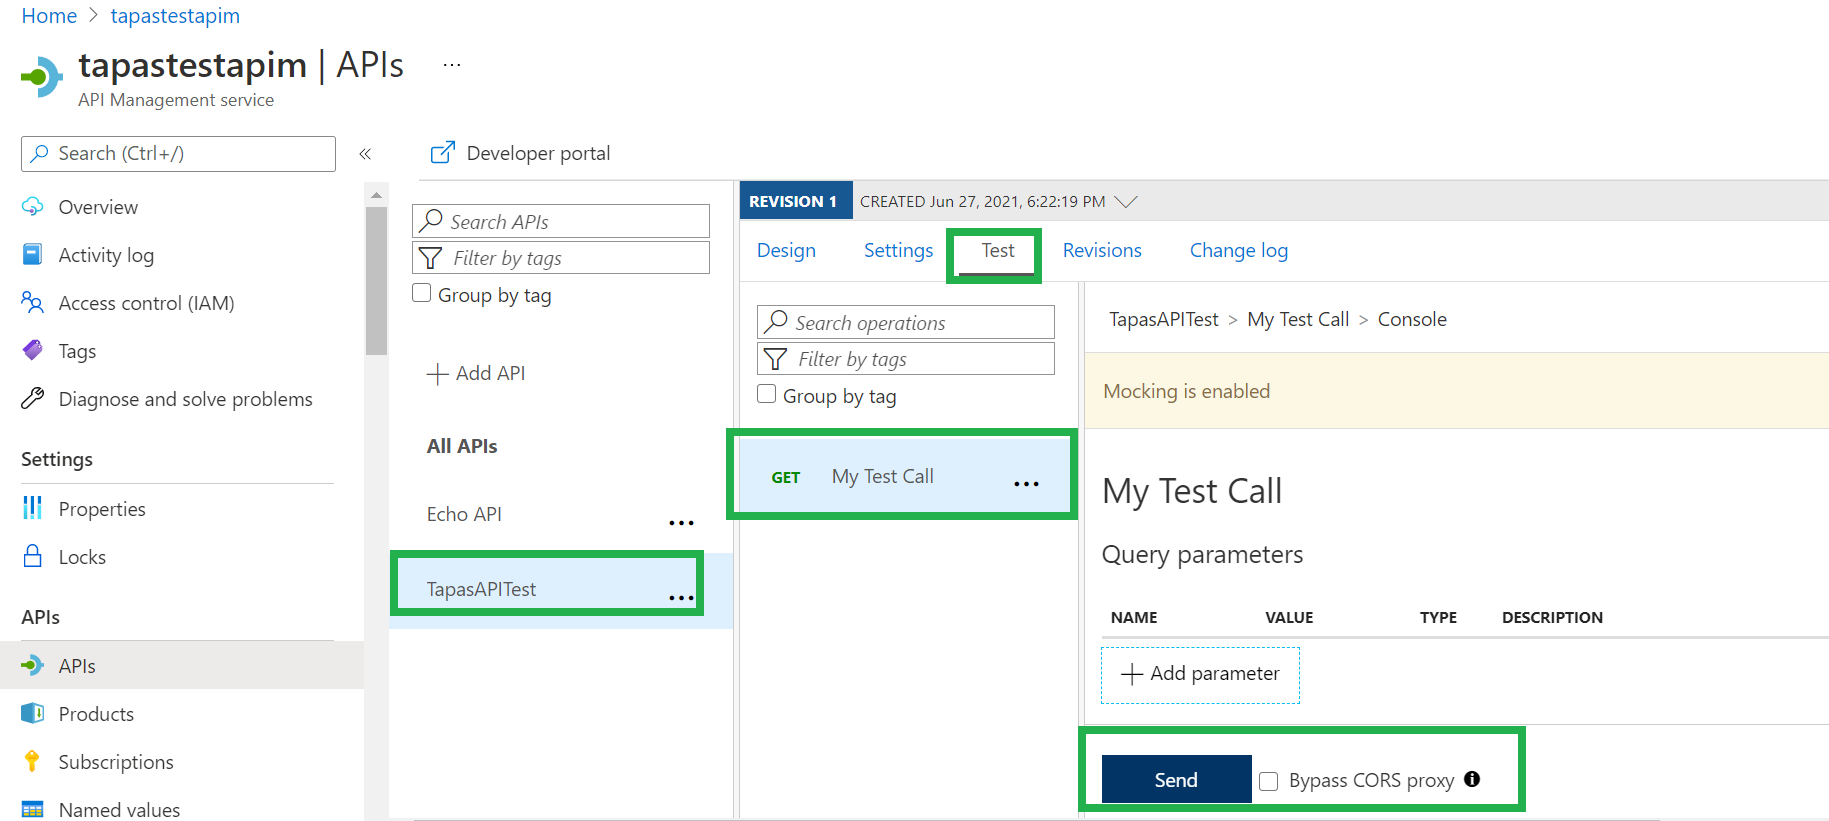
Now, to test the Mock, select the API and Operation created in the previous step, select the Test tab. Choose Send to make a test call, as shown in the figure below: