Introduction
The most popular and globally accepted e-mail service on Azure is SendGrid. It’s a Cloud-based e-mail service that provides reliable transactional e-mail delivery, scalability, and real-time analytics. Its flexible APIs make integration easy for developers. Azure subscribed users receive up to 25,000 e-mails per month for free. In this article, I will demonstrates how to send an e-mail from C# with the SendGrid e-mail service on Azure. The samples are written in C# for constructing e-mail, sending e-mail, adding attachments, and enabling various mail and tracking settings.
Functionalities of the SendGrid E-mail Service
Following are SendGrid common features and functionalities:
- Automatically sending receipts
- Administering distribution lists for sending e-mails
- Collecting real-time metrics
- Forwarding customer inquiries
- Processing incoming e-mails
Creating a SendGrid Account in Azure Portal
Sign in to the Azure portal. Next, from the Azure portal menu or the home page, select Create a resource. Refer to Figure 1.
Figure 1: Azure portal
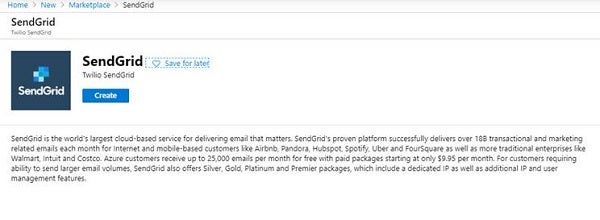
Search for and select SendGrid. Click Create once ‘SendGrid’ service is listed by the search result. Consult Figures 2 and 3.
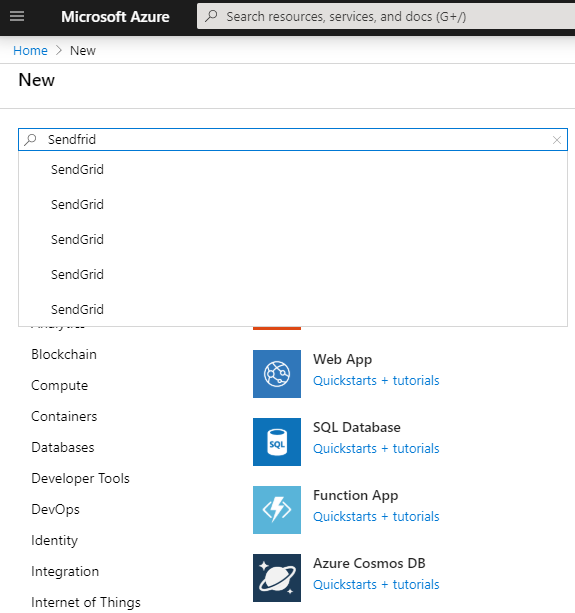
Figure 3: SendGrid loaded and ready
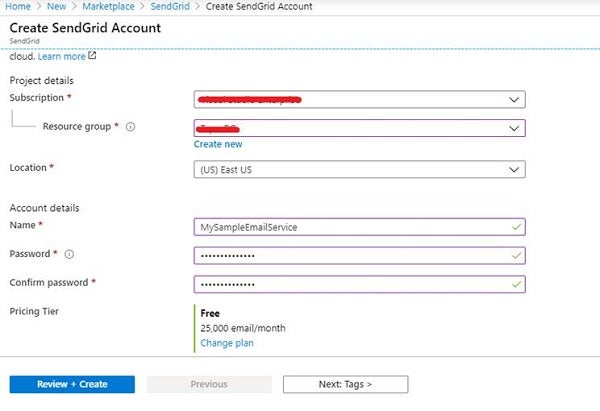
Next, complete the signup form and select Create. Refer to Figure 4.
Figure 4: Completing the signup form
Enter a Name to identify your SendGrid service. Also, enter and confirm your Password.
Next, Choose your Subscription. Select the free pricing tier.
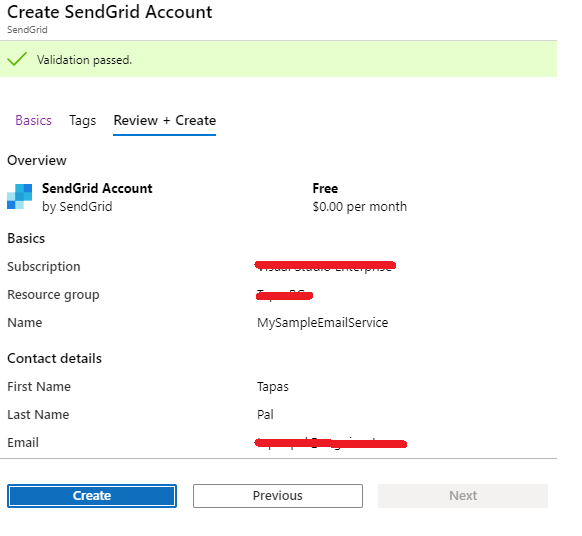
Create a new Resource group or use an existing one. See Figures 4 and 5.
Figure 5: Creating SendGrid account
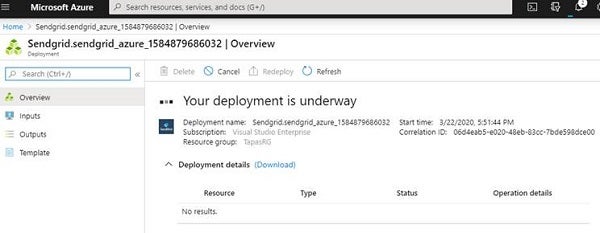
You will see the Deployment Succeeded pop-up and you will see your account listed.
Refer to Figures 6 and 7.
Figure 6: Starting to deploy
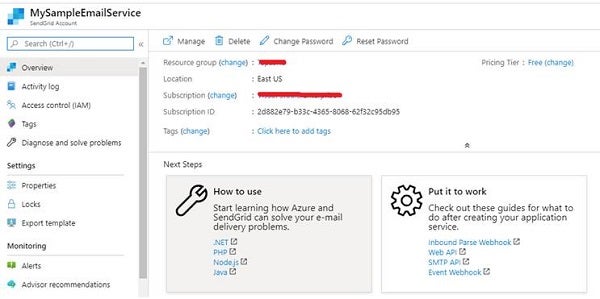
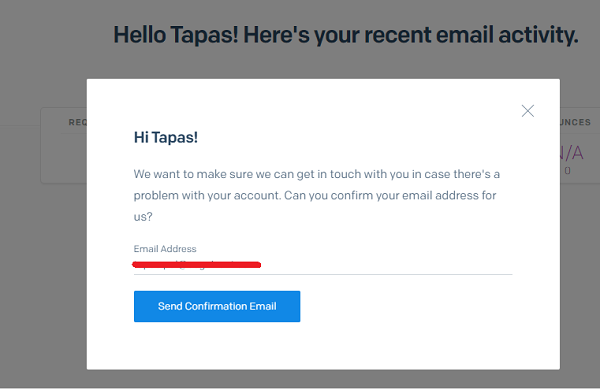
After you have completed your purchase and clicked the Manage button to initiate the e-mail verification process, you will receive an e-mail from SendGrid asking you to verify your account. Refer to Figures 7 and 8.
Figure 7: Initiating the e-mail verification process
Figure 8: Receiving an e-mail from SendGrid asking you to verify your account
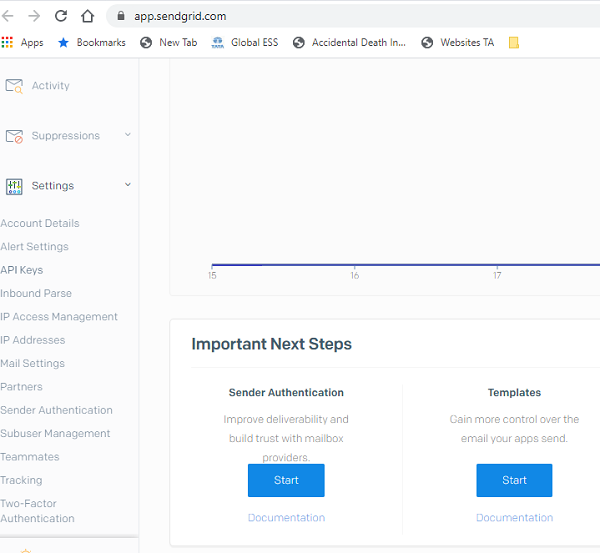
Next, you have to set up an API. From the SendGrid dashboard, select Settings and then API Keys in the menu on the left.
Refer to Figure 9.
Figure 9: Setting up an API
Next, Click the Create API Key. Refer to Figure 10.
Figure 10: Creating the API key
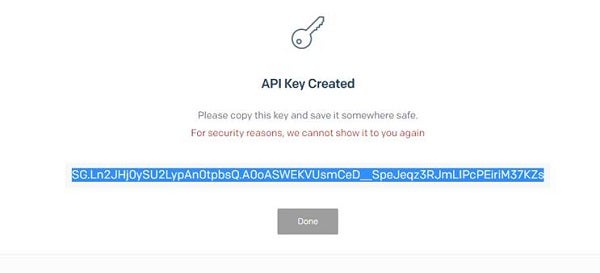
At a minimum, provide the Name of this key and provide full access to Mail Send and select Save. Your API will be displayed at this point one time. The generated API will be used in .NET Applications for sending e-mail. Observe Figures 11, 12, and 13.
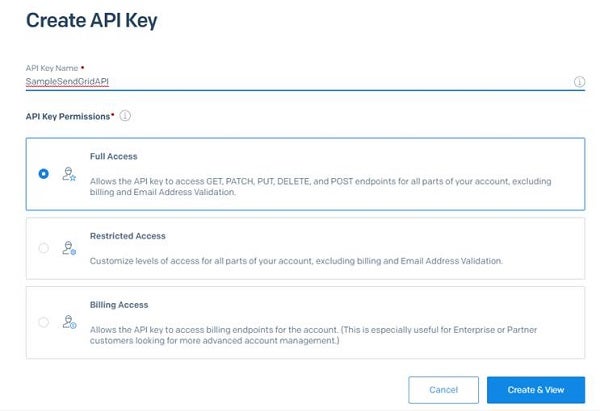
Figure 12: API key has been generated
Figure 13: API key in place and ready to use
Creating a Sample .NET Console Application to Send E-mail
Next, I will create a C# console application to send e-mail using the above-mentioned API. The SendGrid NuGet package is the easiest way to get the SendGrid API and to configure your application with all dependencies. NuGet is a Visual Studio extension included with Microsoft Visual Studio 2015 and above.
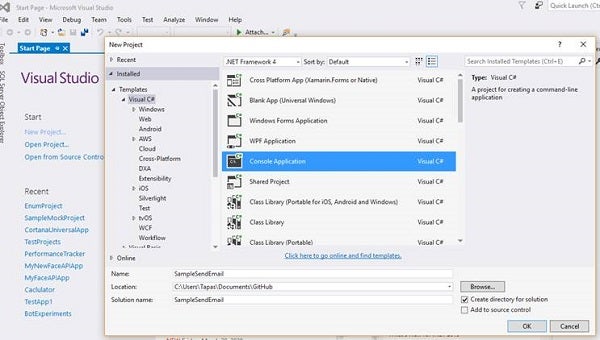
Create a C# Console application, as depicted in Figure 14.
Figure 14: Creating a C# console application
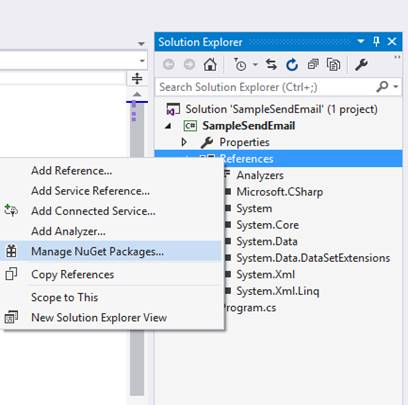
Next, In Solution Explorer, right-click References, then click Manage NuGet Packages. Refer to Figure 15.
Figure 15: Selecting Manage NuGet Packages
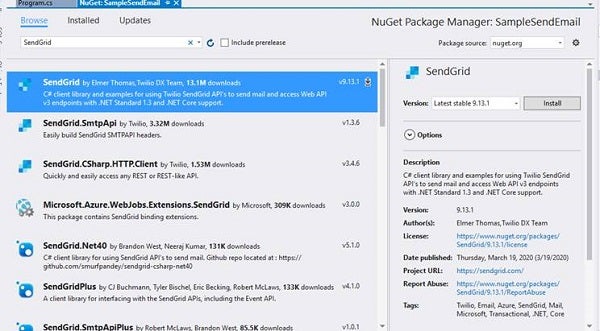
Search for SendGrid and select the SendGrid item in the results list.
Select the latest stable version of the NuGet package from the version drop-down and install it. Refer to Figure 16.
Figure 16: Installing the NuGet Package
SendGrid’s .NET contains the following namespaces:
- SendGrid: For communicating with SendGrid’s API.
- SendGrid.Helpers.Mail: For helper methods to easily create SendGridMessage objects that specify how to send e-mails.
I have used the SendGridMessage object to create an e-mail message. Once the message object is created, developers can set properties and methods, including the e-mail sender, the e-mail recipient, and the subject and body of the e-mail.
The following example demonstrates how to create a e-mail object using the SendGrid API.
using System;
using System.Collections.Generic;
using System.Threading.Tasks;
using System.Linq;
using System.Text;
using SendGridMail;

namespace SampleSendEmail
{
   class Program
   {
      static void Main(string[] args)
      {
         Execute().Wait();

      }

      static async Task Execute()
      {
         var apiKey = System.Environment.GetEnvironmentVariable
            ("MYEMAILAPI");
         var client = new SendGridClient(apiKey);
         var msg = new SendGridMessage()
         {
            From = new EmailAddress("tapas@example.com",
               "My Team"),
            Subject = "Hello World - Sample Email!",
            PlainTextContent = "Hello, Email!",
            HtmlContent = "<strong>Hello, Email!</strong>"
         };
         msg.AddTo(new EmailAddress("tapas@example.com",
            "My Test User"));
         var response = await client.SendEmailAsync(msg);
      }

   }
}
Conclusion
I hope you found this article helpful. Happy reading!


