

This is the first of a series of related articles that I hope to write concerning my solution for a recent programming problem. I needed a VB 2005 Express Edition program that had the ability to automate both Microsoft Office 2002/2003 Word and Excel. The program must be able to open either pre-existing files or templates and also create new ones as required. Some of the spreadsheets needed to be built and formatted using values obtained from pre-existing standard Windows INI files. A few of these also would include either charts and/or pivot tables. Many of the samples I found on the Internet didn’t seem to work as advertised, were too long and complicated, or relied too much on the CreateObject method of instantiating the Office programs. CreateObject is one of those classic examples of late or dynamic binding that I personally consider an anathema. The big issue I have with this method is the fact that the compiler can’t differentiate between an instance of Excel or a stack of pancakes at design time and thus no Intellisense help is available. In this first article, I’ll show you how I managed to automate Excel painlessly.
Start Visual Basic 2005 Express and create a new Windows Application project.
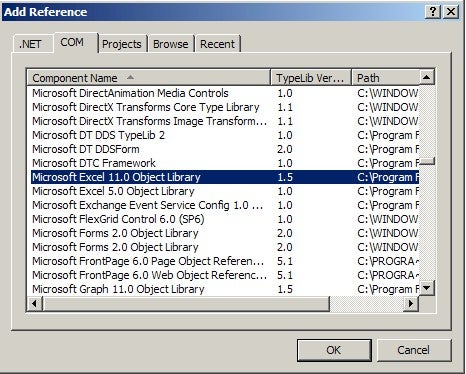
To replace the CreateObject method with “early binding”, you need to add a project reference to the Excel Object Library.
Click the Project – Add Reference menu selection. From the COM tab, locate and select the Microsoft Excel 10.0 or 11.0 Object Library. Your installed Office version (XP or 2003) will determine which one of these libraries you have installed.
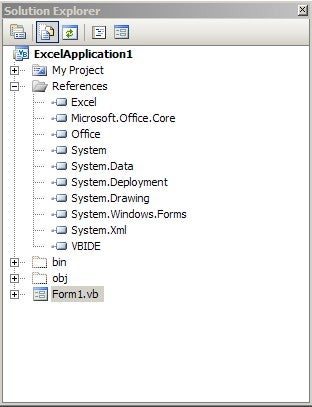
Take a look at “All Files” in your Solution Explorer and note there are three new References. Two of these are common to all the Office programs and are added automatically along with the main library reference.
With Form1 in Design view, open or expand your toolbox and add two command buttons. I’ll use one of those buttons to open a pre-existing file and the other to create, populate, and format a new file.
Double-click Button1 and open the code editing window. The cursor should have automatically positioned itself in the button click event. Move it to a location under the Class declaration and declare a form-level Excel object variable of the type as shown below.
Public Class Form1
Dim objExcel As New Microsoft.Office.Interop.Excel.Application
Place the cursor back into the Button1 click event. Now that you’ve declared your object instance, you can then go ahead and use it. I’ve included PCSample.xls with the download, but you can also use any file you happen to have on your hard drive. Make sure to edit the code and change the name accordingly and that a copy of the file is located in the path you are running the program from. If you’re a VB6 guy like me, this big long path is the replacement for App.Path.
With objExcel
.Visible = True
.Workbooks.Open(My.Application.Info.DirectoryPath & "\PCSample.xls")
End With
That’s it for Button 1. Pretty simple. You can go ahead press F5 and test your program.
Now for Button 2. I’ll open a new Excel application and use VB to add some text and formatting to a few cells. Double-click Button 2 to open the editing window again. Add the following code to the click event:
With objExcel
.Visible = True
.Workbooks.Add()
.Range("A1").Value       = "A1 Construction, Inc."
.Range("A1").ColumnWidth = 20
.Range("A1").Font.Bold   = True
.Range("A2").Value       = "So. Main St."
.Range("A3").Value       = "Hartford" &", " & "CT"
End With
That’s it for Button 2. Again, pretty simple. Try setting some of the other properties such as fonts, colors, and so forth. Try dynamically adding a function that totals rows and/or columns.
In my next article, I’ll show you how I created an INI file class that enables this program to replace the hard-coded values dynamically. Enjoy.