


Introduction
As part of Windows 8.1, Microsoft is planning to release a ton of new APIs and controls to make it easy for application developers to build applications targeting the platform.
Most of the applications have a need to expose application settings to the users. To ensure that applications offer a consistent experience to users, Windows 8.1 introduces a new control called SettingsFlyout, which allows applications to provide access to settings in a consistent manner.
The SettingsFlyout control is available in the Windows.UI.Xaml.Controls namespace for XAML developers and WinJS.UI namespace for JavaScript developers.
The SettingsFlyout control can be declared as a root element of a XAML page.
The SettingsFlyout control has two sections – the header section and the content section.
The header section contains (i) back button, (ii) title, and (iii) icon (optional). The content section should contain the settings the user can change.
The SettingsFlyout can be shown programmatically by calling the SettingsFlyout.Show() or SettingsFlyout.ShowIndependent() methods; the only difference between the two methods is the point where the user is returned when the back button is clicked.
To associate a SettingsFlyout control to the application, we need to handle the SettingsPane.CommandsRequested event. We also need to add a SettingsCommand to the ApplicationCommands collection. In this SettingsCommand, you will specify a method that is executed to create an instance of the SettingsFlyout and display it.
Hands On
For this walkthrough, you will need Windows 8.1 Pro and Visual Studio 2013 RC1 installed.
Create a new Windows Store application (in Visual Studio 2013 RC1) project titled Windows8.1SettingsFlyoutDemo.
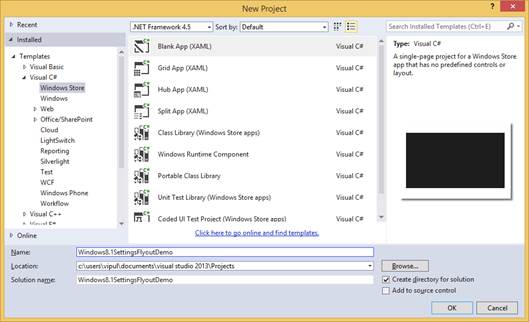
New Project
Next, right click on the project file and click Add new item and select SettingsFlyout from the available items. Leave the default name for the SettingsFlyout unchanged for this sample.
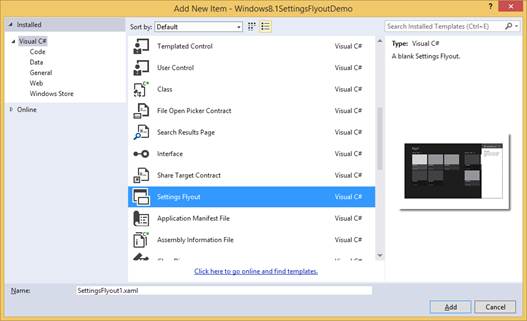
Add New Item
A new XAML file is created called SettingsFlyout1.xaml, which contains the markup that defines the UI of the SettingsFlyout control.
The default markup generated is as below.
<SettingsFlyout
    x:Class="Windows8._1SettingsFlyoutDemo.SettingsFlyout1"
    xmlns="http://schemas.microsoft.com/winfx/2006/xaml/presentation"
    xmlns:x="http://schemas.microsoft.com/winfx/2006/xaml"
    xmlns:local="using:Windows8._1SettingsFlyoutDemo"
    xmlns:d="http://schemas.microsoft.com/expression/blend/2008"
    xmlns:mc="http://schemas.openxmlformats.org/markup-compatibility/2006"
    mc:Ignorable="d"
    IconSource="Assets/SmallLogo.png"
    Title="SettingsFlyout1"
    d:DesignWidth="346">

    <!-- This StackPanel acts as a root panel for vertical layout of the content sections -->
    <StackPanel VerticalAlignment="Stretch" HorizontalAlignment="Stretch" >

        <!-- The StackPanel(s) below define individual content sections -->

        <!-- Content Section 1-->
        <StackPanel Style="{StaticResource SettingsFlyoutSectionStyle}">

            <!-- Section 1 header -->
            <TextBlock Style="{StaticResource TitleTextBlockStyle}" Text="Lorem ipsum" />

            <!-- Section 1 body -->
            <TextBlock Style="{StaticResource BodyTextBlockStyle}" Margin="0,0,0,25" TextWrapping="Wrap">
                <TextBlock.Text>
                    Lorem ipsum dolor sit amet, consectetur adipisicing elit,
                    sed do eiusmod tempor incididunt ut labore et dolore magna aliqua.
                </TextBlock.Text>
            </TextBlock>

        </StackPanel>

        <!-- Define more Content Sections below as necessary -->

    </StackPanel>
</SettingsFlyout>
We will change this to “customize” the SettingsFlyout contents for our application.
<SettingsFlyout
    x:Class="Windows8._1SettingsFlyoutDemo.SettingsFlyout1"
    xmlns="http://schemas.microsoft.com/winfx/2006/xaml/presentation"
    xmlns:x="http://schemas.microsoft.com/winfx/2006/xaml"
    xmlns:local="using:Windows8._1SettingsFlyoutDemo"
    xmlns:d="http://schemas.microsoft.com/expression/blend/2008"
    xmlns:mc="http://schemas.openxmlformats.org/markup-compatibility/2006"
    mc:Ignorable="d"
    IconSource="Assets/SmallLogo.png"
    Title="SettingsFlyout1"
    d:DesignWidth="346">

    <!-- This StackPanel acts as a root panel for vertical layout of the content sections -->
    <StackPanel VerticalAlignment="Stretch" HorizontalAlignment="Stretch" >

        <!-- The StackPanel(s) below define individual content sections -->

        <!-- Content Section 1-->
        <StackPanel Style="{StaticResource SettingsFlyoutSectionStyle}">

            <!-- Section 1 header -->
            <TextBlock Style="{StaticResource TitleTextBlockStyle}" Text="Opacity" />

            <!-- Section 1 body -->
            <TextBlock Style="{StaticResource BodyTextBlockStyle}" Margin="0,0,0,25" TextWrapping="Wrap">
                <TextBlock.Text>
                    Change opacity of buttons
                </TextBlock.Text>
            </TextBlock>
            <ToggleSwitch Header="Opacity" Name="toggleSwitchOpacity" IsOn="True" Toggled="toggleSwitchOpacity_Toggled" />

        </StackPanel>

        <!-- Define more Content Sections below as necessary -->

    </StackPanel>
</SettingsFlyout>
The changes we will be doing for the demo are highlighted. For our sample, we have added a toggleswitch with the default value of “on”.
Next, in the MainPage.xaml, we will create a handler for the CommandRequested event on the SettingsPage. In this handler, we will specify our SettingsFlyout as the setting to invoke when the Settings Charm is invoked from the application.
public MainPage()
        {
            this.InitializeComponent();
            Windows.UI.ApplicationSettings.SettingsPane.GetForCurrentView().CommandsRequested += MainPage_CommandsRequested;
        }

        void MainPage_CommandsRequested(Windows.UI.ApplicationSettings.SettingsPane sender, Windows.UI.ApplicationSettings.SettingsPaneCommandsRequestedEventArgs args)
        {
            Windows.UI.ApplicationSettings.SettingsCommand opacitySetting =
        new Windows.UI.ApplicationSettings.SettingsCommand("OpacitySettings", "Opacity", (handler) =>
        {
            SettingsFlyout1 opacitySettingsFlyout = new SettingsFlyout1();
            opacitySettingsFlyout.Show();

        });

            args.Request.ApplicationCommands.Add(opacitySetting);

        }
Our application is now ready. Fire up the application and once the application is launched, invoke the Settings Charm by swiping on the right corner inwards.
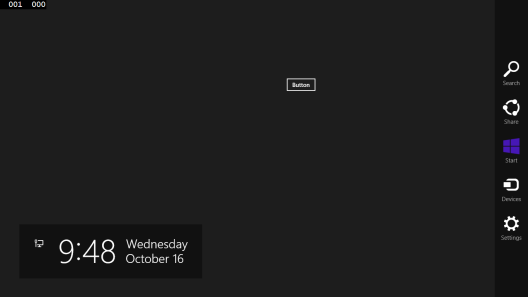
Invoke the Settings Charm
Next, click on Settings.
Click on Settings
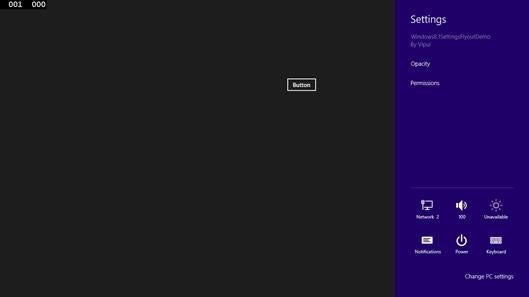
You will notice that Opacity setting is now visible.
Click on it.
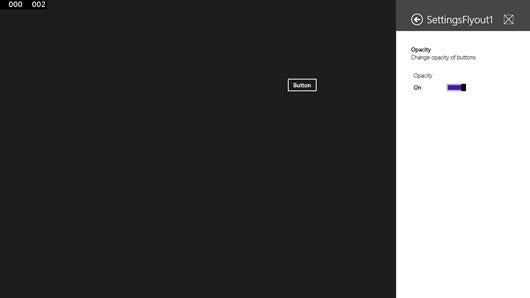
Click on the Opacity Setting
Viola, our SettingsFlyout is displayed.
Summary
In this article, we learned about the SettingsFlyout control and how we can use it in our applications.
You can download the source code of the demo below.
About the author
Vipul Patel is a Program Manager currently working at Amazon Corporation. He has formerly worked at Microsoft in the Lync team and in the .NET team (in the Base Class libraries and the Debugging and Profiling team). He can be reached at vipul.patel@hotmail.com