


Introduction
Push notifications normally are displayed as a toast messages. There can be a scenario where a toast message is to be displayed in a custom UI as a popup or an alert message. In this article, we will display a popup dialog when a notification is received and the app is open. If the app is not active, we display the regular toast message. We will use BroadcastReceiver to broadcast the message internally in the app to display the message in a custom format.
Description
As a prerequisite, the GCM and Azure Notification bug are configured. We start with creating a Xamarin mobile application that will display the notification message in a custom UI.
GCMService Implementation
In Xamarin Studio, create a new multi-platform Xamarin Forms project. Add a “Google Cloud Messaging Client” component under the components folder:
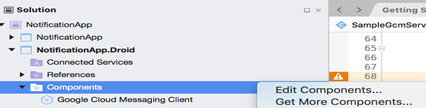
Figure 1: Creating a new Xamarin Forms project
Add a class file named “DemoBroadcastReceiver.cs” and place the following code in it:
[BroadcastReceiver(Permission = Constants.PERMISSION_GCM_INTENTS)]
// Allow GCM on boot and when app is closed
[IntentFilter(new[] { Intent.ActionBootCompleted })]
[IntentFilter(new string[] { Constants.INTENT_FROM_GCM_MESSAGE },
Categories = new string[] { "<Package name>" })]
[IntentFilter(new string[]
   { Constants.INTENT_FROM_GCM_REGISTRATION_CALLBACK },
Categories = new string[] { "<Package name>" })]
[IntentFilter(new string[]
   { Constants.INTENT_FROM_GCM_LIBRARY_RETRY },
Categories = new string[] { "<Package name>" })]
public class DemoGcmBroadcastReceiver :
   GcmBroadcastReceiverBase<DemoGcmService>
{
   // The SENDER_ID is the project number/sender Id from the
   // Google console/firebase
   public static string[] SENDER_IDS = { "Sender Id" };
}
Set the value of the sender ID with the saved project number/sender ID in the ‘Configure GCM’ section. Replace ‘<Package name>’ with the app’s package name.
Add another class file, named ‘DemoGcmService.cs’. This file has a prefix [Service] and is inherited from ‘GcmService.’ Add the following code to the class:
1. [Service]
   public class DemoGcmService : GcmServiceBase
   {
      static NotificationHub hub;
2.    public DemoGcmService() :
         base(DemoGcmBroadcastReceiver.SENDER_IDS)
      {
      }
3.    public static void Initialize(Context context)
       {
          var cs = "<Azure Listner End Point>";
          var hubName = "<Notification hub name>";
          // Azure notification
          hub = new NotificationHub(hubName, cs, context);
      }
4.    public static void Register(Context Context)
      {
         GcmClient.Register(Context,
            DemoGcmBroadcastReceiver.SENDER_IDS);
      }
5.    protected override void OnRegistered(Context context,
         string registrationId)
      {
         // Receive registration ID and register it on Azure
         if (hub != null)
            hub.Register(registrationId, "TEST");
      }
6.    protected override void OnUnRegistered(Context context,
         string registrationId)
      {
         if (hub != null)
            hub.Unregister();
      }
7.    protected override void
         OnMessage(Context context, Intent intent)
      {
         var notificationManager =
            GetSystemService(Context.NotificationService) as
            NotificationManager;
         var title = "Alert";
         var desc = intent.Extras.GetString("message");

         var uiIntent = new Intent(this, typeof(MainActivity));
         PendingIntent intent1 = PendingIntent.GetActivity(this,
            0, uiIntent, PendingIntentFlags.CancelCurrent);
         Android.App.Notification.Builder builder = new
            Android.App.Notification.Builder(this)
               .SetContentTitle(title)
               .SetContentText(desc)
               .SetFullScreenIntent(intent1, true)
               .SetAutoCancel(true)
               .SetSmallIcon(Android.Resource.Drawable
                  .SymActionEmail);

         // Build the notification:
         Android.App.Notification notification = builder.Build();

         notification.Defaults = NotificationDefaults.All;

         // Publish the notification:
         const int notificationId = 0;
         notificationManager.Notify(notificationId, notification);

      }
8.    protected override bool OnRecoverableError(Context context,
         string errorId)
      {
         // On Recoverable Error
         return true;
      }
9.    protected override void OnError(Context context,
         string errorId)
      {
         // On Error
      }
   }   // End of class
Let’s walk through the code. Line 1 prefixes the class as a [service] and is a required step. Stub 2 defines a constructor where we pass the sender’s ID—the project number created in Google Console. In Stub 3, we create an instance of the Azure notification hub.
To get the connection string for the Notification hub, navigate to Azure Portal → ‘All Resources’ →. Click the notification hub that was created earlier. On the Notification hub, click ‘Access Policies.’

Figure 2: Clicking ‘Access Policies’
Copy the connection string with ‘Listen’ permissions to replace the connection string placeholder in Stub 3. Replace the ‘Notification hub name’ with the name of the Notification hub created in Azure. Step 4 registers the current context with the GCM component. Once Step 4 is completed successfully, it executes Step 5 to register the device with Azure. Step 6 is called when the user doesn’t want to receive the notifications.
Step 7, the ‘OnMessage’ method, is called when a message is received. It creates an instance of the notification manager, which displays the message on the UI. In this example, the format of the message received is:
{"data":{"message":"Notification Hub test notification"}}
So, the line
var desc = intent.Extras.GetString("message");
gets the message body. Next, we create an Intent and pass the intent to the notification builder with the message. Then, create a notification object using the notification builder and pass the notification object to the notification manager to display the message. The message finally displayed to the user is shown in Figure 3:

Figure 3: The displayed message
This displays the normal toast notification message.
Application State
To display a custom UI, we first create a class named “ApplicationStateVerification” inherited from ‘Application.’ A bool property named ‘applicationOnPause‘ is created; it saves the current state of the application. This property is private and is made available by using public methods.
1. public class ApplicationStateVerification : Application
2. {
3.    {
4.       static bool applicationOnPause = false;
5.       public override void OnCreate()
         {
            base.OnCreate();
         }
6.       public static bool IsActivityVisible()
         {
            return !applicationOnPause;
         }
7.       public static void ActivityResumed()
         {
            applicationOnPause = false;
         }
8.       public static void ActivityPaused()
         {
            applicationOnPause = true;
         }
9.    }
Broadcast Receiver
To display the custom UI, create a class named ‘NotificationBroadcastReceiver,’ inherited from ‘BroadcastReceiver,’ and implement the ‘OnReceive‘ method. This method will display the message as an alert.
class NotificationBroadcastReceiver : BroadcastReceiver
{
   public override void OnReceive(Context context, Intent intent)
   {
      var desc = intent.Extras.GetString("message");
      AlertDialog.Builder alert = new AlertDialog.Builder(context);
      alert.SetTitle ("Notification Received");
      alert.SetMessage (desc);

      alert.SetPositiveButton ("Close", (senderAlert, args) => {});

      Dialog dialog = alert.Create();
      dialog.Show();
   }
}
MainActivity Changes
On the ‘MainActivity.cs’, we register the ‘NotificationBroadcastReceiver.’ The necessary code follows:
1. const string NOTIFICATION_ACTION = "ReceiverValue";
2. private BroadcastReceiver notificationBroadcastReceiver =
      new NotificationBroadcastReceiver();

3. protected override void OnCreate(Bundle bundle)
   {
      // Initialization code
      ...

      // Initialize the GcmService
      DemoGcmService.Initialize (this);

      // Register device with GCM
      DemoGcmService.Register (this);
   }
4. protected override void OnStart()
   {
      base.OnStart();

      // Register the receiver
      IntentFilter intentFilter = new
         IntentFilter(NOTIFICATION_ACTION);
      RegisterReceiver(notificationBroadcastReceiver,
         intentFilter);

      // Set the application state
      ApplicationStateVerification.ActivityResumed();
   }
5. protected override void OnStop()
   {
      base.OnStop();

      // When the app is closed, un-register the receiver
      UnregisterReceiver(notificationBroadcastReceiver);

      // Set the application state
      ApplicationStateVerification.ActivityPaused();
   }
6. protected override void OnResume()
   {
      base.OnResume();
      // Set the application state
      ApplicationStateVerification.ActivityResumed();
   }
Line 1 defines the name of the intent and Line 2 creates an object of the ‘NotificationBroadcastReceiver,’ which is then registered in the ‘OnStart’ method, as in Stub 4. In Stub 5, the ‘OnStop’ method, the broadcast receiver is un-registered. The application state is set respectively in OnStart, OnStop, and the OnResume methods. ‘OnCreate‘ initializes and registers the device with the GCM Service.
Until now, the device is registered for notification, and the broadcast receiver is defined and registered. Now, when a notification message is received, it needs to be broadcast to display the message in a custom format. Add the next code to the ‘OnMessage’ method defined in the ‘GCM Service Implementation’ section:
1. bool isActivityVisible =
      ApplicationStateVerification.IsActivityVisible();
2. const string NOTIFICATION_ACTION = "ReceiverValue";
3. var desc = intent.Extras.GetString("message");
4. if (isActivityVisible)
   {
      Intent alerIntent = new Intent(NOTIFICATION_ACTION);
      alerIntent.PutExtra("message", desc);
      context.SendBroadcast(alerIntent);
   }
5. else
   {
      // Code to display the toast message
      ...
   }
Line 1 gets the current state of the application. Line 2 is the same constant value that was defined in ‘MainActivity.cs.’ Line 3 gets the message content received in the OnMessage method. If the app state is open, create a new intent, add the message to the intent, and then broadcast the message. This message is received by the ‘OnReceive‘ method of the broadcast receiver and the output is as shown in Figure 4:
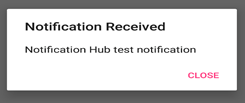
Figure 4: The notification was received
To test this, navigate to notification hub created in Azure and click ‘Test Send.’
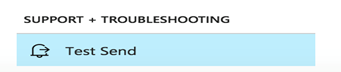
Figure 5: Ready to click ‘Test Send’
Select the platform as ‘Android’ and click Send.
Summary
In this article, we went through the steps to configure the GCM with Azure and the App level changes to enable push notification. A broadcast receiver was implemented to display the custom UI message.