


Introduction
During Build 2013, the annual Microsoft conference introduced Windows developers to over 5000 new APIs, which would arrive in the form of Windows 8.1.
One of the new features being introduced in Windows 8.1 is the ability to create a properly designed app bars using the AppBar controls. We learned in an earlier article about AppBar controls. Microsoft is making the lives of Windows application developers even easier by further simplifying the creation of app bars with the CommandBar control.
The CommandBar control allows Windows developers to create property designed app bars by providing the automatic command layouts and automatic resizing upon application resize.
When to use the CommandBar Control
CommandBar control is intended to be used when the app bar for the application contains only an AppBarButton, AppBarToggleButton and AppBarSeparator controls. AppBar control can be used for scenarios where more complex content such as images, progress bars or text blocks are needed.
CommandBar supports the notion of primary commands and secondary commands, with the primary commands laid out on the right and the secondary commands laid out on the left of the control.
CommandBar Basics
- Items added to a CommandBar control are by default added to the PrimaryCommands collection.
- PrimaryCommands are shown on the right side and SecondaryCommands are shown on the left side.
- CommandBar supports an IsCompact mode, which is activated when its constituent AppBar button controls have their IsCompact property set to true.
Hands On
Let us create a simple Windows Store application.
Create a new Windows Store project in Visual Studio 2013 titled Windows8.1CommandBarDemo.
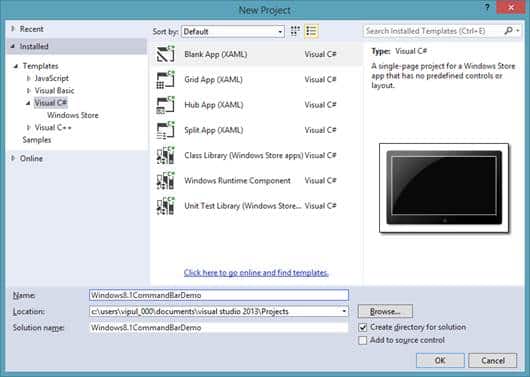
New Project
Open MainPage.xaml and navigate to the Page properties.
Search for BottomAppBar.
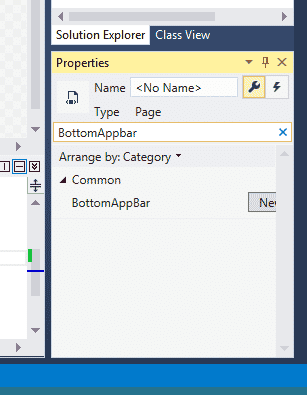
BottomAppBar
Click on the “New” button. It will prompt a dialog.
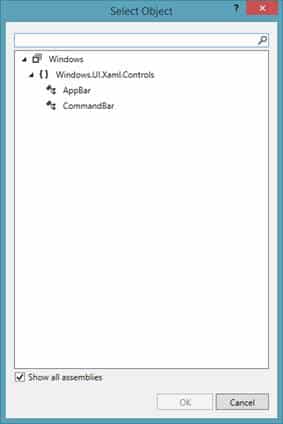
Select Object
Select CommandBar and click OK.
The codebehind for MainPage.xaml will be changed as below.
<Page
    x:Class="Windows8._1CommandBarDemo.MainPage"
    xmlns="http://schemas.microsoft.com/winfx/2006/xaml/presentation"
    xmlns:x="http://schemas.microsoft.com/winfx/2006/xaml"
    xmlns:local="using:Windows8._1CommandBarDemo"
    xmlns:d="http://schemas.microsoft.com/expression/blend/2008"
    xmlns:mc="http://schemas.openxmlformats.org/markup-compatibility/2006"
    mc:Ignorable="d">
    <Page.BottomAppBar>
        <CommandBar/>

    </Page.BottomAppBar>

    <Grid Background="{StaticResource ApplicationPageBackgroundThemeBrush}">


    </Grid>
</Page>
Change the CommandBar element as below.
<Page.BottomAppBar>
        <CommandBar>

        </CommandBar>

    </Page.BottomAppBar>
Note: Due to bugs in the beta version of Visual Studio 2013, the designer view might occasionally throw exceptions.
Drag and drop an AppBarButton control between the CommandBar markup elements.
<Page.BottomAppBar>
        <CommandBar>
            <AppBarButton />
        </CommandBar>

    </Page.BottomAppBar>
Now, we will specify a few properties for the AppBarButton. We will label the AppBarButton as AppBarButtonDemo1.
<Page.BottomAppBar>
        <CommandBar>
            <AppBarButton Label="AppbarButtonDemo1" />
        </CommandBar>

    </Page.BottomAppBar>
We will add code to display a MessageBox when this AppBarButton is clicked. For that, we will need to wire the Click eventhandler.
private async void AppBarButton_Click(object sender, RoutedEventArgs e)
        {
            Windows.UI.Popups.MessageDialog md = new MessageDialog("Primary AppbarButton clicked");
            await md.ShowAsync();
        }
Next, we will change certain attributes of the AppbarButton.
We will specify the tooltip of the AppbarButton as well as the icon.
<Page.BottomAppBar>
        <CommandBar>
            <AppBarButton Label="AppBarButtonDemo1" Click="AppBarButton_Click" ToolTipService.ToolTip="CommandBar Demo" HorizontalAlignment="Center" VerticalAlignment="Center" Margin="-1,0,0,0"  >
                <AppBarButton.Icon>
                    <FontIcon/>
                </AppBarButton.Icon>
            </AppBarButton>
        </CommandBar>

    </Page.BottomAppBar>
Next, we will add an AppBarButton in the SecondaryCollection of the Command Bar.
For that, we will create a new node in the code behind, called CommandBar.SecondaryCommands and add an AppBarButton under that node. Like we did before, we will specify a few properties for this AppBarButton as well as a click event handler.
<CommandBar.SecondaryCommands>
                <AppBarButton Label="AppBarButtonDemo2"  ToolTipService.ToolTip="CommandBar Demo" HorizontalAlignment="Center" VerticalAlignment="Center" Margin="-1,0,0,0" Click="AppBarButton_Click_1"  >
                    <AppBarButton.Icon>
                        <FontIcon/>
                    </AppBarButton.Icon>
                </AppBarButton>

            </CommandBar.SecondaryCommands>
private async void AppBarButton_Click_1(object sender, RoutedEventArgs e)
        {
            Windows.UI.Popups.MessageDialog md = new Windows.UI.Popups.MessageDialog("Secondary AppbarButton clicked");
            await md.ShowAsync();
        }
Our final markup will look as below.
<Page
    x:Class="Windows8._1CommandBarDemo.MainPage"
    xmlns="http://schemas.microsoft.com/winfx/2006/xaml/presentation"
    xmlns:x="http://schemas.microsoft.com/winfx/2006/xaml"
    xmlns:local="using:Windows8._1CommandBarDemo"
    xmlns:d="http://schemas.microsoft.com/expression/blend/2008"
    xmlns:mc="http://schemas.openxmlformats.org/markup-compatibility/2006"
    mc:Ignorable="d">
    <Page.BottomAppBar>
        <CommandBar>
            <AppBarButton Label="AppBarButtonDemo1" Click="AppBarButton_Click" ToolTipService.ToolTip="CommandBar Demo" HorizontalAlignment="Center" VerticalAlignment="Center" Margin="-1,0,0,0"  >
                <AppBarButton.Icon>
                    <FontIcon/>
                </AppBarButton.Icon>
            </AppBarButton>
            <CommandBar.SecondaryCommands>
                <AppBarButton Label="AppBarButtonDemo2"  ToolTipService.ToolTip="CommandBar Demo" HorizontalAlignment="Center" VerticalAlignment="Center" Margin="-1,0,0,0" Click="AppBarButton_Click_1"  >
                    <AppBarButton.Icon>
                        <FontIcon/>
                    </AppBarButton.Icon>
                </AppBarButton>

            </CommandBar.SecondaryCommands>
        </CommandBar>

    </Page.BottomAppBar>

    <Grid Background="{StaticResource ApplicationPageBackgroundThemeBrush}">


    </Grid>
</Page>
We can now test this by running the application and swiping down to show the CommandBar.
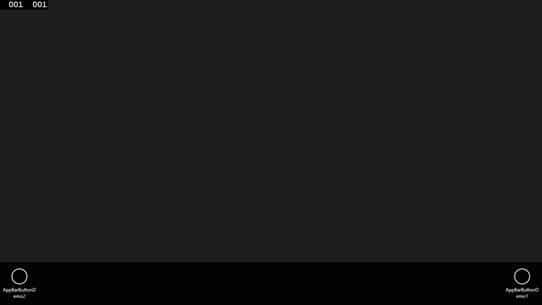
Swipe down to show the CommandBar
Summary
In this article, we learned about CommandBar controls and how to use them in Windows 8.1 applications.
About the author
Vipul Patel is a Program Manager currently working at Amazon Corporation. He has formerly worked at Microsoft in the Lync team and in the .NET team (in the Base Class libraries and the Debugging and Profiling team). He can be reached at vipul.patel@hotmail.com