CodeGuru content and product recommendations are editorially independent. We may make money when you click on links to our partners.
Learn More Introduction
The Windows Phone operating system provides platform support for use by application developers for socket communication for real-time network notifications. This support comes in the form of various classes in the Windows.Networking.Sockets namespace. Let us take a quick look at the various classes in the namespace:
- DatagramSocket class: This class represents a UDP datagram socket that can be used in network communication.
- StreamSocket class: This class represents a stream socket that can be used for incoming or outgoing network communication over TCP or over Bluetooth connections that use RFCOMM.
- StreamSocketListener class: This class represents a stream socket listener to trap incoming TCP and Bluetooth requests.
- MessageWebSocket: This class represents a message-based WebSocket to read and write whole messages for network communications.
- StreamWebSocket: This class represents a stream-based WebSocket to read and write streams for network communications.
In this article, we will explore the DatagramSocket class in more detail and learn how to use it for UDP communication in your mobile applications.
Here are the steps in which we will use these classes.
- Create an instance of the DatagramSocket class to create the socket.
- Create the event handler for the MessageReceived event for the socket instance.
- Invoke the BindEndPointAsync or BindServiceNameAsync methods to bind the datagram socket to a local service or UDP port.
- Call the ConnectAsync method to bind the datagram socket to a remote endpoint to begin communication with a single remote endpoint.
- Process the incoming messages via the MessageReceived event handler.
Hands On
Create a new C# Windows Phone project by using the Blank App template in Visual Studio 2013. Name the project WPUDPSocketDemo.
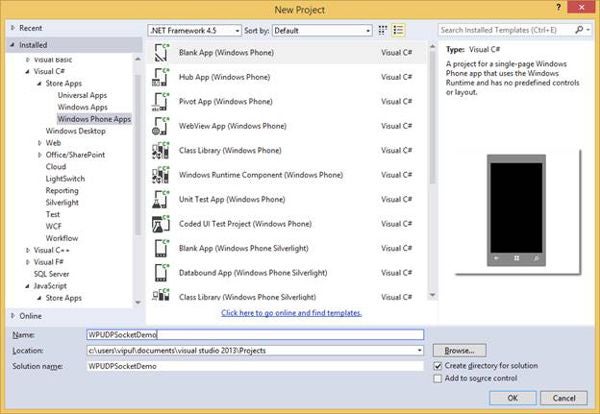
Figure 1: The New Project
Add the three button controls to the default page generated by Visual Studio.
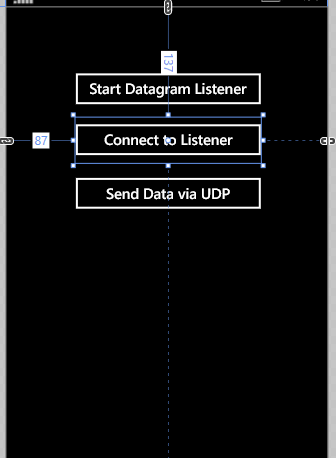
Figure 2: Adding three button controls
Name the three buttons buttonStartDatagramListener, buttonConnectToListener, and buttonSendDataViaUDP.
<Page
   x_Class="WPUDPSocketDemo.MainPage"

   xmlns_x="http://schemas.microsoft.com/winfx/2006/xaml"
   xmlns_local="using:WPUDPSocketDemo"
   xmlns_d="http://schemas.microsoft.com/expression/blend/2008"
   xmlns_mc="http://schemas.openxmlformats.org/markup-compatibility/2006"
   mc_Ignorable="d"
   Background="{ThemeResource ApplicationPageBackgroundThemeBrush}">

   <Grid>
      <Button x_Name="buttonStartDatagramListener"
         Content="Start Datagram Listener"
         HorizontalAlignment="Left" Margin="87,73,0,0"
         VerticalAlignment="Top" Width="230" />
      <Button x_Name="buttonConnectToListener"
         Content="Connect to Listener" HorizontalAlignment="Left"
         Margin="87,137,0,0" VerticalAlignment="Top" Width="230" />
      <Button x_Name="buttonSendDataViaUDP"
         Content="Send Data via UDP" HorizontalAlignment="Left" Margin="87,203,0,0"
         VerticalAlignment="Top" RenderTransformOrigin="0.563,0.276" Width="230" />
   </Grid>
</Page>
Next, we include the following namespaces in the codebehind for Mainpage.xaml.
// Mainpage.xaml.cs


using System;
using System.Collections.Generic;
using System.IO;
using System.Linq;
using System.Runtime.InteropServices.WindowsRuntime;
using Windows.ApplicationModel.Core;
using Windows.Foundation;
using Windows.Foundation.Collections;
using Windows.Networking;
using Windows.Networking.Sockets;
using Windows.Storage.Streams;
using Windows.UI.Core;
using Windows.UI.Popups;
using Windows.UI.Xaml;
using Windows.UI.Xaml.Controls;
using Windows.UI.Xaml.Controls.Primitives;
using Windows.UI.Xaml.Data;
using Windows.UI.Xaml.Input;
using Windows.UI.Xaml.Media;
using Windows.UI.Xaml.Navigation;
In the class definition, we add a couple of instances of the DatagramSocket class as properties.
namespace WPUDPSocketDemo
{
public sealed partial class MainPage : Page
{
DatagramSocket listener, socket;
public MainPage()
{
this.InitializeComponent();
this.NavigationCacheMode = NavigationCacheMode.Required;
}
Next, we will implement code to handle the click events for the buttons we added. Double-click the button titled “Start Datagram Listener” to create the event handled for the Click event. In this method, we create a new listener socket and create the event handler for the message received event.
async private void
   buttonStartDatagramListener_Click(object sender,
   RoutedEventArgs e)
{
   if (listener != null)
   {
      listener = new DatagramSocket();
      listener.MessageReceived += listener_MessageReceived;
      object outObj;
      if (!CoreApplication.Properties.TryGetValue("serverAddress",
         out outObj))
         CoreApplication.Properties.Add("serverAddress",
            "localhost");
      if (!CoreApplication.Properties.TryGetValue("listener",
         out outObj))
         CoreApplication.Properties.Add("listener", listener);
      await listener.BindServiceNameAsync("22112");
   }
   buttonStartDatagramListener.IsEnabled = false;
}
async void listener_MessageReceived(DatagramSocket sender,
   DatagramSocketMessageReceivedEventArgs args)
{
   IOutputStream outputStream = await sender.GetOutputStreamAsync(
      args.RemoteAddress,
      args.RemotePort);
   object outObj;
   RemotePeer peer = new RemotePeer(outputStream, args.RemoteAddress,
      args.RemotePort);
   if (!CoreApplication.Properties.TryGetValue("remotePeer", out outObj))
   {
      CoreApplication.Properties.Add("remotePeer", peer);
   }

   await peer.OutputStream.WriteAsync(args.GetDataReader().DetachBuffer());
}
Next, we implement the logic to connect to the listener by implementing the click event handler for the “Connect to Listener” button.
async private void buttonConnectToListener_Click(object sender,
RoutedEventArgs e)
{
HostName hostname = new HostName("localhost");
socket = new DatagramSocket();
socket.MessageReceived += socket_MessageReceived;
await socket.ConnectAsync(new HostName("localhost"), "22112");
buttonConnectToListener.IsEnabled = false;
}
void socket_MessageReceived(DatagramSocket sender,
DatagramSocketMessageReceivedEventArgs args)
{
}
Note: You need to add code in the preceding section if you want to handle the message received.
Finally, we implement the click event handler for the “Send Data via UDP” button where we add the code to send the message via UDP.
async private void buttonSendDataViaUDP_Click(object sender, RoutedEventArgs e)
{
   DataWriter writer = new DataWriter(socket.OutputStream);
   writer.WriteString("hello");
   await writer.StoreAsync();
Our application is now complete. We now can run this, test our application, and see the UDP communication in action on Windows Phone 8.
Summary
In this article, we learned about how to use a datagram socket to send and receive data via UDP on the Windows Phone platform.
About the Author
Vipul Patel is a technology geek based in Seattle. He can be reached at vipul.patel@hotmail.com. You can visit his LinkedIn profile at https://www.linkedin.com/pub/vipul-patel/6/675/508.


