


If you want to learn about the Internet of Things (IoT), you’ll want to get to know Arduino. The platform has been around for over ten years and has produced a wide range of basic boards and add-on devices. One key to Arduino’s popularity has been the continued use of a standard arrangement of input/output (I/O) pins and the header connectors soldered onto the circuit board. This allows third-party vendors to develop their add-on boards, called shields, to the pin-out standard and know they will be compatible with the majority of Arduino boards sold.
Microsoft introduced the Windows Virtual Shields for Arduino app as a way for software developers to connect an Arduino with the sensors in a Windows device in the same way you would use a typical hardware shield. It’s also a great example of the power of the Universal Windows Platform (UWP) app concept that allows the same application to run on everything from a desktop to a laptop to a Windows Phone. We tested the app on all three for this article.
Setup for Working with the Windows Virtual Shields for Arduino
Amazon has a wide range of Arduino devices for sale from a variety of vendors. It’s a good idea to read the customer comments and pick a reliable vendor because some of the cheaper boards seem to have issues. You will also need a Bluetooth module for the Arduino to communicate with your Windows device. We already had the recommended device from SparkFun Electronics on hand so all that was left was to hook it up. Of note here is the instructions under the “Set up your Arduino” section on the MS-IoT github page. It calls out the pin connections, which differ from the referenced picture.
The quickest way to get started testing is to install the Windows Virtual Shields for Arduino app from the Windows Store (see Figure 1). You also could download the source code from the MS-IoT github site if you want to examine the code for the application. We had to update the NuGet packages for the application to compile (see Figure 2). Be sure to update all three projects in the solution and then do a “build all” before deploying the application.
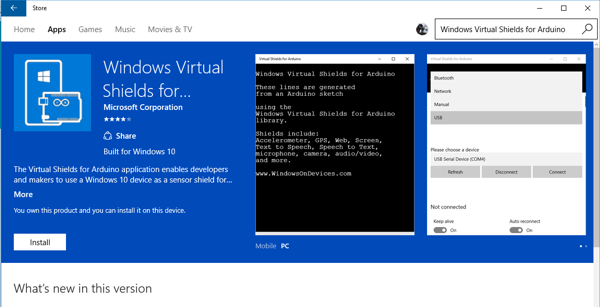
Figure 1: Installing the Windows Virtual Shields for Arduino app
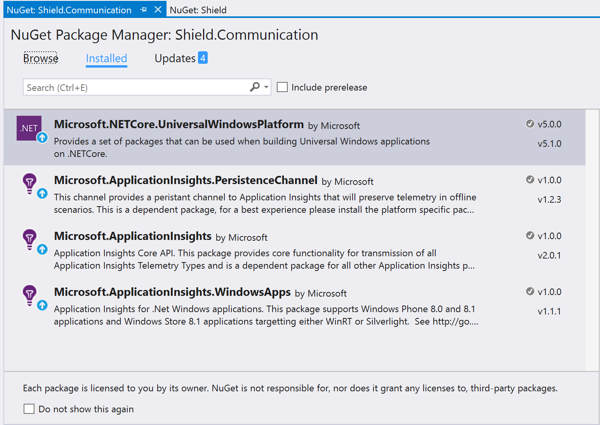
Figure 2: Updating the NuGet packages
Developing code for the Arduino requires the Arduino IDE available on the Download page of the main Arduino site. The page offers versions for Windows, Mac OSX, and Linux. We used the Windows installer version for our Windows 10 desktop and laptop. If you use git to clone the Microsoft repository, it will create an examples directory with sample code. This directory must be moved under the Arduino application libraries folder so that the IDE will show the examples as an option and have access to the necessary link modules.
Running an Arduino App
An Arduino application is called a sketch and is similar in function to a Visual Studio solution. Each sketch can contain one or more code modules that will be downloaded to the Arduino for execution. Compiling and executing an example sketch requires the Arduino IDE (see Figure 3). Here’s what the basic Hello World code looks like:
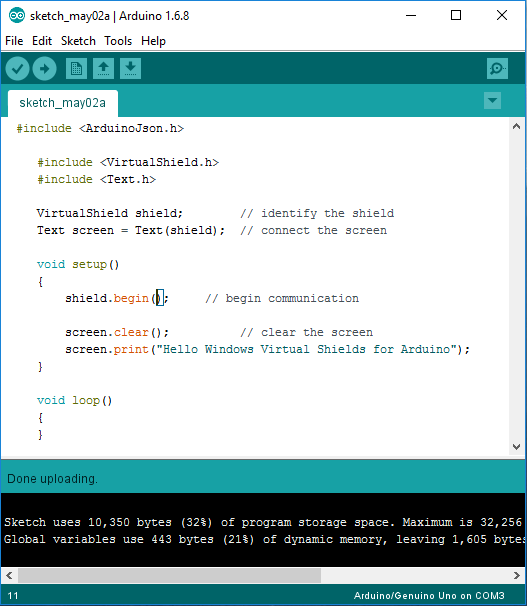
Figure 3: The Arduino IDE
#include <ArduinoJson.h>

   #include <VirtualShield.h>
   #include <Text.h>

   VirtualShield shield;        // identify the shield
   Text screen = Text(shield);  // connect the screen

   void setup()

      shield.begin();           // begin communication

      screen.clear();           // clear the screen
      screen.print("Hello Windows Virtual Shields
         for Arduino");
   }

   void loop()
   {
   }
We did have to make a few tweaks, depending on the platform we used for the Virtual Shield. For the Windows Phone, we had to change the shield.begin() call to specify the baud rate using shield.begin(9600). With a laptop as the target, the code ran without modification. Credit goes to the MS-IoT site github site Troubleshooting section for the baud rate hint.
On the Windows device, you must connect to the SparkFun Bluetooth card before running the Arduino sketch. Figure 4 shows the connection dialog with the RNBT-704C device successfully connected. You must remove the Bluetooth TX and RX wires before downloading a new sketch to the device because there is only one serial port, and it is shared between the USB and Bluetooth ports. After a successful download, you can reconnect the TX and RX wires and press the Arduino Reset button to restart the sketch. If all goes well, you should see the text on your device app, as shown in Figure 5.
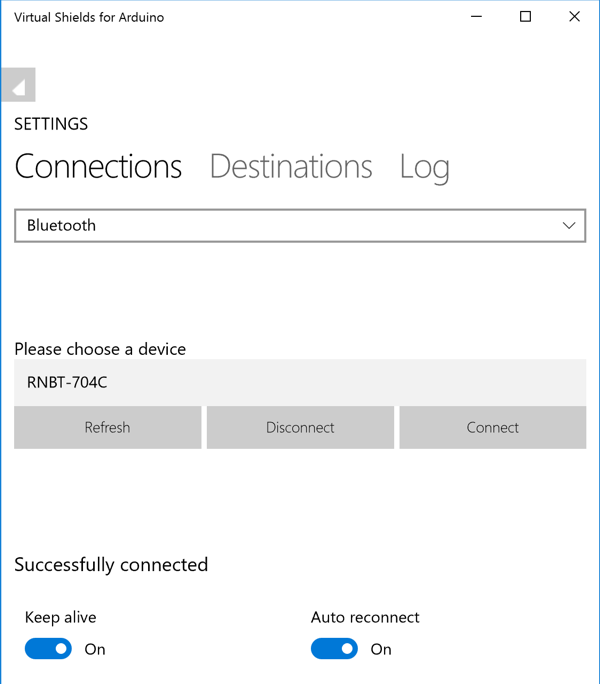
Figure 4: The RNBT-704C device connection dialog
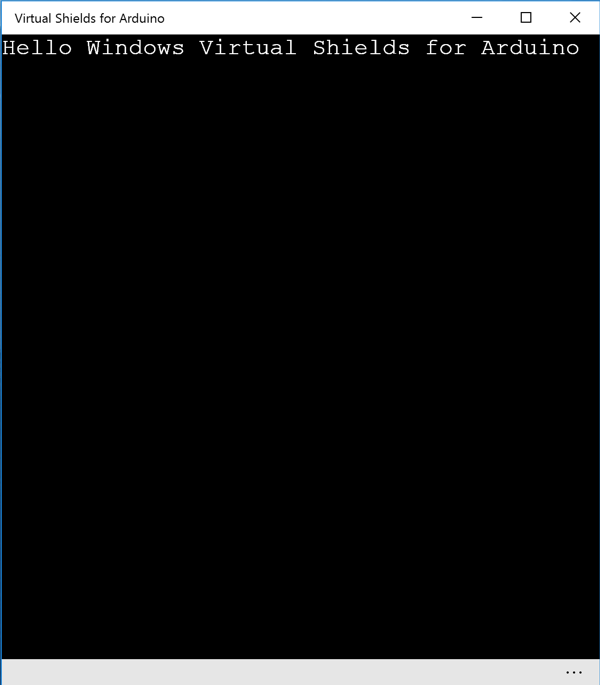
Figure 5: The text appears on your device app
Wrap Up
Building applications for the Arduino is all about connecting sensors and devices together. It really helps to have the option to develop against a virtual device to debug and test. We tested a number of the example sketches on both a Windows Phone (Lumia 640) and a Lenovo Yoga 900. Both platforms worked as advertised, including the speech recognition examples.
The Windows Virtual Shields for Arduino app is free for the download and a definite must if you’re into IoT and Arduino. Although we did have a few bumps (should have read the documentation a little closer), getting everything working wasn’t too much trouble to figure it out.