


In the first three parts of this series, we laid the foundation for a project that connects the Raspberry Pi 2 with some kind of external hardware. For this demo, we’re going to build a working stoplight using red, yellow, and green LEDs. We’ll be using Python to create a timed operation that cycles through each LED at a pre-determined rate. All you need at this point is a prototyping board plus the LEDs, three resistors, and some hookup wire.
The Raspberry Pi implements a measure of control over I/O ports by requiring root privileges to change the state of an output port. This is due to the fact that the GPIO pins are actually memory mapped to /dev/mem. All this means is that you must run your Python code from the command prompt prefaced by the sudo command, as in:
sudo Python StopLight.py
Figure 1 shows how you can launch Python with the sudo command to accomplish the same thing. We’ll edit the initial version of our code using the Python 2 option from the Programming menu and then run it from the command line. Listing 1 shows the code for our stoplight program.
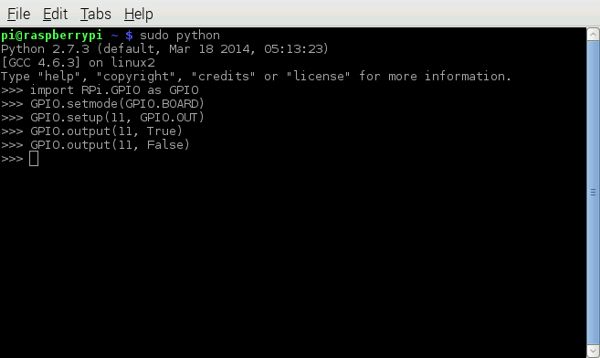
Figure 1: The stoplight program’s code
#!/usr/bin/env python
import RPi.GPIO as GPIO
import time
# Our output ports use pins 11, 13, and 15
RED = 11
YEL = 13
GRN = 15
GPIO.setmode(GPIO.BOARD)
GPIO.setup(RED, GPIO.OUT)
GPIO.setup(YEL, GPIO.OUT)
GPIO.setup(GRN, GPIO.OUT)
# Now we'll loop until a break (Ctrl-C) is pressed
try:
while(True):
GPIO.output(RED, True)
GPIO.output(YEL, False)
GPIO.output(GRN, False)
time.sleep(10)
GPIO.output(RED, False)
GPIO.output(YEL, True)
time.sleep(5)
GPIO.output(YEL, False)
GPIO.output(GRN, True)
time.sleep(20)
except KeyboardInterrupt:
print ("\n")
print ("Exit by Keyboard\n")
finally:
GPIO.cleanup(RED)
GPIO.cleanup(YEL)
GPIO.cleanup(GRN)
Listing 1
The first line in the listing is a technique found in many Linux utility programs using what’s called the shebang (#!). If found at the beginning of an executable file, Linux interprets this character sequence as an interpreter directive. In our case, it uses the /usr/bin/env Python command to launch the Python interpreter. This makes it possible to launch the script by simply typing ./StopLight.py. You do need to set the file’s permissions to include execute using the chmod +x command before this technique will work.
Looking at the second line in the code, you’ll see a reference to the GPIO library as discussed in Part 3 of this series. It allows our program to directly manipulate the I/O pins. Our LEDs are wired to GPIO pins 11,13, and 15 and accessed using the RED, YEL, and GRN variables. After configuring the pins for output, the program enters a try, except, finally loop to turn each LED on and then off, repetitively.
The last piece of the code uses the GPIO.cleanup() module to set the I/O pins back to an uninitialized state. If you don’t do this and then run the program again, you will see a warning message that the pins have already been configured.
That wraps up our four-part series on getting started with the Raspberry Pi 2. Now you have the basic tools to go out and build something interesting!