


One of the questions a see most often regarding the WinForms-to-MVC transform is “How do I add my drag-and-drop components” or “Where’s my webforms tool box gone?”
The answer to this is not a simple one. ASP.NET MVC does things very differently to ASP.NET Webforms when it comes to creating your page markup, and as a result has a new way of adding your components. Actually it has a number of ways, such as partial views (which I’ve mentioned before in this column).
In this post, we’re going to take a look at a different way of adding your own customizations, called “HTML Helpers”.
What Are HTML Helpers?
Before we move onto how to write one, let me first show you how they work.
Create yourself a simple MVC web application using Visual Studio. Don’t add anything to it; just create an Empty Web application and just make sure it has the assemblies for ASP.NET MVC added but nothing else:
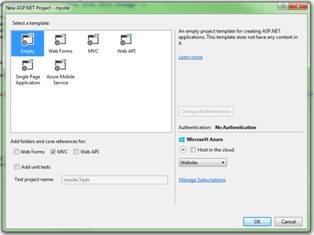
Figure 1: An Empty Web application
Figure 1 is from Visual Studio 2013. If you’re using 2012 or lower, your project wizard will look a little different, but if you just ensure you pick the same options you’ll be fine.
You can create a project that has pages, auth, and other stuff added if you want, but we’ll not be using them and I’ll be assuming an empty application.
With your project created, let’s add a simple home controller to the project (so we have a page to add our content to).
Right-click “Controllers” in your Solution Explorer and add a new controller to your project. We’ll call this “HomeController” so that it’s displayed by default when the site is requested.
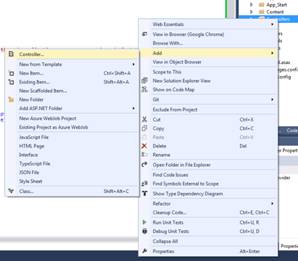
Figure 2: Adding a new controller to your project
Make sure this controller has the following code in it:
using System.Web.Mvc;

namespace TestUI.Controllers
{
   public class HomeController : Controller
   {
      public ActionResult Index()
      {
         return View();
      }
   }
}
(Remember to make sure you adjust the namespace as required for your project name.)
Right-click “View” in the return statement, and add a view for the controller to display.
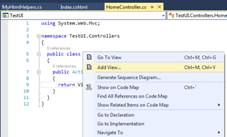
Figure 3: Adding a view for the controller to display
Add the following HTML code to the newly created view page:
@{
   Layout = null;
}

<!DOCTYPE html>

<html>
   <head>
      <meta name="viewport" content="width=device-width,
         initial-scale=1.0">
      <meta http-equiv="X-UA-Compatible"
         content="IE=9; IE=8; IE=7; IE=edge" />
      <meta charset="utf-8" />
      <title>Html Helpers | Test Page</title>
      <link href="@Url.Content("~/Content/bootstrap.min.css")"
         rel="stylesheet" type="text/css" />
      <link href="@Url.Content("~/Content/bootstrap-theme.min.css")"
         rel="stylesheet" type="text/css" />
      <link href="@Url.Content("~/Content/site.css")"
         rel="stylesheet" type="text/css" />
   </head>

   <body>
      <p>Html Helpers - Test page</p>

      <script src="@Url.Content("~/scripts/jquery-2.1.1.min.js")"
         type="text/javascript"></script>
      <script src="@Url.Content("~/scripts/bootstrap.min.js")"
         type="text/javascript"></script>

   </body>
</html>
Then, right-click References, open NuGet, and add the Bootstrap 3 UI framework.

Figure 4: Adding the Bootstrap 3 UI framework
jQuery should also be installed as a dependency.
Once this is done, check the HTML code in the view to make sure you’re referencing the correct file names. jQuery particularly seems to embed the version in its file name.
When you are finished, press F5 to run and, all being well, you should be greeted by the following in your browser:
Figure 5: Your test page is now available
Once we get to this point, we now have a page with which we can test and examine our HTML Helpers.
The Built-in Helpers
There are a huge number of helpers built into the base MVC framework. If you’ve used any of the MVC scaffolding to create your views, you’ve already used some of the built-in helpers possibly without realising.
If you open the view you created just a moment ago, and type in the following code, you’ll see the same helpers at work.
@Html.ActionLink("Go to Home page", "Index", "Home")
If you then refresh your browser, you should see that the framework has inserted an HTML link with the correct path to allow you to browse to your home controller index page.
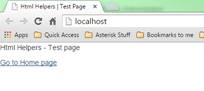
Figure 6: The HTML link shows the correct path
There are many others too, all can be found by ‘@Html.’ and looking in the Intellisense output.
To help with the strong model binding and typing, you should always try to use the HTML helpers provided when creating forms, and other similar components. There will come a point, however, where you’ll most definitely have a chunk of HTML you’d like to reuse, and is not available in the built-in helpers. It’s at this point you need to write your own.
Wrapping Your Markup into Reusable Chunks
If you’ve ever written any extension methods, you’ve got all the skills you need to create a HTML helper. An HTML helper is simply an extension method on the ‘HtmlHelper’ class.
For the purposes of demonstration, we’re going to create a helper that wraps the Bootstrap 3 alert box style, and allows you to specify the alert type you want to display.
To create an alert in boot strap, you simply need to create a ‘div’ element with the appropriate CSS classes added to it to style it using the bootstrap alert styles, something like the following:
<div class="alert alert-danger">
   <h2>Alert</h2>
   <p>This is an alert.</p>
</div>
This will produce the following in your Razor page:
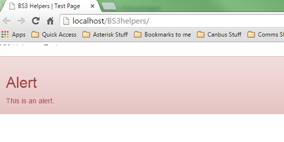
Figure 7: The Alert page is displayed
The alert type is varied by changing the “alert-danger” string to be one of “alert-info”, “alert-success”, “alert-warning” or “alert-danger”.
What we’d like to do would be to replace this with something like:
@Html.Alert("Alert", "This is an alert", AlertType.Danger)
We then can simply just vary the alert type parameter and text as required to give us different alerts. Right-click your project root, and add a new folder called ‘Helpers’. It will look something like Figure 8.
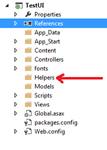
Figure 8: The new Helpers folder
Inside this folder, add a new class called ‘MyHtmlHelpers.cs’, and add the following code to it:
using System.Text;
using System.Web.Mvc;

namespace TestUI.Helpers
{
   public static class MyHtmlHelpers
   {
      public enum AlertTypes
      {
         info,
         success,
         warning,
         danger
      }

      public static MvcHtmlString Alert(this HtmlHelper helper,
         string title, string caption, AlertTypes alertType)
      {

         StringBuilder sb = new StringBuilder();

         // default is an info alert
         string strAlertType = "alert-info";
         switch (alertType)
         {
            case AlertTypes.info:
               strAlertType = "alert-info";
               break;

            case AlertTypes.success:
               strAlertType = "alert-success";
               break;

            case AlertTypes.warning:
               strAlertType = "alert-warning";
               break;

            case AlertTypes.danger:
               strAlertType = "alert-danger";
               break;

         }

         sb.AppendFormat("<div class=\"alert {0}\" />\n",
            strAlertType);
         sb.Append(" <h2>" + title + "</h2>\n");
         sb.Append(" <p>" + caption + "</p>\n");
         sb.Append("</div>\n");

         return new MvcHtmlString(sb.ToString());
      }

   }
}
As you can see from the preceding code, we first create a public enumeration so that we have a means to specify the flags we want to use for the alert types.
Note also that the class and any methods we add to it are static. This is a requirement of writing an HTML helper. If you don’t make the methods and classes static, you’ll find that IntelliSense and the Razor compiler likely won’t pick them up at design time.
Following on from the enumeration, you’ll see we have a static method called ‘Alert’. This is the method that will inject the tag into your markup.
The first parameter in the method signature MUST be referenced by using ‘this’ and it MUST be of type ‘HtmlHelper’. Following on from that, add any other parameters as needed; in our case, that will be a title, caption, and alert type.
We then create a string builder to build up our HTML markup. How you do this is entirely up to you. Some will say you have to use a string builder; others will tell you string concatenation and formatting will work. Whatever you choose, it must produce valid HTML formatted as a standard string.
You’ll then see we have a switch statement used to adjust the class depending on the value selected for the alert type parameter.
Finally, we return an ‘MvcHtmlString’ that MVC will then inject into your markup at the correct location in your page.
It’s also possible to create nested markup, but this has to be done in a slightly different way. Instead of returning an ‘MvcHtmlString’, you need to return an IDisposable object that writes the opening string to the helper view context; then, on disposal, it returns the closing tag.
To make this easy to do, you’re better off using two classes, as follows:
First, create a high-level class that “Begins” the ‘component’. This will be the method that’s used with the @Html call, something like the following:
using System;
using System.Web.Mvc;

namespace BS3Helpers.Helpers
{
   public static class PageConstructionHelper
   {
      public static IDisposable BeginBs3Page(this
         HtmlHelper helper, bool fluid = false)
      {
         string tag = fluid ? "<div class=\"container-fluid\">"
            : "<div class=\"container\">";
         helper.ViewContext.Writer.Write(tag);
         return new Bs3Page(helper);
      }

   }
}
Then, create a secondary class that actually returns the IDisposable object for MVC to use.
using System;
using System.Web.Mvc;

namespace BS3Helpers.Helpers
{
   class Bs3Page : IDisposable
   {
      private readonly HtmlHelper _helper;

      public Bs3Page(HtmlHelper helper)
      {
         _helper = helper;
      }

      public void Dispose()
      {
         _helper.ViewContext.Writer.Write("</div>");
      }

   }
}
As you can see from the first class, we provide a default parameter that allows us to specify if our page div is fluid or not (full width or not full width in bootstrap speak). This sends the opening tag to the document by using the HtmlHelper view writer.
With this in place, any other tags or helpers that are used inside the helper’s curly braces are added inside the parent element. The closing tag is written when the IDisposable destructor is called. This, too, is written out by using the HtmlHelper view stream.
The net result is that inside your Razor page, you can now do the following:
@using(Html.BeginBs3Page())
{
   <h1>Html Helper Test</h1>
   @Html.Alert("Woa, something broke!",
      "Hey dude, whatever you just did made the
      web application a very, very sad panda.",
      MyHtmlHelpers.AlertTypes.danger);
}
Which, if you refresh your page, should give you something like what’s shown in Figure 9.

Figure 9: The shiny new Alert page
Now, all that’s needed is for you to let your imagination run wild and wrap up all those repetitive chunks of code you keep having to type in to simple, easy-to-use helper methods.
If you create them in a class library project, just add a reference to that library to your MVC project. You easily can create your components in their own separate DLL that you easily can re-use in any MVC project you create.
Seen something in .NET you can’t explain, or want to know “Is there an API for that?”? Come find me in Lidnug, the user group I help run on the Linked-in platform and ask; there’s a good chance that your question will get answered in this column.