


Introduction
Web applications commonly store data in some RDBMS, such as SQL Server. However, relational data is not the only type of data needed in an application. Your applications may need to handle data that doesn’t fit into traditional row-column format. In such cases Document databases, such as RavenDB, come into the picture. To that end this article shows you how to work with RavenDB in an ASP.NET application.
NoSQL Initiative and RavenDB
Most of the applications developed today store data in one or another relational database, such as SQL Server. Any RDBMS expects that data to be stored is in a tabular format (Rows-Columns). However, in many cases the data to be stored may not be fit as relational data. Consider, for example, that you wish to store an arbitrary object in the data store. Another example can be arbitrary key-value kind of data.
Document databases essentially allow you to store data in “schema-less” fashion. That is you no longer define any fixed table structures in the data store. You store data as a document with a key and then later retrieve it using the same key. RavenDB is one such document database. RavenDB follows the NoSQL initiative, which doesn’t require any SQL to access the data stored in the database. In other words you store data in RavenDB without defining any table schemas and access it without using any SQL statements. As far as accessing RavenDB from .NET applications is concerned, you use LINQ based syntax for data access.
RavenDB is designed for the Windows platform specifically geared towards .NET applications. It stores data in JSON format. The data can be accessed and manipulated using LINQ based syntax. Though there are multiple ways to deal with the data stored in RavenDB the easiest approach is to use the .NET Client API. Even the RavenDB server can be used in multiple ways but this article uses a standalone installation of the server for the sake of demonstrating its basic usage.
Installing the RavenDB Database Server
To install RavenDB on your machine you first need to download it by visiting the download section of the RavenDB website. Once you download and extract the RavenDB files on your machine, go to the Server folder and double click on the Raven.Server.exe. This will start the RavenDB console as shown below:

RavenDB Console
RavenDB also comes with a web interface. By default you can access the RavenDB web interface at http://localhost:8080/raven/studio.html. The following figure shows the web interface with some sample data already stored in the database.
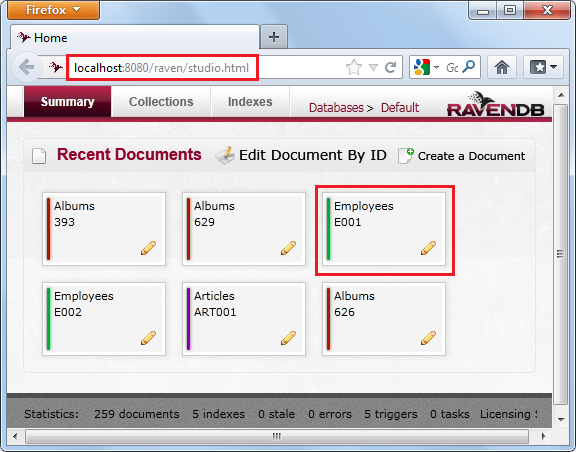
RavenDB Web Interface
Notice that the above figure shows Albums and Employees objects stored in the database. If you double click on any of the objects it will reveal its JSON representation as shown below:
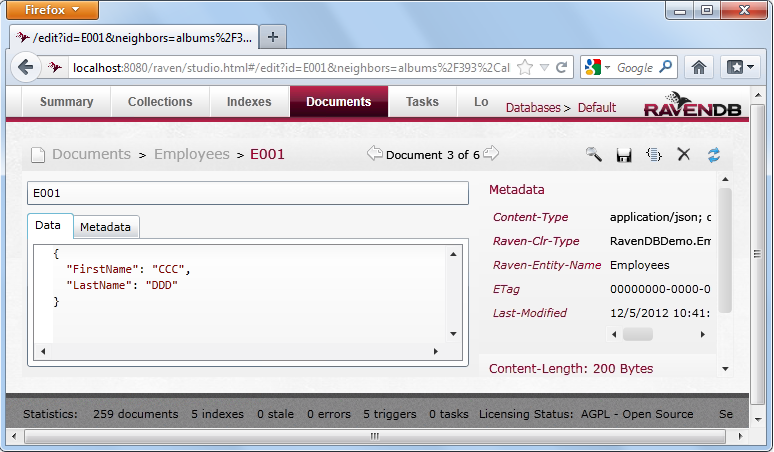
JSON Representation
Initially, when there is no data added to the data store, the same web interface also allows you to add sample data. For example, the Albums objects shown above are added through the web interface.
Keep the RavenDB server running and move on to the next step.
Installing the RavenDB Client API
The next step is to install .NET Client API for accessing the data stored in RavenDB. The easiest way to do so is to install an appropriate NuGet package. Create a new ASP.NET Web Application project in Visual Studio and then select the “Manage NuGet Packages” menu option from the Project menu. Then search for RavenDB.Client. Finally, select that package from the list and click on Install.
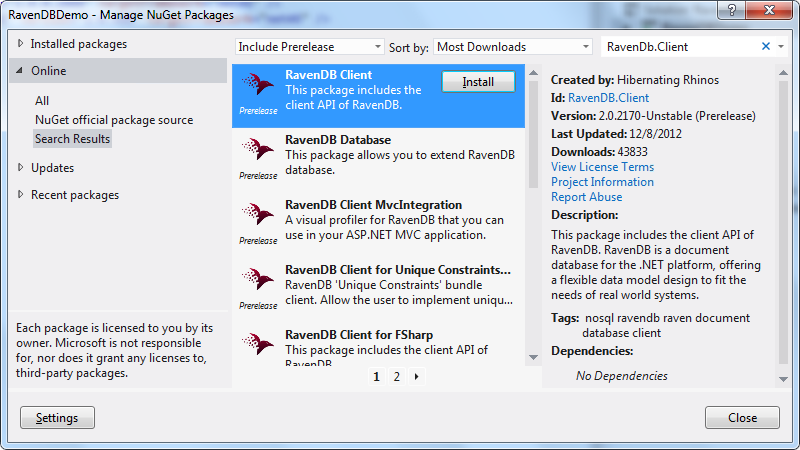
RavenDBDemo – Manage NuGet Packages
The complete list of available RavenDB NuGet packages is available here.
Now that you have set up the server as well as the .NET Client API you are ready to add, remove, and modify data in the RavenDB data store.
Developing a Sample Application
Now let’s develop a web form as shown below that allows you to add, modify, and delete Employee objects to and from the RavenDB data store.
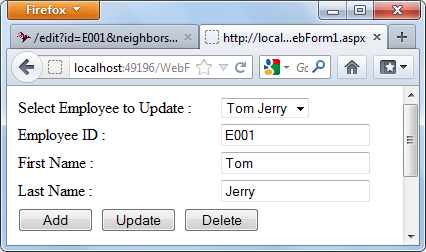
Web Form
As you can guess from the figure the Employee object has three properties Id, FirstName, and LastName and is shown below:
namespace RavenDBDemo
{
    public class Employee
    {
        public string Id { get; set; }
        public string FirstName { get; set; }
        public string LastName { get; set; }
    }
}
RavenDB offers three ways to handle the Id of a document. They are as follows:
- Your object can have a property named Id. If you don’t assign it explicitly to some value, RavenDB will generate a unique Id for you and will assign it to this property.
- Your object can have a property named Id that you can set explicitly in your code. In this case RavenDB will use your Id value for the document but it is your responsibility to maintain the uniqueness of the Id values.
- If your object doesn’t have an Id property, RavenDB still generates and assigns a unique ID to it but you will need to figure out the Id assigned by RavenDB by making a separate Client API call.
In this example the Employee class has an Id property and you will assign it explicitly in the code.
Open the Global.asax file and add the following code to it.
using Raven.Client.Document;
using Raven.Client.Indexes;
using System.Reflection;
 public static DocumentStore Store;

protected void Application_Start(object sender, EventArgs e)
{
 Store = new DocumentStore { ConnectionStringName = "RavenDB" };
 Store.Initialize();
}
The above code first imports certain RavenDB Client API specific namespaces. It then creates a global variable of type DocumentStore. A document store is considered a resource intensive object and hence it is recommended to maintain only one instance of the DocumentStore object rather than creating it again and again. Inside the Application_Start event the DocumentStore is instantiated by passing the ConnectionStringName of RavenDB. The RavenDB connection string is stored in the web.config file as follows:
<connectionStrings>
  <add name="RavenDB" connectionString="Url=http://localhost:8080" />
</connectionStrings>
The Initialize() method of the DocumentStore object initializes the document store so that it is ready for further data access operations.
Next, go in the code behind of the default web form and add a helper method named FillList().
private void FillList()
{
    using (var session = Global.Store.OpenSession())
    {
        var employees = session.Query<Employee>()
        .ToList();
        DropDownList1.Items.Clear();
        for (int i = 0; i < employees.Count; i++)
        {
            ListItem item = new ListItem(employees[i].FirstName + " " + employees[i].LastName, employees[i].Id);
            DropDownList1.Items.Add(item);
        }
    }
}
As you can see from the above piece of code, the FillList() method gets hold of the global DocumentStore variable declared earlier inside the Global.asax file. It then calls the OpenSession() method on the DocumentStore to begin a new session of database operations. Notice how LINQ syntax is used to retrieve a list of Employee objects stored in the database (if any). A for loop then iterates through the Employees collection and fills the DropDownList with the employee name and Id.
The FillList() method is called from Page_Load so that when the page loads for the first time the DropDownList displays all the existing Employee objects.
protected void Page_Load(object sender, EventArgs e)
{
    if (!IsPostBack)
    {
        FillList();
    }
}
The code that adds a new Employee, modifies an existing Employee, and removes an existing Employee is located in the Click event handler of Add, Update, and Delete buttons respectively. The following code shows how a new Employee can be added to the data store.
protected void Button1_Click(object sender, EventArgs e)
{
    Employee emp = new Employee();
    emp.Id = TextBox1.Text;
    emp.FirstName = TextBox2.Text;
    emp.LastName= TextBox3.Text;

    using (var session = Global.Store.OpenSession())
    {
        session.Store(emp);
        session.SaveChanges();
        FillList();
    }
}
The code essentially constructs a new Employee object by grabbing values entered in various textboxes. The Store() method of the RavenDB session object adds the specified Employee object. The SaveChanges() method actually saves the newly added object to the database.
The Update and Delete operations are quite similar and involve finding a particular Employee to be updated or deleted respectively. The following code shows how an existing Employee object can be Deleted.
protected void Button4_Click(object sender, EventArgs e)
{
    using (var session = Global.Store.OpenSession())
    {
        var emp = session.Query<Employee>()
        .Where(x => x.Id == DropDownList1.SelectedValue)
        .SingleOrDefault();

        session.Delete(emp);
        session.SaveChanges();
        FillList();
    }
}
Notice how the LINQ where condition is specified to fetch only a single Employee object. The Delete() and SaveChanges() method calls then delete the Employee object.
That’s it! Run the web form and try adding, removing, and updating Employee objects. You can also check them via the RavenDB web interface discussed earlier.
Summary
RavenDB is a NoSQL document database that stores data in JSON format. The RavenDB server has a web interface that can be used to examine data. RavenDB .NET Client API allows you to interact with the data store from your ASP.NET application. Using RavenDB you can easily store data that can’t be categorized as relational data yet requires data manipulation operations such as add, update and delete. This article introduced you to RavenDB and its basic data manipulation operations. You can explore more features of RavenDB by visiting the documentation section of the RavenDB website.