


Introduction
While developing Windows store apps with JavaScript and HTML, often you need to present multiple pages to the user. One way to accomplish this is to shift the control entirely from one page to another. This technique, however, has drawbacks of its own. A better approach for Windows store apps is to keep the base page the same and change the content of the page without navigating to entirely different pages. This latter technique makes use of PageControl objects. This article shows how PageControl objects can be used to present different content to the user and how to navigate between PageControl objects.
Overview of PageControl Objects
While working with multiple HTML pages the navigation between them can be accomplished by two techniques:
- Multi-page navigation
- Single-page navigation
In the case of multi-page navigation one HTML page essentially links to another using a hyperlink or script. When a user navigates from one page to another the entire page is rendered on the screen. While this approach is fine for most of the web applications it suffers from disadvantages of its own. Firstly, since navigating from one page to another is causing the whole page to be rendered this approach will take more time to display page content to the user. Secondly, during this refresh the transition is difficult to handle since two independent pages are being accessed. Additionally, it is difficult to maintain state between these two pages.
Considering this, a recommended approach for Windows store apps is single-page navigation. In this approach you never leave the main page of the app. Instead you render content of multiple HTML pages inside this main page. Think of this approach as an IFRAME used to display two altogether different HTML pages inside the same window. This way the entire screen is never refreshed. Instead content from HTML pages is loaded in the main page at runtime.
To implement single-page navigation WinJS (Windows Library for JavaScript) provides PageControl object. Each PageControl is basically a bundle of an HTML file, a JavaScript file and a CSS file. The following figure shows this arrangement.
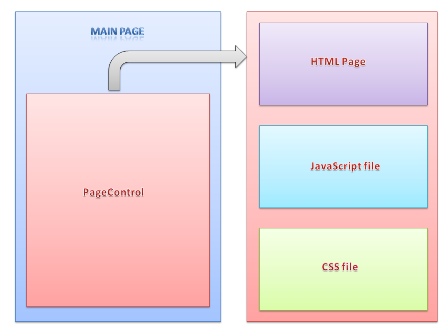
Each PageControl is a bundle of an HTML file, a JavaScript file and a CSS file
An Example App
To illustrate the use of PageControl objects in developing single-page navigation you will develop a Windows store app as shown below.

Develop a Windows store app
The app consists of three PageControl objects. The first two pages accept some customer information (CustomerID, CompanyName, ContactName and Country) and the final page saves the new customer into the database. To store a customer to the database you use Web API. The third HTML page makes an Ajax call to the ASP.NET Web API using WinJS and passes data to be stored to the server. The Web API then stores that data (a new customer record) into a SQL Server database.
Creating Web API Project
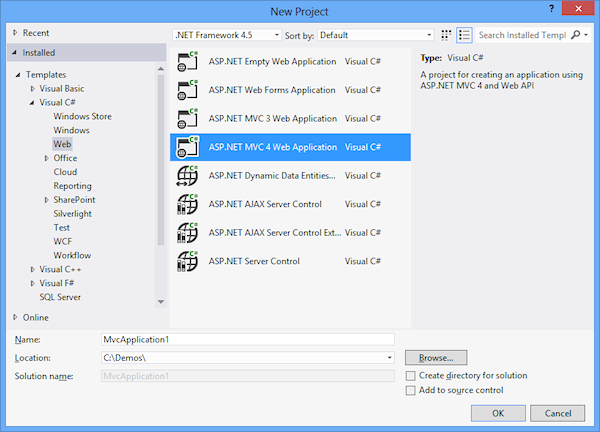
Let’s begin by creating a new ASP.NET Web API project. Select ASP.NET MVC 4 project in the New Project dialog of Visual Studio 2012 and then select Web API project template.
Create a new ASP.NET Web API project
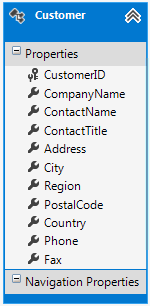
Next, add a new ADO.NET Entity Framework Data Model in the Models folder of the newly created project and create a data model for the Customers table of Northwind database.
Add a new ADO.NET Entity Framework Data Model
Though the Customers table contains many columns you will use only four of them, viz. CustomerID, CompanyName, ContactName and Country.
Now, open the default Web API controller class and write the implementation of Post() method as shown below.
public void Post(Customer obj)
{
    NorthwindEntities db = new NorthwindEntities();
    Customer c = new Customer();
    c.CustomerID = obj.CustomerID;
    c.CompanyName = obj.CompanyName;
    c.ContactName = obj.ContactName;
    c.Country = obj.Country;
    db.Customers.Add(c);
    db.SaveChanges();
}
Though the Web API controller consists of other methods you need only the Post() method for this example because the Windows store app will be inserting a record by issuing a POST request to the Web API. As you can see the Post() method accepts a Customer object and adds the new Customer into the database.
Compile the Web API project and run it in the browser to test if everything is fine so far. Also, note the URL of the Web API because you will need it further while developing the Windows store app.
Creating Windows Store App
Now that your Web API is ready, add a new Windows store app in the solution. Make sure to select Navigation App project template.
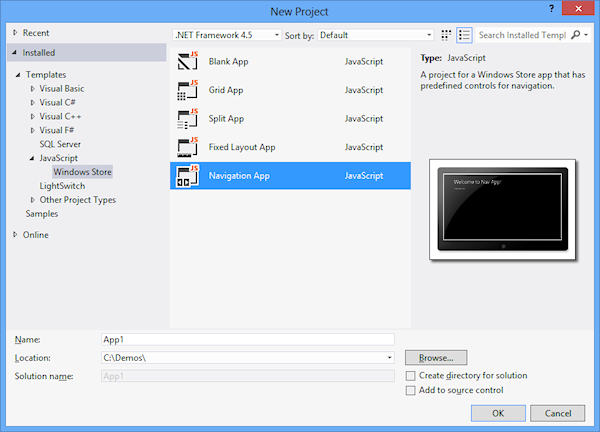
Select Navigation App project template
This way Visual Studio 2012 will create a project with basic framework for PageControl objects and navigation that you can modify as per your needs. If you see the project folder structure you will find that one PageControl (home) is already added for you as shown below.
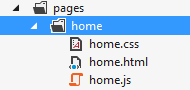
PageControl (home)
As you can see the home sub-folder under pages contains three files viz. home.html, home.css and home.js. In addition to the home PageControl you will add two more. You will add them in the next section.
Also, if you open the default.html file you will find the following markup in it.
 <div id="contenthost" data-win-control="Application.PageControlNavigator"
data-win-options="{home: '/pages/home/home.html'}">
</div>
The <div> tag shown above has two special attributes – data-win-control and data-win-options. These attributes are responsible for creating a navigation control (PageControlNavigator) at runtime. This control provides the navigation model to the app. The data-win-options attribute specifies the initial page to be loaded and rendered.
Adding PageControl Objects
In addition to the home PageControl already available in the default project template, you need to add two more PageControl objects. You can do so using Add New Item dialog and then selecting PageControl.
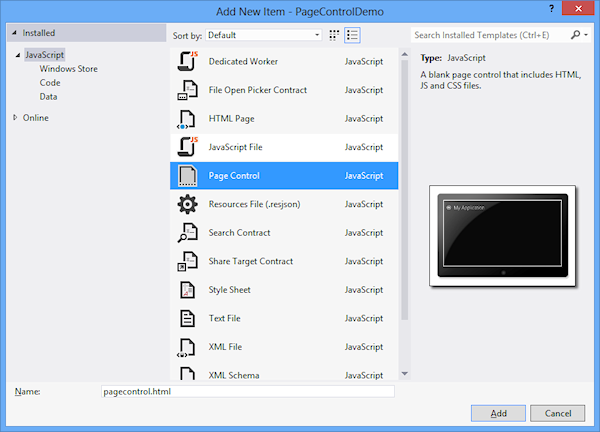
Add New Item
Name the new PageControl objects as Page2 and Page3.
Now open home.html file and add the following HTML markup to it:
<header aria-label="Header content" role="banner">
	<button class="win-backbutton" aria-label="Back" disabled type="button"></button>
	<h1 class="titlearea win-type-ellipsis">
		<span class="pagetitle">Step 1 - Basic Details</span>
	</h1>
</header>
<section aria-label="Main content" role="main">
	<p>
	 <span>Customer ID : </span>
	 <input type="text" id="txtCustomerID" />
	 <br /><br />
	 <span>Company Name : </span>
	 <input type="text" id="txtCompanyName" />
	 <br /><br />
	 <input type="button" id="btnNext" value="Next" />
	</p>
</section>
As you can see the main part of the PageControl consists of two textboxes to accept CustomerID and CompanyName respectively. The Next button navigates the user from Home to Page2. Additionally, values entered in the textboxes are passed to Page2. Both of these tasks are performed in home.js file as shown below:
...
WinJS.UI.Pages.define("/pages/home/home.html", {
 ready: function (element, options) {
    var button = document.getElementById("btnNext");
    button.addEventListener("click", this.OnNextClicked, false);
},

OnNextClicked: function (evt) {
    var stateObj = {};
    stateObj.CustomerID = document.getElementById("txtCustomerID").value;
    stateObj.CompanyName = document.getElementById("txtCompanyName").value;

    WinJS.Navigation.navigate("/pages/page2/page2.html", stateObj);
}
The define() function creates a PageControl object from the specified HTML page. The ready option specifies a function that is called once the PageControl is initialized and rendered. Inside the ready function you wire an event handler (OnNextClicked) for the click event of the Next button. The OnNextClicked event handler retrieves the values entered in the textboxes and stores them in a JSON object. More importantly it navigates to page2 by calling the navigate() function. The navigate() function accepts two parameters. The first parameter is the URL of the PageControl to navigate and the second parameter is the state information to be carried from the current page to the next page. In our example you wish to pass stateObj JSON object.
The Page2 HTML file and the associated JavaScript code is quite similar to Home PageControl you just developed. The only difference is that Page2 accepts ContactName and Country values and stores them in a state object. Recollect that Home PageControl is already storing CustomerID and CompanyName into a state object. How do you access this state object in Page2? This is done as follows:
OnNextClicked: function (evt) {
    var stateObj = WinJS.Navigation.state;
    if (stateObj) {
	stateObj.ContactName = document.getElementById("txtContactName").value;
	stateObj.Country = document.getElementById("txtCountry").value;
	WinJS.Navigation.navigate("/pages/page3/page3.html", stateObj);
    }
}
While calling the navigate() function in Home PageControl you passed stateObj as the second parameter. The state object is available to your JavaScript code from Page2 via the state property of the Navigation object.
Saving Data Using Web API
The final step (Page3 PageControl) of the app is important because it calls the Web API to store the data in a database. This page is shown below:
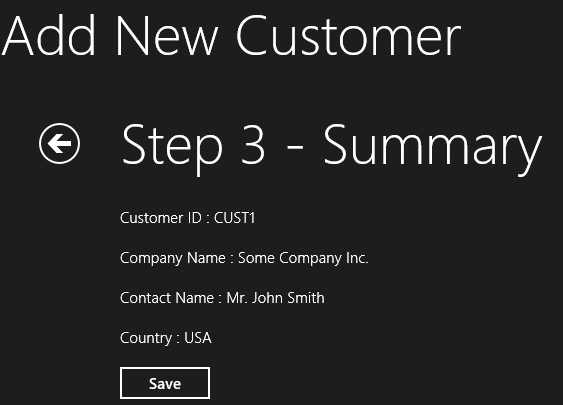
The final step (Page3 PageControl) of the app
As you can see it displays all the values entered in Step 1 and Step 2. Clicking on the Save button invokes the Web API and a Customer is saved in the database. The click event handler of the Save button is responsible for this task and is shown below:
OnSaveClicked: function (evt) {
    var stateObj=WinJS.Navigation.state;
    var objData = {};
    objData.CustomerID = stateObj.CustomerID;
    objData.CompanyName = stateObj.CompanyName;
    objData.ContactName = stateObj.ContactName;
    objData.Country = stateObj.Country;

    var options = {
	url: "http://localhost:49177/api/customers",
	type: "POST",
	data: JSON.stringify(objData),
	headers: {"Content-Type":"application/json;charset=utf-8"}
    }

    WinJS.xhr(options).then(
	function success(req) {
	    document.getElementById("lblMsg").innerHTML = "<strong>Data stored successfully!</strong>";
	}
	,
	function error(err) {
	    document.getElementById("lblMsg").innerHTML = "<strong>Error while storing data! - " + err.statusText + "</strong>";
	});
}
The OnSaveClicked event handler function uses xhr() fuction of WinJS to make an Ajax call to the Web API you developed earlier. The xhr() function essentially makes use of XMLHttpRequest object to make Ajax calls. The options parameter defines several parameters of the HTTP request being made. Firstly, the url option specifies the location of the Web API. Secondly, it also specifies the request type as POST. This way the Web API will invoke the Post() method you wrote earlier. The data option holds the data that needs to be passed along with the request. In this case the data is a JSON object with customer information. Finally, the headers option specifies the Content-Type header to the application/json.
If the xhr() call is successful, success() function will be called. If there is any error in the process the error() function will be called. The success() and error() functions simply display a relevant message in a <span> element.
That’s it! You can now run the app and see how the navigation and state transfer works. Especially notice how Step 2 and Step 3 show a navigation arrow at the top that allows you to navigate to the previous page. In its current form the app won’t remember its values when the back button is clicked but you can easily do that by saving the state in session state (WinJS.Application.sessionState).
Summary
Whenever you need to display multiple pages to the end user the recommended approach for Windows store apps is single-page navigation. In this approach you create one or more PageControl objects and then navigate between them as and when required. Each PageControl is a bundle of .html, .css and .js file. The navigate() function allows you to navigate between pages. The state information passed from one page to the other can be accessed using the state property of WinJS. Navigation.