

If you are a Microsoft Insider, then there is a chance you’ve already installed a pre-release of Microsoft Windows 11 onto your system. While Windows 10 was promoted as the last version of Windows when it was released, time has shown that a new version was desired to help reset hardware expectations and promote a few new features. Sometimes the evolution of an operating system simply needs a new number – in this case, the new number is 11.
With terms like “flexible” and “fluid” used by Microsoft to describe the update, it is possible to have flashbacks to Windows Vista. Of course, market terms like “reliable”, “secure”, “connected”, and “performant” are also used by Microsoft to describe Windows 11.
System Requirements for Windows 11
Overall, Windows 11 is just another update to Windows 10. In fact, Microsoft has indicated that Windows 11 should be delivered later this year as an update to devices running Windows 10 that are eligible as well as on new devices that are capable of running the new features.
What makes a device eligible? Meeting the requirements for running the operating system, which include some standard expectations such as a processor running at a speed of at least one gigahertz (GHz). Faster is always better. The processor needs to have two or more cores on a 64-bit processor or a system on a chip (SoC). Additionally, 4 gigabytes (GB) of RAM are required. These have been relatively standard low-end criteria for systems for a while. Also required are:
- 65 GB or more of storage
- A graphics card that is compatible with Direct X or later with a WDDM 2.0 driver
- Support for UEFI and Secure System Boot Firmware
- Support for TPM 2.0 (Trusted Platform Module)
- A high definition display including a 9” or greater monitor with 8 bits per color channel
Additionally, an internet connection is required for device setup. Also, depending on the features of Windows 11 that you want to use, you might need to meet other requirements. For example, if you want to use Voice Assist, then you would need a microphone and speakers. Similarly, if you wanted to use Snap with a three-column layout, then you’d need a monitor with a width of at least 1920 effective pixels. You can find a full list of Windows 11 hardware requirements at https://docs.microsoft.com/en-us/windows/whats-new/windows-11-requirements.
Earlier I mentioned Windows Vista. For those of you familiar with Vista, you know it suffered issues upon release. While Microsoft took a dink for the issues, those that looked closer knew that the problem was that manufacturers didn’t get their drivers updated as needed. It wasn’t Vista but the drivers that drove a big part of the problem. With Windows 11, most drivers and accessories that work for Windows 10 are expected to work. Of course, as with any operating system upgrade, you should confirm with device manufacturers that they’ve confirmed compatibility.
Hello World in Windows 11 and C#
Of course, this article is supposed to be about the legendary “Hello World” application developers create when reviewing something new. In this case, Windows 11 is new, so we need to create and run a “Hello Windows 11” app. To target Windows 11, you should use Visual Studio 2019 version 16.10 or higher.
What you can see when you run a Windows 11 app is that there has been a change in the styles used to present windows and dialogs. Windows 11 uses the Fluent Design System. This is an adaptive design that includes updates so that windows have slightly rounded edges, updated icons, and a bit more transparency.
Read: C# Programming for Beginners.
For this article, we will create a simple Universal Windows App (UWP) using the Visual Studio 2019 integrated development environment (IDE). Start by creating a new project and selecting the Blank App (Universal Window) using C# from the option:

Click Next to launch the dialog asking for an app name and location. You can fill these in with “Hello 11” and a location that works for you. Click Create to proceed. You will be prompted to state the targeted version of Windows for your application. Because the primary way to have Windows 11 at the time of this article is to be in the Windows Insiders program, you’ll want to select Windows Insider Preview (Build 22000) or something similar.
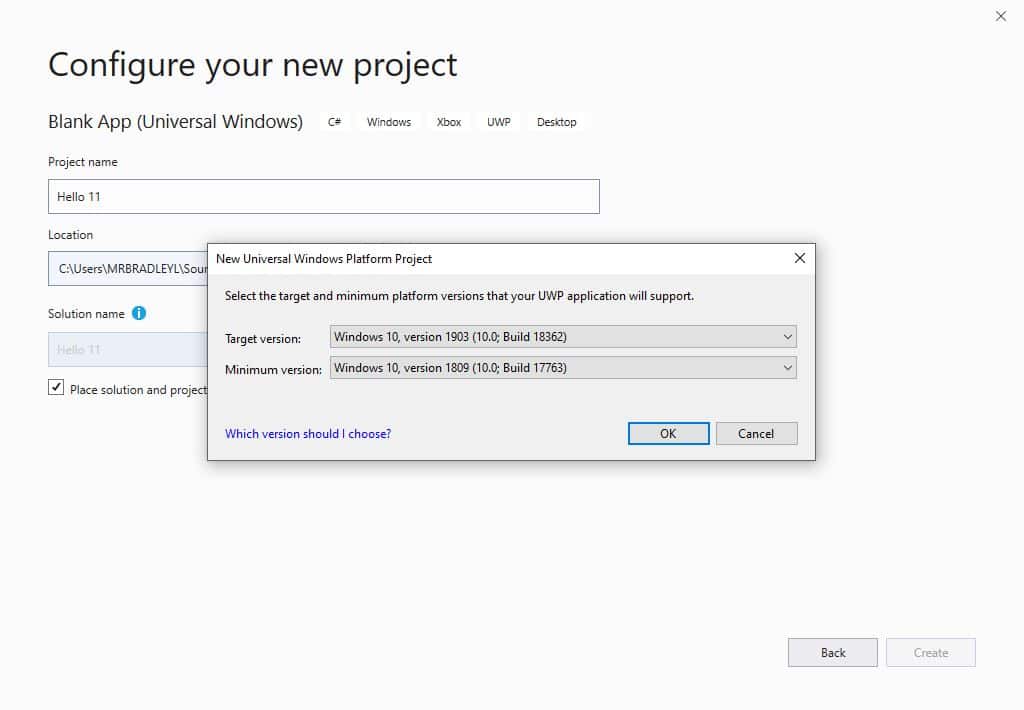
Note that if you are not running Windows 11, then you will not be able to target Windows 11.
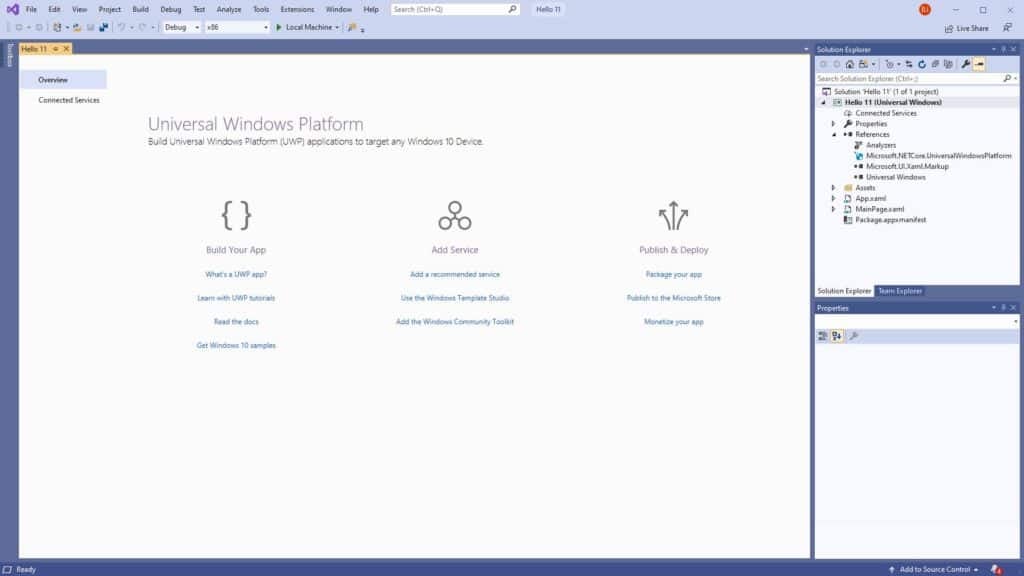
Click OK to create the application. Microsoft will create the basic project files as shown in the following figure.
Because we are going to use controls in our Hello World app, we need to add the WinUI library. At the time of this article, WinUI 3.0 did not support the new visual styles of Windows 11, so you need to use the WinUI 2.6.1 library. This can be added to your project by adding the Microsoft.UI.Xaml package and selecting version 2.6.1. You can add this by selecting Project then Manage NuGet Packages… from the menus, then clicking Browse (or right-click in the Solution Explorer and select the same). You’ll then be able to search and click on Microsoft.UI.Xaml to add it to your project.
With the package added to the solution, let’s add a reference from our code. Open the App.xml file and add the reference so we can use the resources. Your App.xaml listing should look like the following:
<Application

    x:Class="TEST1.App"

    xmlns="http://schemas.microsoft.com/winfx/2006/xaml/presentation"

    xmlns:x="http://schemas.microsoft.com/winfx/2006/xaml"

    xmlns:local="using:TEST1">

    <Application.Resources>

        <XamlControlsResources xmlns="using:Microsoft.UI.Xaml.Controls" />

    </Application.Resources>

</Application>
We are now ready to update the code to say “Hello” to the world and also to display a few controls. For our simple demo UWP, you will need to add the namespace for the updated controls to the MainPage.xaml file. We’ll update what is in the default MainPage.xaml Grid control to display our “Hello” message and a few Windows controls as well as an updated RadioButtons control. Update what is in your Grid control to match the following code:
You can then compile and run the program on Windows 11 to see the dialog:
<Page

    x:Class="Hello_11.MainPage"

    xmlns="http://schemas.microsoft.com/winfx/2006/xaml/presentation"

    xmlns:x="http://schemas.microsoft.com/winfx/2006/xaml"

    xmlns:local="using:Hello_11"

    xmlns:d="http://schemas.microsoft.com/expression/blend/2008"

    xmlns:mc="http://schemas.openxmlformats.org/markup-compatibility/2006"

    xmlns:controls="using:Microsoft.UI.Xaml.Controls"

    mc:Ignorable="d"

    Background="{ThemeResource ApplicationPageBackgroundThemeBrush}">

    <Grid>

        <ScrollViewer Height="800" Padding="20">

            <StackPanel Orientation="Vertical" HorizontalAlignment="Left" >

                <Line X1="0" Y1="0" X2="190" Y2="0" Stroke="Black" StrokeThickness="1" />

                <TextBlock Margin="11,1,1,1">Hello Windows 11 World!!!</TextBlock>

                <Line X1="0" Y1="0" X2="190" Y2="0" Stroke="Black" StrokeThickness="1" />

                <CheckBox Content="Unchecked CheckBox"/>

                <CheckBox Content="Checked CheckBox" IsChecked="True"/>

                <Slider Width="200"/>

                <controls:RadioButtons>

                    <x:String>Home</x:String>

                    <x:String>Business</x:String>

                    <x:String>Mobile</x:String>

                    <x:String>Other</x:String>

                </controls:RadioButtons>

                <Button Content="A Button" Margin=”10” />

                <controls:ColorPicker />

            </StackPanel>

        </ScrollViewer>

    </Grid>

</Page
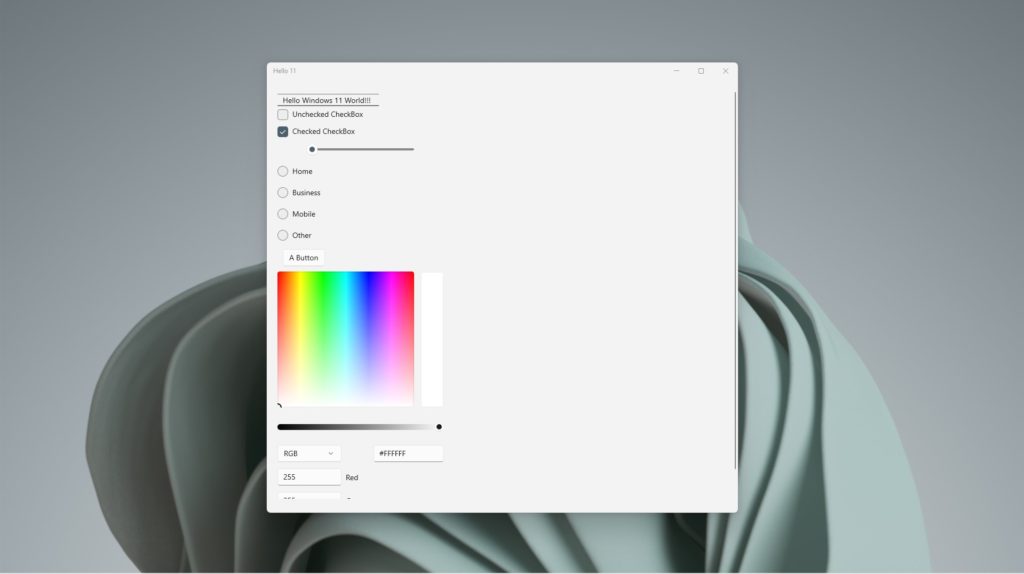
Of course, the thing about this application is that the code works on Windows 10 as well as Windows 11. Where the difference should be seen is when you run the code on Windows 11, dialog corners will be rounded, the appearance of the controls should be just a bit crisper/cleaner, and some of the control animations will be updated. In short, you don’t have to say “goodbye” to what you know about Windows 10 in order to say Hello to Windows 11!