

In the previous article of the series we’ve seen how to create a simple Hello world application in Silverlight for WP7. In this article we delve a little further and discuss the application bar, or shortly the app bar.
What is the App Bar?
The app bar on WP7 is the equivalent of a menu bar and/or toolbar for desktop applications. You can have several icon buttons (up to four) – the equivalent of toolbar buttons, and several menu items.
The namespace Microsoft.Phone.Shell defines several classes for the app bar:
- ApplicationBar: this is the class representing the application bar control
- ApplicationBarIconButton: represents an application bar button with an icon
- ApplicationBarMenuItem: represents a menu item that can be added to the menu of an application bar.
Restrictions:
- The number of buttons on the app bar cannot exceed 4
- The icons should be 48 x 48 pixels, mostly transparent, with the actual image centered to the image in a square of 26 pixels
- The number of menu items should not, in general, be more than five with a text up to 20 characters
- Regardless of the case you use for the button and menu item texts they are always displayed in lowercase
- The application bar is not customizable
Default App Bar
When you create a new page, the wizard inserts into the XAML code the definition of an application bar with two buttons and two menu items, but this definition is commented. At the bottom of the page you can find this code:
    <!--Sample code showing usage of ApplicationBar-->
    <!--<phone:PhoneApplicationPage.ApplicationBar>
        <shell:ApplicationBar IsVisible="True" IsMenuEnabled="True">
            <shell:ApplicationBarIconButton IconUri="/Images/appbar_button1.png" Text="Button 1"/>
            <shell:ApplicationBarIconButton IconUri="/Images/appbar_button2.png" Text="Button 2"/>
            <shell:ApplicationBar.MenuItems>
                <shell:ApplicationBarMenuItem Text="MenuItem 1"/>
                <shell:ApplicationBarMenuItem Text="MenuItem 2"/>
            </shell:ApplicationBar.MenuItems>
        </shell:ApplicationBar>
    <phone:PhoneApplicationPage.ApplicationBar>-->
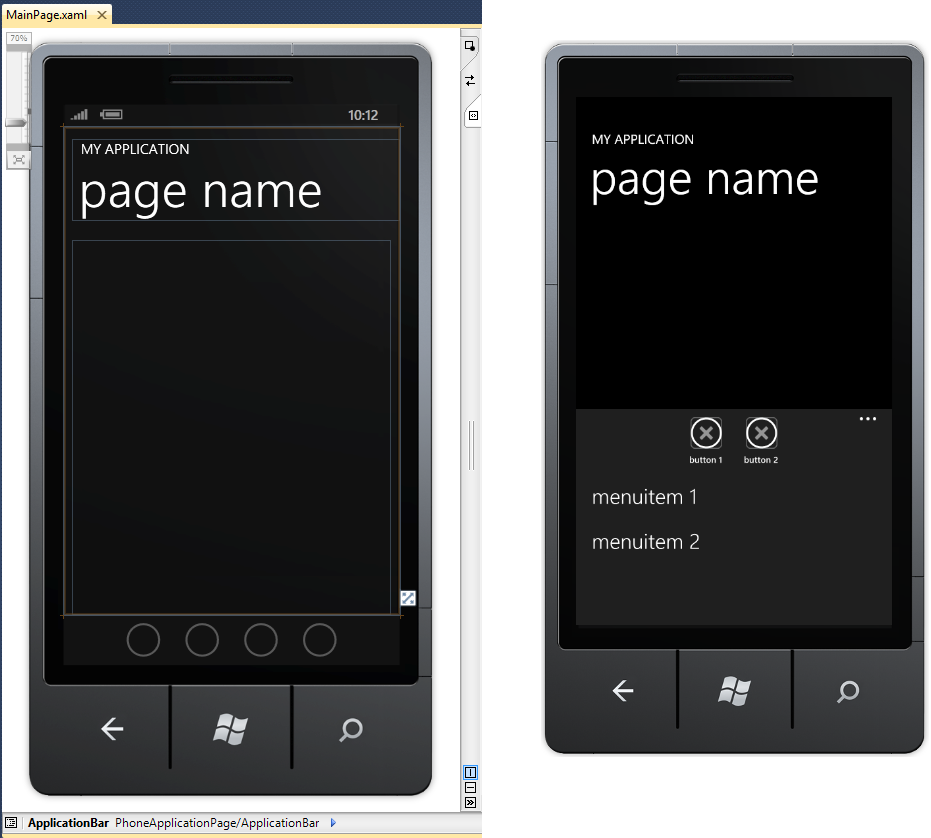
If you remove the comment the app bar will show up in designer, however the visualization is rather a static image than the actual bar you get at runtime, and shows four circles representing the buttons (even if you define less than four buttons).
The following image shows on the left how the page looks in the designer and on the right how it looks at runtime when you click on the app bar to show it entirely.
Using Images
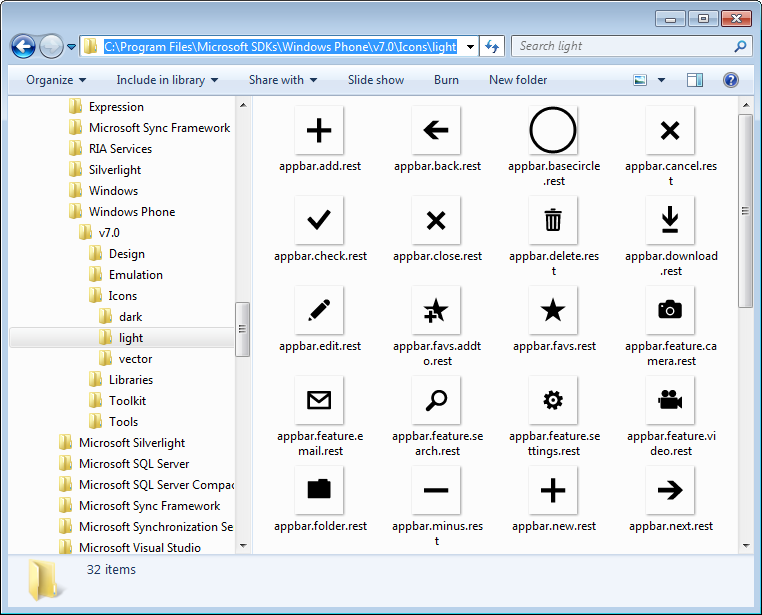
Microsoft provides a set of several simple images in two versions (light and dark) that you can use in your application. Of course, you can create and use your own ones, except that you should follow the recommendation for the size and aspect. When you install the WP7 Developer Tools you get these icons installed in the folder Program Files\Microsoft SDKs\Windows Phone\V7.0\Icons.
In this example I will use appbar.add.rest.png for an Add button and appbar.delete.rest.png for a Delete button, and change the application bar to the following definition (given that these images were copied to a folder called Images in the application folder):
<shell:ApplicationBarIconButton IconUri="/Images/appbar.add.rest.png" Text="Add"/>
<shell:ApplicationBarIconButton IconUri="/Images/appbar.delete.rest.png" Text="Delete"/>
<shell:ApplicationBar.MenuItems>
    <shell:ApplicationBarMenuItem Text="Delete all"/>
</shell:ApplicationBar.MenuItems>
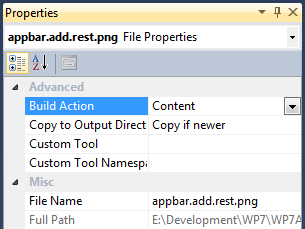
However, if you run the application now in the emulator you won’t see the specified images, but a default image. Reason is that when you add the images to the project they are flagged as Resource. You should go to the properties of the images and change the Build Action property to Content, as shown in the following image.
After that, the images will be correctly packaged and deployed to the phone, so that the app bar will correctly display them.
Building an Example
To see the app bar at work we’ll create a simple example: the main content of the page will be a list with the items being plain strings. The app bar will have two buttons: one called add that when pressed will add a new item to the list, and one called delete. When pressed, it will enable the “delete” mode for the application, meaning that when taping on a list item, that item will be removed from the list. When pressed again, the delete button will end the “delete” mode, so selecting the list items will no longer remove them. Also, the app bar will have a menu item called delete all that when pressed will remove all the items from the list.
The definition for this app bar was already shown in the previous paragraph. The following code shows the definition with handlers for the Click event for each button and menu item.
<phone:PhoneApplicationPage.ApplicationBar>
   <shell:ApplicationBar IsVisible="True" IsMenuEnabled="True">
      <shell:ApplicationBarIconButton x_Name="btnAdd"
                                      IconUri="Images/appbar.add.rest.png"
                                      Text="Add"
                                      Click="btnAdd_Click" />
      <shell:ApplicationBarIconButton x_Name="btnDel"
                                      IconUri="Images/appbar.delete.rest.png"
                                      Text="Delete"
                                      Click="btnDel_Click"/>
      <shell:ApplicationBar.MenuItems>
         <shell:ApplicationBarMenuItem x_Name="menuDelAll"
                                       Text="Delete all"
                                       Click="menuDelAll_Click"/>
      </shell:ApplicationBar.MenuItems>
   </shell:ApplicationBar>
</phone:PhoneApplicationPage.ApplicationBar>
Also, the content panel, with the listbox is defined as:
<!--ContentPanel - place additional content here-->
<Grid x_Name="ContentPanel" Grid.Row="1" Margin="12,0,12,0">
   <ListBox x_Name="ListContent"
            Grid.Row="0"
            SelectionChanged="ListContent_SelectionChanged" />
</Grid>
Using x:Name
You can’t use the x:Name for the buttons and menu items. Though you can set the values in the XAML code, trying to access the elements from .NET code will fail, because these objects will always be null. The following code is incorrect.
btnAdd.IsEnabled = false;
menuDelAll.IsEnabled = false;
Instead you should use the Buttons and MenuItems properties of ApplicationBar (both of type IList) and get references to the actual controls. The code should look like this:
ApplicationBarIconButton m_appbarBtnAdd;
ApplicationBarIconButton m_appbarBtnDel;
ApplicationBarMenuItem m_appbarMenuDelAll;

public MainPage()
{
    InitializeComponent();

    m_appbarBtnAdd = ApplicationBar.Buttons[0] as ApplicationBarIconButton;
    m_appbarBtnDel = ApplicationBar.Buttons[1] as ApplicationBarIconButton;
    m_appbarMenuDelAll = ApplicationBar.MenuItems[0] as ApplicationBarMenuItem;
}
Then you can write the following to disable the buttons and menu items for instance:
m_appbarBtnAdd.IsEnabled = false;
m_appbarMenuDelAll.IsEnabled = false;
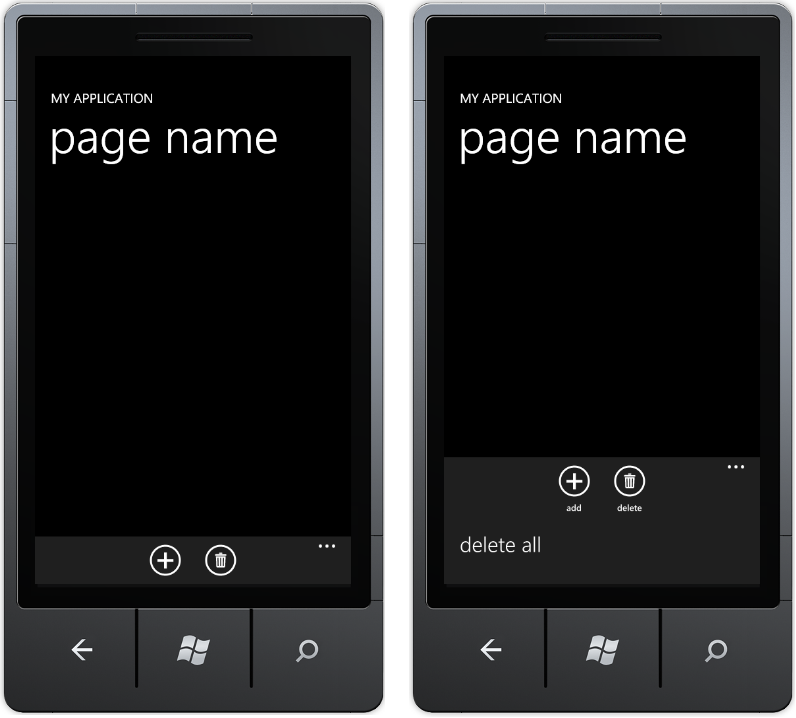
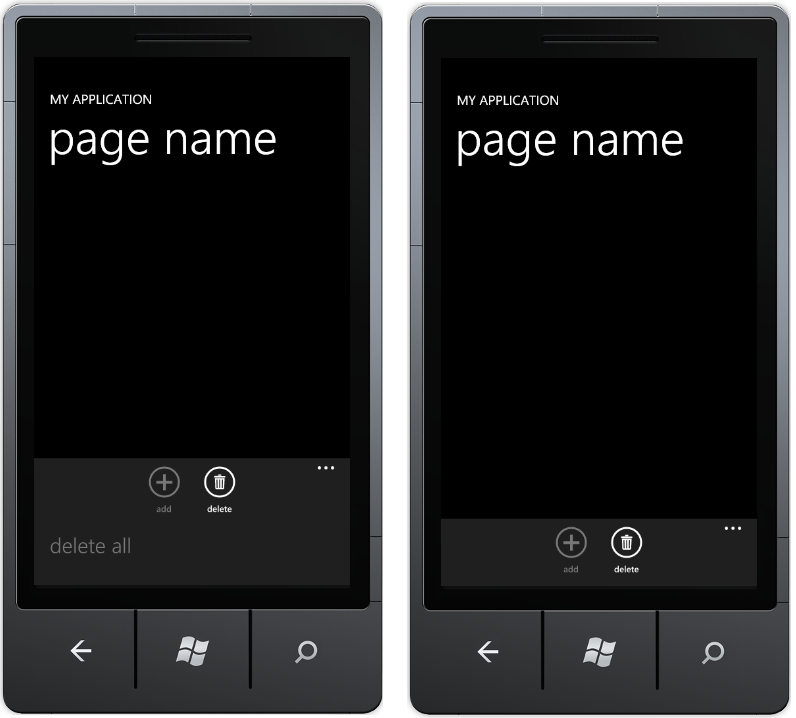
The following image shows the difference between disabling only the menu item (left) or disabling the entire menu (right).
// disable only the menu item
m_appbarMenuDelAll.IsEnabled = false;

// disable the entire menu of the app bar
ApplicationBar.IsMenuEnabled = false;
Putting All Together
Given the example stated in an earlier paragraph the following have to be implemented:
- Get references to the buttons and menu item (in the constructor)
- Handle the Click event for the add button and add a new item to the list
- Handle the Click event for the delete button and enter or exit the “delete” mode
- Handle the Click event for the delete all menu item and remove all the items from the list
- Handle the SelectionChanged event for the list and if the “delete” mode is enabled, remove the selected item
The code is shown below:
    public partial class MainPage : PhoneApplicationPage
    {
        bool m_deleting;
        int m_count;
        ApplicationBarIconButton m_appbarBtnAdd;
        ApplicationBarIconButton m_appbarBtnDel;
        ApplicationBarMenuItem m_appbarMenuDelAll;

        public MainPage()
        {
            InitializeComponent();

            m_appbarBtnAdd = ApplicationBar.Buttons[0] as ApplicationBarIconButton;
            m_appbarBtnDel = ApplicationBar.Buttons[1] as ApplicationBarIconButton;
            m_appbarMenuDelAll = ApplicationBar.MenuItems[0] as ApplicationBarMenuItem;
        }

        private void btnAdd_Click(object sender, EventArgs e)
        {
            ListContent.Items.Add(String.Format("Item {0}", m_count++));
        }

        private void btnDel_Click(object sender, EventArgs e)
        {
            m_deleting = !m_deleting;
            m_appbarBtnAdd.IsEnabled = !m_deleting;
            ApplicationBar.IsMenuEnabled = !m_deleting;
        }

        private void menuDelAll_Click(object sender, EventArgs e)
        {
            ListContent.Items.Clear();
        }

        private void ListContent_SelectionChanged(object sender, SelectionChangedEventArgs e)
        {
            if (m_deleting)
            {
                object sel = ListContent.SelectedItem;
                if (sel != null)
                    ListContent.Items.Remove(sel);
            }
        }
    }
Conclusions
The app bar is a control meant to hold several buttons and menu items for common or most used commands. It is not a customizable control and is not actually part of the visual tree of the page. Each page has its own app bar and you can show and hide, enable and disable it entirely or its controls individually.