


It’s unfortunate Microsoft didn’t include a database for use when building Windows 8 Metro Apps in C#. However, there is a very popular database known as SQLite, which works very well in mobile environments. SQLite is an extremely powerful and lightweight database used across many different platforms. SQLite allows you to create a minimalistic SQL style database contained within a single file. Unlike some mobile platforms, SQLite is not included out of the box for creating Windows 8 Metro apps. However, the SQLite team does provide a package, which allows you to include it within your project.
To get started, we first need to download and install the WinRT VSIX package from the SQLite download page. Once you have successfully downloaded and installed the package you will need to add a reference to it by right clicking on References and select Add Reference. You will then be presented with the Reference Manager as shown below.
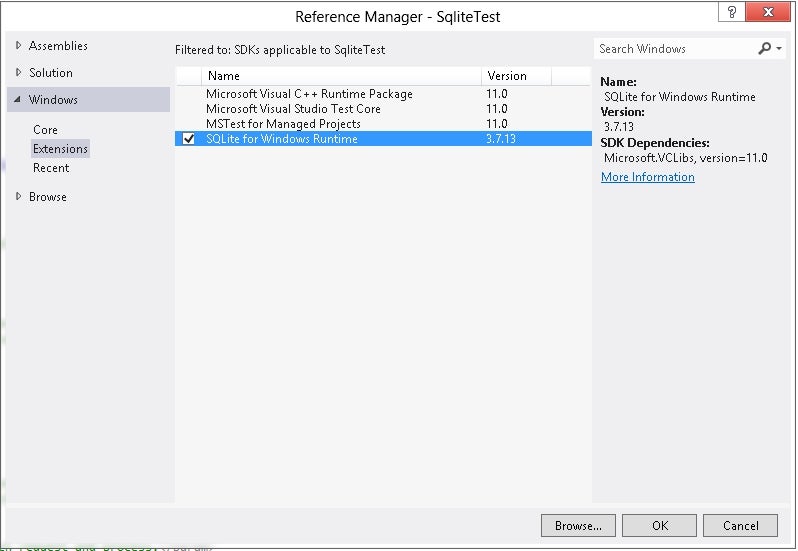
Reference Manager
Be sure to select SQLite for Windows Runtime and Microsoft Visual C++ Runtime Package. Since SQLite is a native package you will receive an error if you try to compile at this point. Instead you will need to change the project settings to change the Platform Target from Any Cpu to either x86, x64 or ARM. Next you will need a .Net driver for SQLite to use within your project. There are several different .Net drivers available. For this article we will use the sqlite-net, which can be installed via NuGet Package Manager and allows for use of LINQ as well as strongly typed operations. Right click on the project and select Manage NuGet Packages. Then search for the sqlite-net package as shown below.
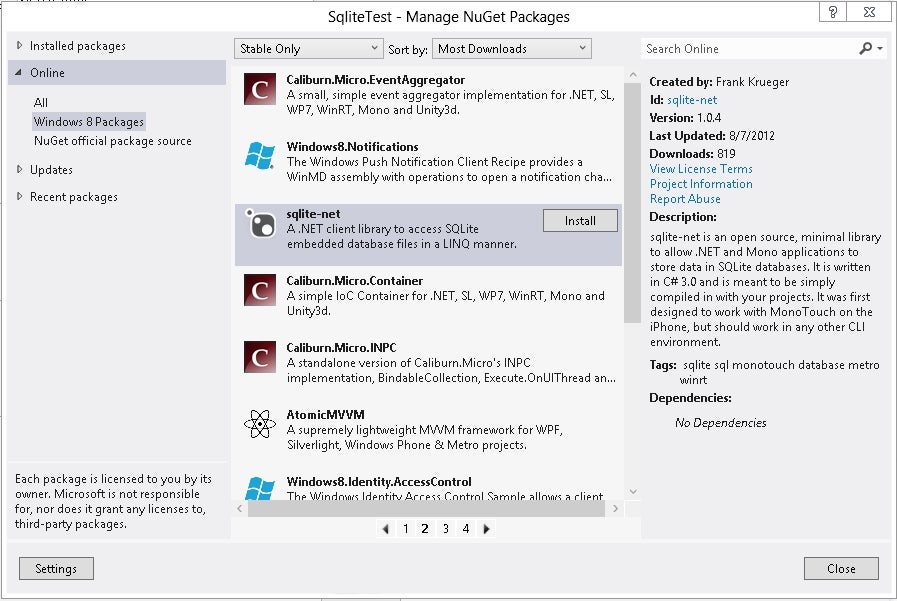
NuGet Package manager
Click Install for the sqlite-net package and follow the instructions. Once complete, close the NuGet Package Manager. You may notice that two additional C# files have been added to your application SQlite.cs and SQLiteAsync.cs. These two files include the source code for the sqlite-net driver, which will be compiled into your project.
Now that we have SQLite in our project as well as a driver, we can move forward with beginning to work with the database. In the snippet below we first create a string, which points to the correct path with the desired database name and extension. Next we create a new SQLiteConnection with the provided path and name within a using statement.
string dbpath = Path.Combine(Windows.Storage.ApplicationData.Current.LocalFolder.Path, "mydb.db");

using (var db = new SQLite.SQLiteConnection(dbpath))
{

// Place code here

}
At this point we have a database connection; however, before we start creating tables, queries, etc., we need to define an object. For this article we will create a custom class called book, which will be used to define records within the book table. The book class definition is show below:
public class Book
{
[SQLite.PrimaryKey,
SQLite.AutoIncrement]
public int ID { get; set; }
public string Title { get; set; }
public string Author { get; set; }
}
As you can see this is a very simple class; however you can provide additional definition within the class. For instance, on the ID field two attributes are included to identify the primary key and to enable auto-increment.
Now that we have the definition for the table, we can go ahead and created it as shown below:
db.CreateTable();
This simple state is all we need to do to create a table within the database. Next we can go ahead and add a handful of records to the Book table.
db.RunInTransaction(() =>
{
for (int x = 0; x < 10; x++)
{
db.Insert(new Book() { Title = "Title-" + x.ToString(), Author = "Author " + x.ToString()
});
}
});
This block starts off by using a RunInTransaction statement with a lamda expression to include a for loop. Within the for loop, we call Insert on the db and pass in a new Book object each pass. The result is similar to inserting 10 records to a regular SQL database within a transaction. If an error occurs, the transaction will be rolled back. If we want to pull those records back we can use the Table method, which will return all records in the table as shown below.
var books = db.Table().ToList();
The books object will contain a complete list of records added to the book table.
Conculsion
As you can see it’s not very difficult to use a SQLite database within your Windows 8 Metro app. The approach described above can be used for many apps that require a database; however, this approach does use a native DLL, which is why you need to change the Target Platform from Any CPU. If your application needs to maintain the ability to target Any CPU, you may need to go down a different path. One path, which may suit your application, is a project called C#SSQLite. The C#SQLite project is not a new driver for SQLite but instead a direct port over to C# and .Net. The C#SQLite project is maintained by a different team and work is currently underway to ensure it is compatible with the Windows 8 Metro platform. At the time of this writing the project was not ready for use in Metro apps; however, that may change in the near future.