


I’ve been holding off the installation of Visual Studio 2017 for as long as I could; mostly in part due to ongoing projects where I can’t risk something not working. However, curiosity has taken hold and the installation has begun. Therefore, I dedicate this short article to those of us who are, or going to continue to, hold off installation until more information is made available on stability and general operation.
The first noticeable change to this version of the very popular IDE is the dialogue shown in Figure 1 to select what features of VS you wish to install.
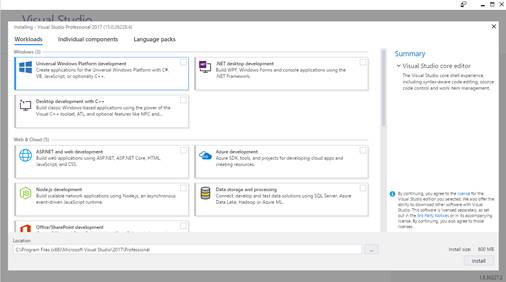
Figure 1: The Visual Studio installation main screen
Before we go on, if you’re used to what used to be there, the ‘Individual Components’ tab at the top will present to you a view that is more of what we used to see. An example is shown in Figure 2.
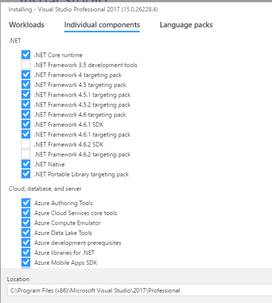
Figure 2: Selecting Individual Components
From the first tab, ‘Workloads,’ I’ve made sure I’ve ticked the .NET Core cross-platform development, which we’ll use to put together a bit of code to conclude this article. As for the installation, the whole process came across as very smooth with a required restart at the end. Such restarts are common to those of us in the IT industry.
Anyway, once installed, I’ve gone ahead and created an empty ASP.NET Core project. That project looks something like what we see in Figure 3…
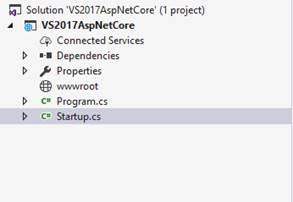
Figure 3: The empty ASP.NET Core project
This is the first time I’ve put together a .NET Core project that does not use project.json; that is now a relic of history. Instead, we are back to csproj and one thing I’m quite happy about is being able to edit that csproj file without having to unload the project first. After right-clicking the project, then hitting Edit *.csproj, I’m presented with what we see in Figure 4.
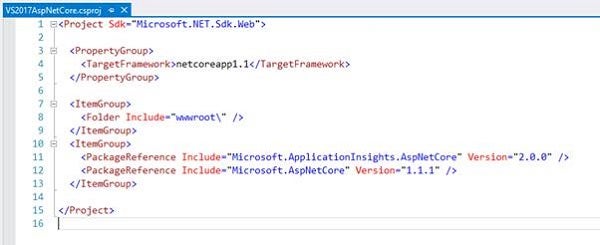
Figure 4: The .csproj file
It is indeed as they said it would be, and that’s a lot tidier than it used to be. For those of your who want to bring your MSBuild skills to .NET Core, this shift away from project.json represents the opportunity for you to do that! However, in the interest of diplomacy, I’m going to keep my personal thoughts on the update to myself and leave it to your good self to decide if this is a good move or not. Also, note that I am still using .NET Core 1.1, because some updates are still pending on my side.
Some Code
Let’s conclude this article with a nice addition that ships with ASP.NET Core, and that’s the Logger Factory. If you’re running your application from the console, which is a preferred method if you’re not on Windows, you can use the Logger Factory to output useful information at runtime.
Just to be sure we’re on the same page, I’ve kept the default code from the empty ASP.NET template, which can be found in the startup class. And that code looks something like this…
public void ConfigureServices(IServiceCollection services)
{
}

public void Configure(IApplicationBuilder app,
   IHostingEnvironment env, ILoggerFactory loggerFactory)
{
   loggerFactory.AddConsole();

   if (env.IsDevelopment())
   {
      app.UseDeveloperExceptionPage();
   }

   app.Run(async (context) =>
   {
      await context.Response.WriteAsync("Hello World!");
   });
}
In the preceding code, we can see that we have the logger added to your middleware chain by default. So, let’s run this application. Open a command window at the location of the project, and type dotnet run.

Figure 5: The application run from the console window
If you then navigate to the URL http://localhost:5000, you’ll find some basic output from your application, which was defined in the custom middleware component defined in your startup.cs.
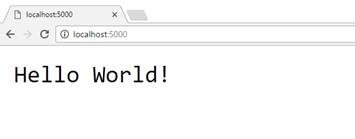
Figure 6: Output from the application shown in the browser
Now, if your console window is visible to you, you would have seen some activity in that window courtesy of the logger added to your application. After navigating to the localhost URL, my window has given me this output…
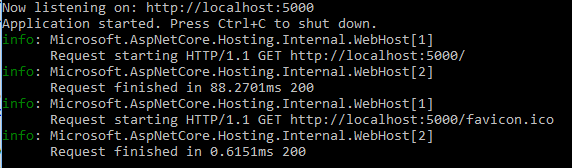
Figure 7: Logger output shown in the console window
At this time, there is a variety of information the logger will show, and at times this can be too much to take in. But, fear not, you can configure your logger to output only severe information that may be more relevant to you.
Let’s change the code in the Configure method in our startup.cs to look more like this…
loggerFactory.AddConsole(LogLevel.Error);

if (env.IsDevelopment())
{
   app.UseDeveloperExceptionPage();
}

app.Run(async (context) =>
{
   throw new NullReferenceException();
   await context.Response.WriteAsync("Hello World!");
});
What we’ve done above is to set the logger’s log level to LogLevel.Error, which, to quote the documentation, “Logs that highlight when the current flow of execution is stopped due to a failure.” I’ve also thrown an exception inside our custom middleware component, which is of type NullReferenceException. Let’s stop the application by using Ctrl+C, re-build, and re-run. Then, observe the results…

Figure 8: The application running, with log level set to error, and throwing an exception
Notice that we’ve lost any logged information that was prefixed as ‘info,’ and can see only the error we’ve forced upon the application.
Conclusion
For further experimentation, I would suggest playing around with the log levels and trying to create a variety of errors for your application to deal with. Again, this feature ships with ASP.NET Core out of the box, and is a valuable addition to that box. It can greatly assist with learning more about the ASP.NET Core framework, too.
If you have any questions you’d like to ask about this article, please find me on Twitter @GLanata.