

This is a fun little game that you might be familiar with. When you click a light (button), it switches from “on” to “off.” It also switches the buttons to the right, left, above, and below. To win the game, you have to change all the lights from being on to being off. Once you win, you should then try to do it in fewer moves.
This program was created by using C# in Visual Studio 2005. Most of the code should be easy to follow for the average C# developer. There are just a few things worth noting.
Using an Array of Buttons
The main game form is a grid of buttons as shown in Figure 1. The size of this grid can be adjusted within the code by changing the value stored in GridSize. In general, you want this to be from 3 to 9; however, you technically could go as large as you want. The code is written to place the buttons dynamically and to resize the form based on the value you place in GridSize.
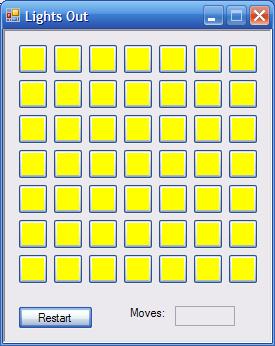
Figure 1: The Lights Out game form
The grid of buttons is stored in an array called btnLights declared as:
private System.Windows.Forms.Button [,] btnLights;
This array then is instantiated with the following:
this.btnLights = new System.Windows.Forms.Button[GridSize,GridSize];
for (int row = 0; row < GridSize; row++)
   for( int col = 0; col < GridSize; col++)
   this.btnLights[row,col] = new System.Windows.Forms.Button();
Note that after instantiating the array using the GridSize variable mentioned earlier, each element within the array then is instantiated with a button. You must instantiate the individual buttons into the array. Once the above code is completed, you will have an array of valid buttons.
Caution: The Visual Studio 2005 Editor design editor can’t deal with the array of buttons. As such, if you use Visual Studio 2005, you won’t be able to view the form in design mode.
Once the buttons are created, you then can configure the properties for each and add them to the form. This is done again using a couple of for loops:
for (int y = 0; y < GridSize; y++)
{
  for(int x = 0; x < GridSize; x++ )
  {
     this.btnLights[x,y].Location = new System.Drawing.Point(13+(35*x),
        13+(35*y));
     this.btnLights[x,y].Name = "btnLights" + x.ToString() + y.ToString();
     this.btnLights[x,y].Size = new System.Drawing.Size(30, 30);
     this.btnLights[x,y].TabIndex = x + (y*GridSize) + 1;
     this.btnLights[x,y].BackColor = onColor;
     this.btnLights[x,y].Click +=
        new System.EventHandler(this.LightsClickHandler);
  }
}
There are a couple of important things that might not be clear in this code. In setting the location, a 13 pixel buffer is used for the edge of the form. Then, 35 pixels are added for each button placed on the form. As such, the first button will be at 13+(35*0), or thus at 13 pixels over. The second button (indexed 1) will be at 13+(35*1), or 48 pixels over. Each button is 30 pixels wide, so this gives a nice buffer of 5 pixels between each.
Also worth noting is that each button is set a tab index value. The Restart button is set earlier in the program to be the first tab position (0). Thus, the buttons are set to a tab index starting at 1. Later, the tab index will be used to determine where in the grid a button is located.
The code also adds a Click event handler to each button. You should notice that the same handler, LightsClickHandler, is added to each button. Before discussing this handler, it is worth looking at one last bit of code in the form layout:
this.ClientSize = new System.Drawing.Size(
            ( GridSize < 7 ? 240 : ((35*GridSize)+20)),
            ((35*GridSize) + 65));
This code sets the size of the form. The minimum size of the form will be 240 pixels. If the Gridsize is 7 or larger, the form size will be increased to make room. If you set Gridsize to less than 7, you will get a warning when you compile that the code to the right is unreachable. Should you decide to make the form dynamic when the program is running, this code would be more useful.
Handling the Button Clicks
A single event handler is used for all the buttons on the grid. This is the LightsClickHandler. Within this handler, the sender parameter is cast and assigned to a temporary button control, tempButton. This button then is used throughout the event.
Once cast to a button, it is easy to change the current button’s color. You simply change the button’s color. This is done by changing the BackColor to either the offColor or onColor, depending on what it was before.
Where things get trickier is in figuring out whether there are buttons to the left or right as well above or below. To determine this, the following two lines determine the coordinates of the current button in the grid of buttons.
int btnX = ((tempButton.TabIndex-1) % GridSize);
int btnY = (int)((tempButton.TabIndex-1) / GridSize);
As mentioned earlier, the buttons are in the tab order staring in position 1. Each button is then sequentially numbered. Using the size of the grid, the above two lines convert this linear value into the coordinate system that is used in the array. Once you have the coordinates, it is a much easier task to determine whether there are surrounding buttons and then toggling their colors if there are:
// Toggle button to the left
if(btnX > 0 )
{
   ToggleButtonColor(btnLights[(btnX-1), btnY]);
}
// Toggle button to the right
if(btnX < (GridSize-1) )
{
   ToggleButtonColor(btnLights[(btnX+1), btnY]);
}
// Toggle button above
if(btnY > 0 )
{
   ToggleButtonColor(btnLights[btnX,(btnY-1)]);
}
// Toggle button below
if(btnY < (GridSize-1))
{
   ToggleButtonColor(btnLights[btnX,(btnY+1)]);
}
Winning the Game
After each move, a check is done to see whether the game has been won. The game has not been won if any of the buttons still has a BackColor that is on. If all of the BackColors are the offColor, a message is displayed saying the game has been won. The game board then is reset back to a grid with the buttons all on.
The Code
Attached is a zip file containing the entire Visual Studio 2005 project for this program. The key files are Form1.Designer.cs and Form1.cs. You’ll find the code described in this article in primarily these two files.
This is really just the beginning of a good game. Although the game is playable in its current form, you can make a number of enhancements to greatly improve it. You could add the ability for the user to configure the on and off colors at runtime. You also could allow the user to set the grid size at run time. Other improvements could include better functionality when the game is won. Right now, the game simply pops up a message and resets. You obviously could add a lot more to that as well.
This game was written quickly for fun, while I also was watching American Idol. The article was written while watching Grey’s Anatomy. As such, I might have goofed here and there. If so, feel free to comment or drop me an email. In the mean time, feel free to play Lights Out. I’m terrible at the game. It likely took me less time to write the game than it would take me to win in the 7×7 grid!
# # #