


The C# programming language includes capabilities that make working with Microsoft Office API objects easier. With the advent of named and optional arguments, introduction of the dynamic type in .NET, and the ability to pass arguments to the reference parameters in COM methods, C# 4.0 quickly became the language of choice for working with COM and Interop objects.
This article talks about office interop objects in C# and how you can use them to interact with Microsoft Word and Microsoft Excel. Code examples are also provided to illustrate the concepts covered.
Prerequisites for working with Interop Objects
Visual Studio 2019 or Visual Studio 2022 must be installed on your computer to work with the code samples demonstrated in this C# tutorial. In this example, we will be using Visual Studio 2022. If you don’t have it installed in your computer, you can download it from here.
As of this writing, Visual Studio 2022 RC 2 has been released. You should also have Microsoft Office Excel 2007 or Microsoft Office Word 2007 (or their later versions) installed on your computer.
Read: Code Refactoring Tips for C#.
How to Create a New Console Application in Visual Studio
In this section we will examine how we can create a new console application project in Visual Studio 2022. Assuming Visual Studio 2022 is installed on your system, adhere to the steps given below to create a new Console Application project:
- Start the Visual Studio 2022 IDE.
- Click on “Create new project.”
- In the “Create new project” page, select C# in the language drop down list, Windows from the Platforms list and Console from the “Project types” list.
- Select Console App (.NET Framework) from the project templates displayed.
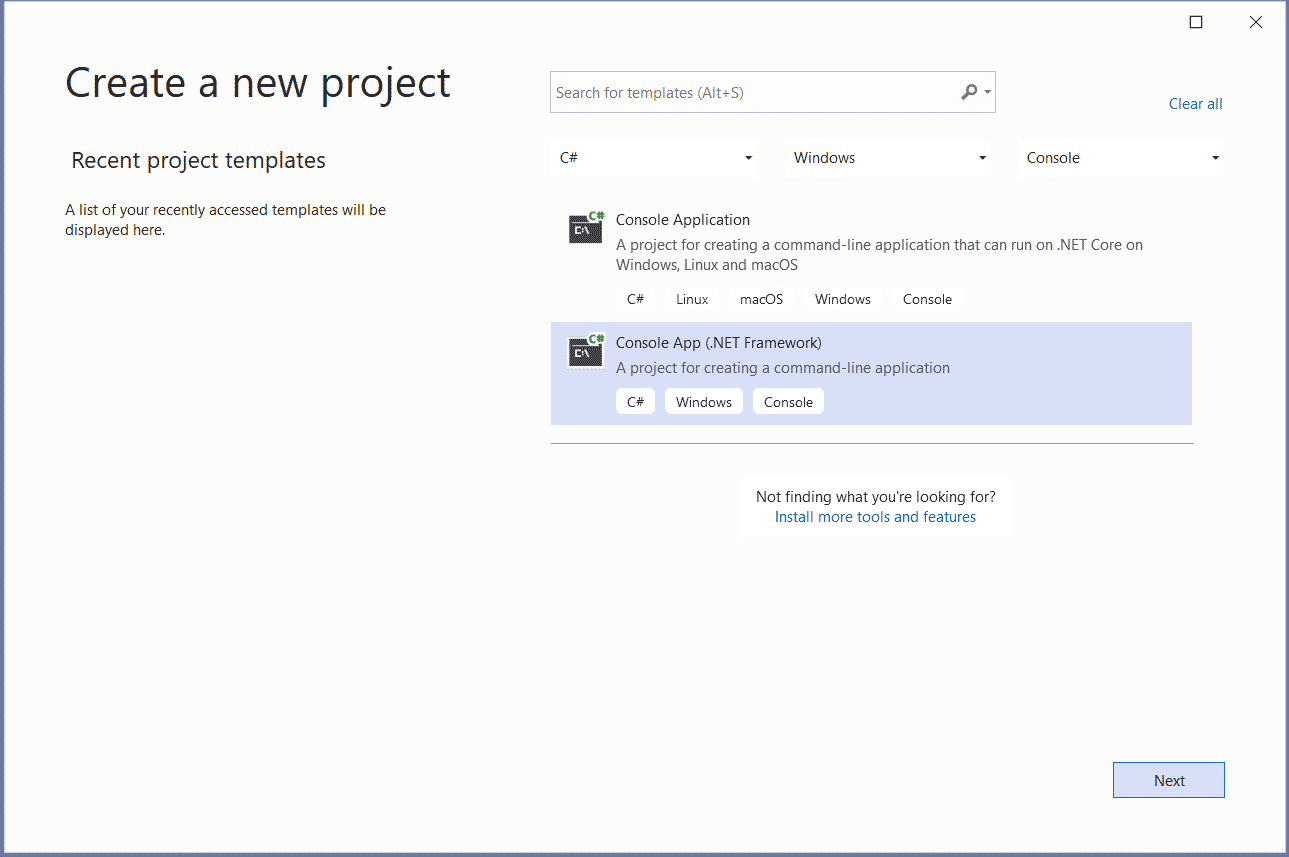
- Click Next.
- In the “Configure your new project” screen, specify the project’s name and the location where you would want the project to be created.
- Before you move on to the next screen, you can optionally select the “Place solution and project in the same directory” checkbox.
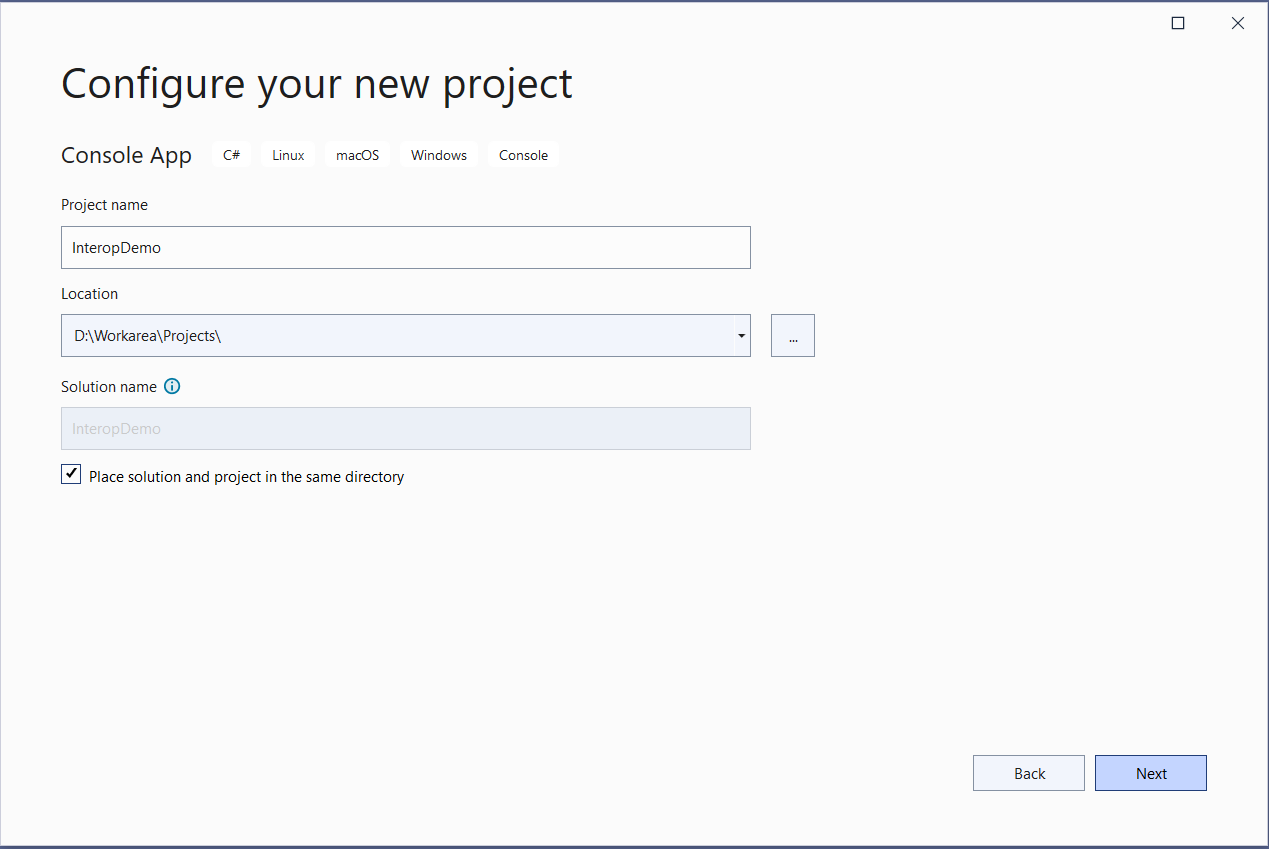
- Click Next.
- In the Additional Information screen, specify the Framework version you would like to use. We will use .NET Framework 4.8 in this example.

- Click Create to complete the process.
This will create a new .NET Framework Console application project in Visual Studio 2022. We will use this project in the sections that follow.
Install NuGet Packages
Install the following libraries from NuGet using the NuGet Package Manager or from the NuGet Package Manager Console:
Microsoft.Office.Interop.Word
Microsoft.Office.Interop.Excel
Read: Working with C# Math Operators.
How to Program Office Interop Objects in C#
In this section we will examine how to work with Office Interop objects and use them to connect to Microsoft Word and Excel and read/write data.
You must add the following using directives in your program for working with Word and Excel respectively when using Office interop objects:
using Microsoft.Office.Interop.Excel;
using Microsoft.Office.Interop.Word;
Working with Excel Interop Objects in C#
To begin, create a new Excel document named Test.xslx as a sample Excel file present in the root directory of the D:\> drive. We will use this file in the following example.
You should create an instance of the Application class pertaining to the Microsoft.Office.Interop.Excel library for communicating with Excel. To do this, write the following C# code:
Application excelApplication = new Application();
The next step is to create an instance of the Workbook class to access a Workbook in Excel. You can create an instance of Workbook using the following code:
Workbook excelWorkBook = excel.Workbooks.Open(@"D:\Test.xslx");
To read the name of the workbook, you can use the Name property of the workbook instance as shown in the code snippet given below:
string workbookName = excelWorkBook.Name;
The following code listing illustrates how you can display the value of the first cell of the first worksheet of the Excel document:
int worksheetcount = excelWorkBook.Worksheets.Count;
if (worksheetcount > 0) {
  Worksheet worksheet = (Worksheet) excelWorkBook.Worksheets[1];
  string worksheetName = worksheet.Name;
  var data = ((Range) worksheet.Cells[row, column]).Value;
  Console.WriteLine(data);
} else {
  Console.WriteLine("No worksheets available");
}
Here’s the complete code listing for your reference:
using Microsoft.Office.Interop.Excel;
using Microsoft.Office.Interop.Word;
using System;
using System.Runtime.InteropServices;

namespace OfficeInteropDemoApp
{
    class Program
    {
        static void Main(string[] args)
        {
            string filename = @"D:\Test.xlsx";
            DisplayExcelCellValue(filename, 1, 1);
            Console.Read();
        }

        static void DisplayExcelCellValue(string filename,
        int row, int column)
        {
            Microsoft.Office.Interop.Excel.Application
            excelApplication = null;
            try
            {
                excelApplication = new
                Microsoft.Office.Interop.Excel.Application();
                Workbook excelWorkBook =
                excelApplication.Workbooks.Open(filename);
                string workbookName = excelWorkBook.Name;
                int worksheetcount = excelWorkBook.Worksheets.Count;

                if (worksheetcount > 0)
                {
                    Worksheet worksheet =
                   (Worksheet)excelWorkBook.Worksheets[1];
                    string firstworksheetname = worksheet.Name;
                    var data = ((Microsoft.Office.Interop.Excel.Range)
                    worksheet.Cells[row, column]).Value;
                    Console.WriteLine(data);
                }
                else
                {
                    Console.WriteLine("No worksheets available");
                }
            }
            catch (Exception ex)
            {
                Console.WriteLine(ex.Message);
            }
            finally
            {
                if (excelApplication != null)
                {
                    excelApplication.Quit();
                    Marshal.FinalReleaseComObject(excelApplication);
                }
            }
        }
    }
}
Refer to the code listing given above. Note, the finally block of the DisplayExcelCellValue method. The Quit method is called on the Excel application instance to stop the application. Finally, a call to Marshall.FinalReleaseComObject sets the reference counter of the Excel application instance to 0.
The following code listing illustrates how you can create a new Excel document using Office Interop in C#. Note how a new workbook has been created:
static void CreateExcelDocument()
{
Microsoft.Office.Interop.Excel.Application excelApplication = null;
try {
excelApplication = new
Microsoft.Office.Interop.Excel.Application();
Workbook excelWorkBook = excelApplication.Workbooks.Add();
Worksheet worksheet = (Worksheet) excelWorkBook.Worksheets[1];
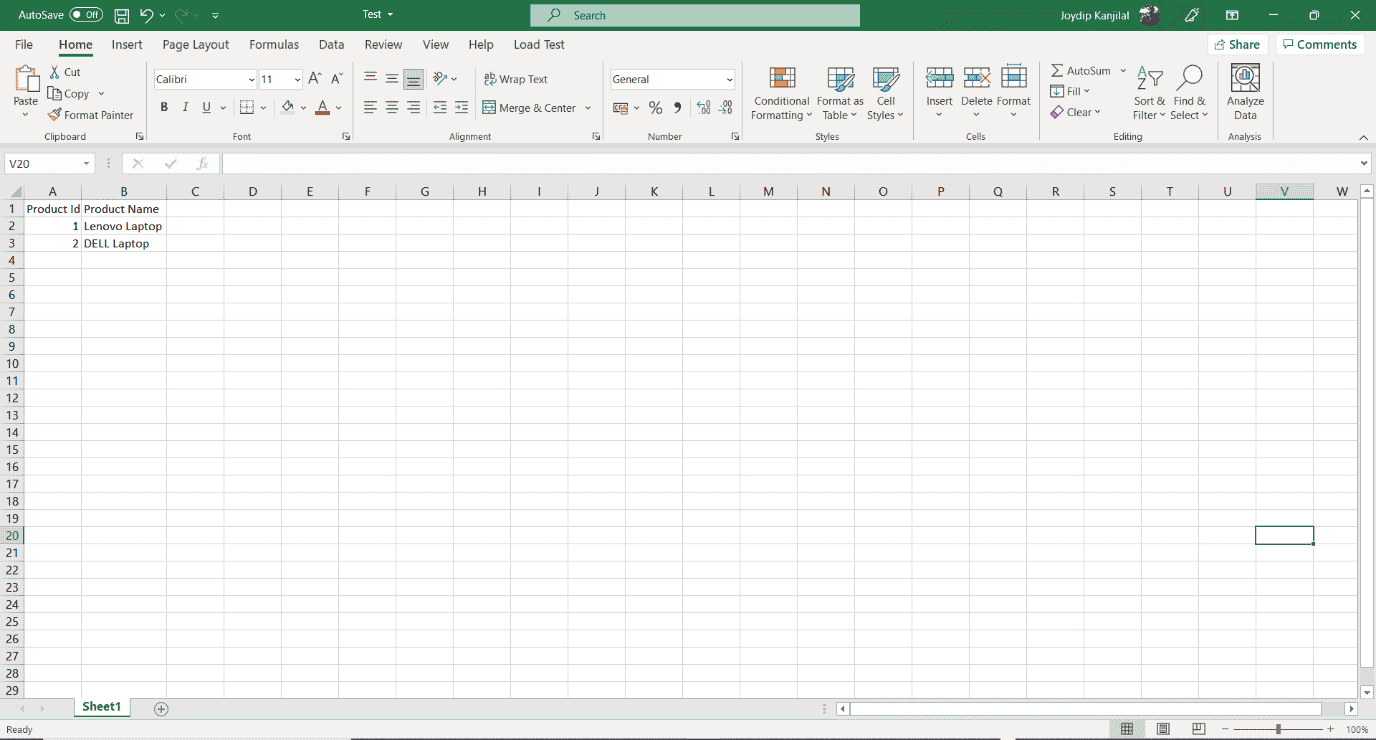
worksheet.Cells[1, 1] = "Product Id";
worksheet.Cells[1, 2] = "Product Name";
worksheet.Cells[2, 1] = "1";
worksheet.Cells[2, 2] = "Lenovo Laptop";
worksheet.Cells[3, 1] = "2";
worksheet.Cells[3, 2] = "DELL Laptop";
excelWorkBook.SaveAs(@"D:\Test.xls");
}
catch(Exception ex) {
Console.WriteLine(ex.Message);
}
finally {
if (excelApplication != null) {
excelApplication.Quit();
Marshal.FinalReleaseComObject(excelApplication);
}
}
}
When you run this code, a new Excel document will be created at the path specified with the following content inside:
Read: Working with Strings in C#.
Working with Word Interop Objects in C#
To work with Microsoft Word, you would need to create an instance of Microsoft.Office.Interop.Word.Application. Like Excel, this instance would be used to communicate with a Word document.
Microsoft.Office.Interop.Word.Application wordApplication = new Microsoft.Office.Interop.Word.Application();
The next step is to create a document instance using the Documents property of the Microsoft.Office.Interop.Word.Application instance we just created, as shown in the C# code snippet given below:
wordApplication.Documents.Add();
Next, you can create a paragraph and add some text to it using the as shown in the code snippet shown below:
var paragraph = document.Paragraphs.Add();
paragraph.Range.Text = "This is a sample text to demonstrate how Interop works...";
Then you can save the Word document using this code:
wordApplication.ActiveDocument.SaveAs(@"D:\Test.doc", WdSaveFormat.wdFormatDocument);
Here is the complete code listing showing how to work with Microsoft Word Interop Objects in C# for your reference:
using Microsoft.Office.Interop.Excel;
using Microsoft.Office.Interop.Word;
using System;
using System.Runtime.InteropServices;

namespace OfficeInteropDemoApp
{
    class Program
    {
        static void Main(string[] args)
        {
            string filename = @"D:\Test.doc";
            CreateWordDocument(filename);
            Console.Read();
        }

        static void CreateWordDocument(string filename)
        {
            Microsoft.Office.Interop.Word.Application
            wordApplication = null;
            try
            {
                wordApplication = new
                Microsoft.Office.Interop.Word.Application();
                var document = wordApplication.Documents.Add();
                var paragraph = document.Paragraphs.Add();
                paragraph.Range.Text = "This is a sample text to
                demonstrate how Interop works...";
                wordApplication.ActiveDocument.SaveAs(filename,
                WdSaveFormat.wdFormatDocument);
                document.Close();

            }
            finally
            {
                if (wordApplication != null)
                {
                    wordApplication.Quit();
                    Marshal.FinalReleaseComObject(wordApplication);
                }
            }
        }
    }
}
To read a Word document and display each word of the document you can use the following C# code:
static void ReadWordDocument(string filename)
        {
            Microsoft.Office.Interop.Word.Application
            wordApplication = null;
            try
            {
                wordApplication = new
                Microsoft.Office.Interop.Word.Application();
                Document document =
                wordApplication.Documents.Open(filename);

                int count = document.Words.Count;
                for (int i = 1; i <= count; i++)
                {
                    string text = document.Words[i].Text;
                    Console.WriteLine(text);
                }
            }
            catch(Exception ex)
            {
                Console.Write(ex.Message);
            }
            finally
            {
                if (wordApplication != null)
                {
                    wordApplication.Quit();
                    Marshal.FinalReleaseComObject(wordApplication);
                }
            }
        }
Note how the Words property of the Word application instance has been used to retrieve the words contained in the document.
C# Interop Objects Tutorial
In this article we have examined how we can access Microsoft Office Interop objects using C#. Since there is still no support for working with Interop objects in .NET Core, we have created a .NET Framework Console Application in this example.