

Introduction
Routing was first introduced with ASP.NET 3.5 SP1 as an alternative to URL rewriting and query strings. Initially routing was limited to the ASP.NET MVC framework only but with release of Microsoft Visual Studio 2010, ASP.NET 4.0 developers can now use routing with web forms also. Using routing, developers can now easily eliminate long URL’s and hide file extensions too (like .aspx). Another advantage of URL routing is that developers can now easily hide the physical path/location of web pages residing in the web server.
Routing has new features in ASP.NET 4.0 and the most significant one is URL routing enhancements. Using URL routing developers can now, very easily, decouple the URL with physical files. ASP.NET 4.0 also improves developers’ lives by providing the feature “bi-directional URL routing” with the help of components named Route Table, Page Routehandler and ExpressionBuilders. In this article I will show you an example of bi-directional URL routing using Visual Studio 2010.
Bi Directional Routing Application Demo
Using the bi-directional routing feature, developers can now generate URL’s on the fly. No need to hard code URLs in several places of your application. To demonstrate bi-directional URL routing, I have created an ASP.NET application and added an employee master database (added a SQL Server database to ASP.NET solution).
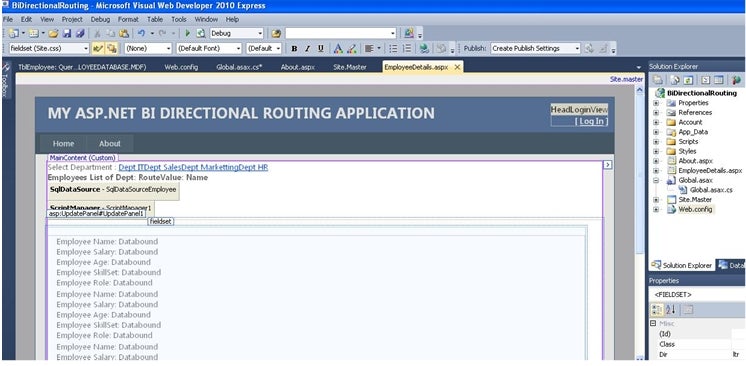
Figure 1
In this database I have created an employee details table with the following columns:
EmployeeName  Data type – nvarchar(100)
EmployeeSalary  Data type – numeric(18, 2)
EmployeeId	     Data type – int
Department	     Data type – nvarchar(100)
Age	               Data type – int
Skillset	     Data type – nvarchar(1000)
Role	               Data type – nvarchar(50)
Next, to test my bi directional URL routing application, I have also added sample data to my employee details table.

Figure 2
Now, to implement web form routes I have added Global.asax to my Microsoft Visual Studio solution and written the following code snipped in the Application_Start event. This will create a route for my employee department and I will be able to see department wise employee details by typing a short URL in my browser. Like this, http://localhost:1488/Department/IT, instead of http://localhost:1488/EmployeeDetails.aspx?Department=IT .
<code>
using System;
using System.Collections.Generic;
using System.Linq;
using System.Web;
using System.Web.Security;
using System.Web.SessionState;
using System.Web.Routing;
namespace BiDirectionalRouting
{
    public class Global : System.Web.HttpApplication
    {
        void Application_Start(object sender, EventArgs e)
        {
           // Adding Routing Information ASP.NET 4.0
            RouteTable.Routes.MapPageRoute(“Department”, “Department/{Name}”, “~/EmployeeDetails.aspx”);

        }
    }
 }
</code>
The MapPageRoute function that you can see in the above code snippet is introduced in ASP.NET 4.0. This method has 3 overloaded versions as follows.
- MapPageRoute(string routeName, string routeUrl, string physicalFile, bool checkPhysicalUrlAccess)
- MapPageRoute(string routeName, string routeUrl, string physicalFile, bool checkPhysicalUrlAccess, RouteValueDictionary defaults)
- MapPageRoute(string routeName, string routeUrl, string physicalFile, bool checkPhysicalUrlAccess, RouteValueDictionary defaults, RouteValueDictionary constraints)
The same employee department route can be achieved in ASP.NET 3.5 by writing the following code snippet in the Application_Start event.
<code>
   // Adding Routing Information ASP.NET 3.5
   RouteTable.Routes.Add (“Department”, new Route(“Department/{Name}”,new
   PageRouteHandler(“~/EmployeeDetails.aspx”)));

</code>
Next, to handle all incoming web form URL requests, I have used ExpressionBuilders introduced in ASP.NET 4.0. I have used ASP:HyperLink web controls to generate hyperlinks at runtime. The following code snippet shows how these hyperlinks are created.
<code>
  <div>
    <asp:Label ID=”Label1″ runat=”server”  text=”Select Department : ” ></asp:Label>
         <asp:HyperLink ID=”HyperLinkIT” runat=”server”
           NavigateUrl=”<%$RouteUrl:RouteName=Department, Name=IT%>”  Text=”Dept IT” />
         <asp:HyperLink ID=”HyperLinkSales” runat=”server”
           NavigateUrl=”<%$RouteUrl:RouteName=Department, Name=Sales%>”  Text=”Dept Sales” />
         <asp:HyperLink ID=”HyperLinkMarketting” runat=”server”
           NavigateUrl=”<%$RouteUrl:RouteName=Department, Name=Marketting%>”  Text=”Dept Marketting” />
           <asp:HyperLink ID=”HyperLinkHR” runat=”server”
           NavigateUrl=”<%$RouteUrl:RouteName=Department, Name=HR%>”  Text=”Dept HR” />
   </div>
</code>
Using RouteUrl (an expression builder) I have created hyperlink URL’s dynamically based on the parameter received in the request. In ASP.NET 3.5 we had to hardcode the URL’s again and again but using RouteUrl this hard coding has been eliminated. Expression builders are provided with ASP.NET 4.0 to achieve bi-directional routing. There are 2 types of expression builder named RoutURLExpressionBuilder and RoutValueExpressionBuilder.