At some point in the past few years you will have heard of REST services. You will have seen various articles talking about the merits of REST and how it’s going to save the planet from global warming in addition to being an architecture meant specifically for the web, the way it was meant to be. This is great, but there are generally very few tools and frameworks that help you create REST services and work with them. ADO.NET Data Services is therefore the messiah – it lets you expose data in a truly RESTful pattern and work with it as well without the headaches and hair loss.
This tutorial will give you an introduction to ADO.NET Data Services and touch upon various operations and features in it. To fully understand this tutorial, it would be helpful if you have some knowledge of these topics, but it’s not entirely necessary.
- A bit about the ADO.NET Entity Framework
- A bit about WCF
- A bit about REST
- A bit about JSON
- A bit about RSS feeds
You will also need
- Visual Studio 2008 with Service Pack 1
Contents
- Page 1: Introduction and setting up your first Data Service
- Page 2: Playing with querystring parameters, expressions, operations
- Page 3: Service Operations (custom functions)
- Page 4: Using GET, POST, MERGE and DELETE for CRUD operations
- Page 5: Using Linq to Data Services
- Page 6: Intercepting Data Service requests (QueryInterceptor and ChangeInterceptor)
- Page 7: Security, exceptions and tracing
What are ADO.NET Data Services?
ADO.NET Data Services generally sit on top of the ADO.NET Entity Framework and exposes entities through a web service. It exposes these entities in a RESTful way (you can view it in a browser!) which means that the entities being exposed need to be serialized to a certain format. At present, ADO.NET Data Services can expose data as JSON or an ATOM feed. In addition, it also maps the HTTP verbs to CRUD operations in the Entity Framework or your database layer.
| GET | -> | SELECT(Read) |
| POST | -> | INSERT(Create) |
| MERGE | -> | UPDATE(Update) |
| DELETE | -> | DELETE(Delete) |
When exposing your data, it also allows various querystring parameters to help sort and filter the data being viewed. Further, you can introduce custom methods for business logic to be exposed via the same URL scheme, and intercept the We’ll touch upon all of these topics in this tutorial.
Creating an ADO.NET Data Service
To actually get your first ADO.NET Data Service running, you will have a bit of work to do. For a variety of reasons, this process is also a little awkward but it gets smooth later. The steps involve creating an Entity Data Model, then creating a Data Service to sit on top of it, and then configuring your browser to display the data properly.
- Download this database script file and run it against your database.
- Once the database is ready, create a “WCF Service Application” in Visual Studio. Right-click on the project and add a new item. Add an “ADO.NET Entity Data Model” and call it PublisherModel.edmx.
- Choose “Generate from Database” and click Next.
- Supply it with the right server name, authentication, credentials, and the database name PublishingCompany. “Save entity connections settings in App.Config as” should be PublishingCompanyEntities.
- In the next dialog box, choose all of the options-tables, views, and stored procedures-and the model will be generated for you.
- You have now created an Entity Data Model, a representation of your database. You can now create an ADO.NET Data Service. Right click on your project, add a new item, and this time choose “ADO.NET Data Service” from the dialog.
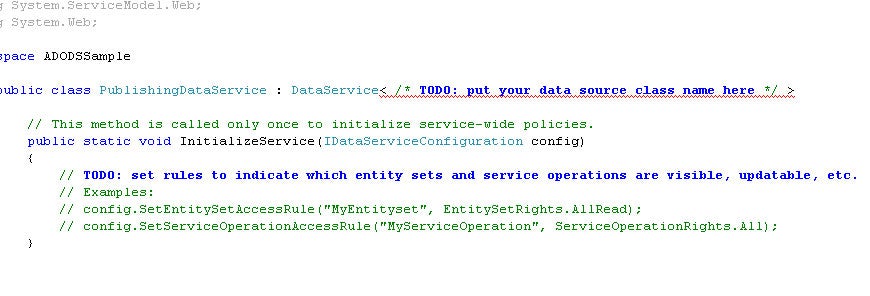
- Name it PublishingDataService.svc. Visual Studio will create a service and you will be presented with a somewhat sparse page. Have a look at the TODO and the comments on the page.
- Change the class declaration to specify the name of the entities.
- Delete the comments from the InitializeService method and paste this in:
public class PublishingDataService : DataService<PublishingCompanyEntities>
config.SetEntitySetAccessRule("*", EntitySetRights.All);
config.SetServiceOperationAccessRule("*", ServiceOperationRights.All);
What you’re essentially doing here is telling the ADO.NET Data Services that you want to work with entities from the Publishing Companies database and you also want to give full permissions on everything – this is temporary, we will touch upon this later. But you’re almost ready now! Press F5 and browse to PublishingDataService.svc, where you are presented with some XML.
If you observe the XML, you’ll notice that these are the entities or tables that the service has made available to you. All you have to do is append the entity names to the current URL, since this is RESTful.
Change the URL to
http://localhost:49958/PublishingDataService.svc/Article
The port number assigned to this application was 49958 on my PC, which I will use in my URLs. You will need to replace it with the port number assigned to you by Visual Studio.
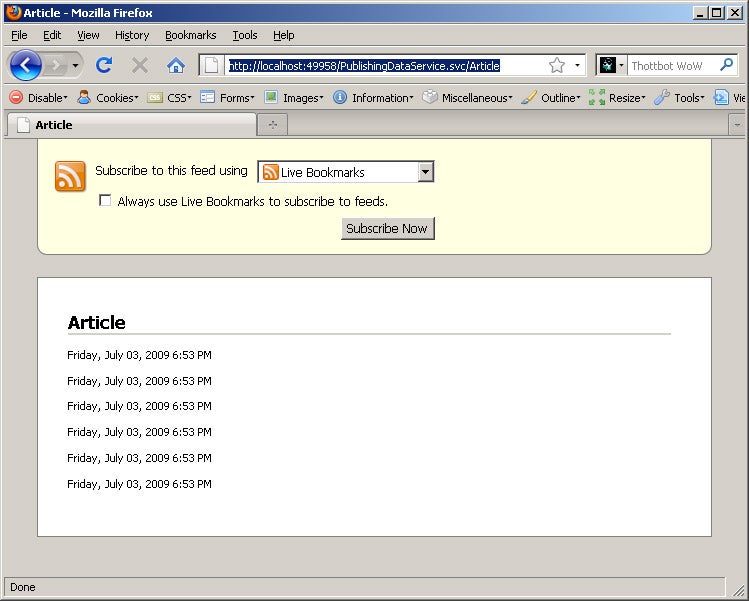
As soon as you go to the Article URL, instead of seeing data, you will most likely be presented with a page with almost no information on it. This is the default feed view in Firefox trying to “helpfully” render the page for you, and if you’re using Internet Explorer, you will get an equivalent screen.
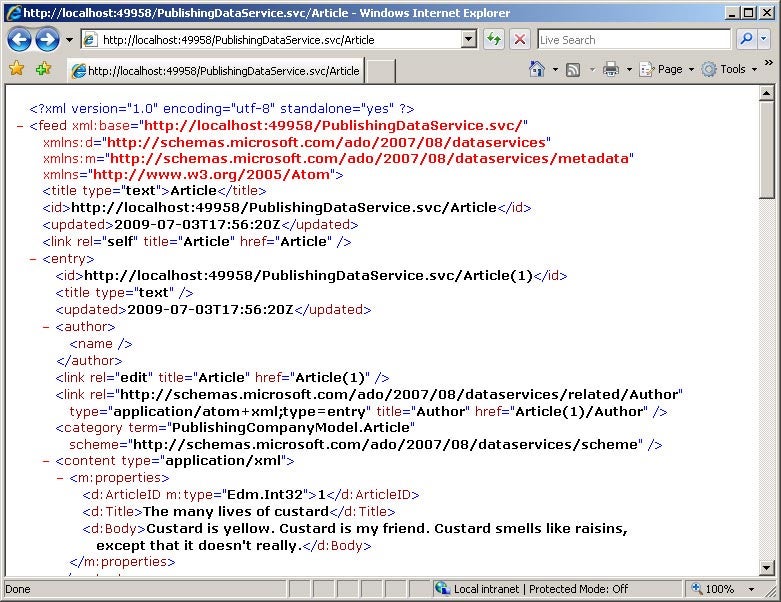
Do a view source of the page, and you will see that the page does contain all the XML data. The reason it’s not being displayed is because the data relevant to us is inside the m:properties and d:* nodes in the XML – although the source of the page indicates that this is an actual ATOM Feed, the browsers don’t know how to display this ‘custom’ data, so it simply hides it. To work with ADO.NET Data Services, you’ll need to be able to display the XML from the feeds directly. Unfortunately, in Firefox, there isn’t a straightforward way to do this, so I suggest that you use Internet Explorer for the duration of this tutorial.
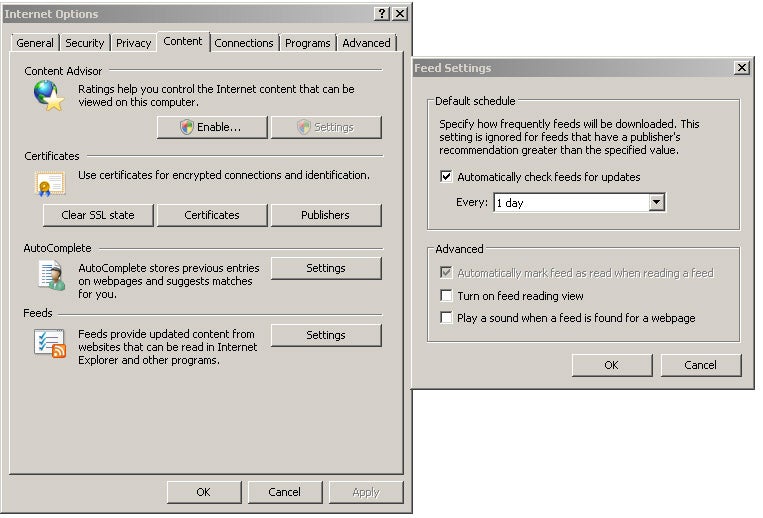
In IE, go to Tools > Internet Options > Content Tab > Feeds Section > Settings button > Uncheck “Turn on feed reading view”.
Now, if you reload the URL (in IE), you’ll be able to see the XML from the feed and all the article data in it.
That’s the end of the awkward bit, things get a lot better now. Next, you’ll play with the querystring to filter and manipulate the data.


