

With the release of Windows Vista, Microsoft is introducing many built-in features that will help the user achieve many tasks that were earlier possible only with third-party tools in Windows XP. Windows XP did not have many tools for collaboration with others and the two major utilities were Remote Desktop and Remote Assistance. They were used mostly for problem solving or by using an Administrator to assist others in their task.
Some common requirements needed for peer-to-peer networking were to share their workstations with people in remote places or demonstrate some software tools for exhibition or marketing purposes. These scenarios required the usage of commercial software that was either too costly to procure or too complex to install and configure the software to meet the requirements.
Windows Vista introduces a utility called “Windows Meeting Space,” which meets the requirements discussed above and it is freely available for anyone who owns Windows Vista Home Premium, Windows Vista Business, or Windows Vista Ultimate.
Windows Meeting Space is a peer-to-peer application that operates directly between personal computers. No server infrastructure is involved, even when you use the application over a corporate local area network (LAN) or wireless LAN (WLAN). Also, Windows Meeting Space is designed to enhance and support spontaneous and informal small-group collaboration (up to 10 concurrent users) anywhere, anytime. Lastly, Windows Meeting Space is delivered as a built-in feature of the Windows Vista operating system, and participants only need to be running Windows Vista on their PCs.
Windows Meeting Space allows a user to do the following, provided that he is on a network and the other users also have a copy of Windows Vista running.
- Have a peer-to-peer discussion either with chat or telephone.
- Share the desktop or any particular application with other users.
- Distribute handouts for discussion or share points to be raised.
- Allow one’s desktop to be remotely controlled by another user who is part of the meeting. For example, an administrator could see the errors happening on a user’s workstation and troubleshoot the problem without the need for him to travel all the way to the user’s location, which could be either in the same building or several buildings away in a corporate environment.
Windows Meeting Space works on your current network (wired or wireless). Even if you don’t have a network, Windows Meeting Space will create an ad hoc network for you as long as you have a laptop with a network card. Users don’t need special knowledge about creating or joining an ad hoc wireless network. The process of creating or joining the meeting is exactly the same as if you were joining a meeting on an infrastructure network. This ad hoc feature is perfect for collaboration when participants do not have access to a network infrastructure—for example, in a coffee shop that has no Wi-Fi hotspots, or when you have a meeting with customers who do not have corporate network access. Windows Meeting Space and its inventive use of ad hoc wireless network integration opens up a range of new and more flexible collaboration possibilities.
The first time Meeting Space is run, it will ask for information that can be used to identify the user on the network. Figures 1 and 2 show the typical setup process.
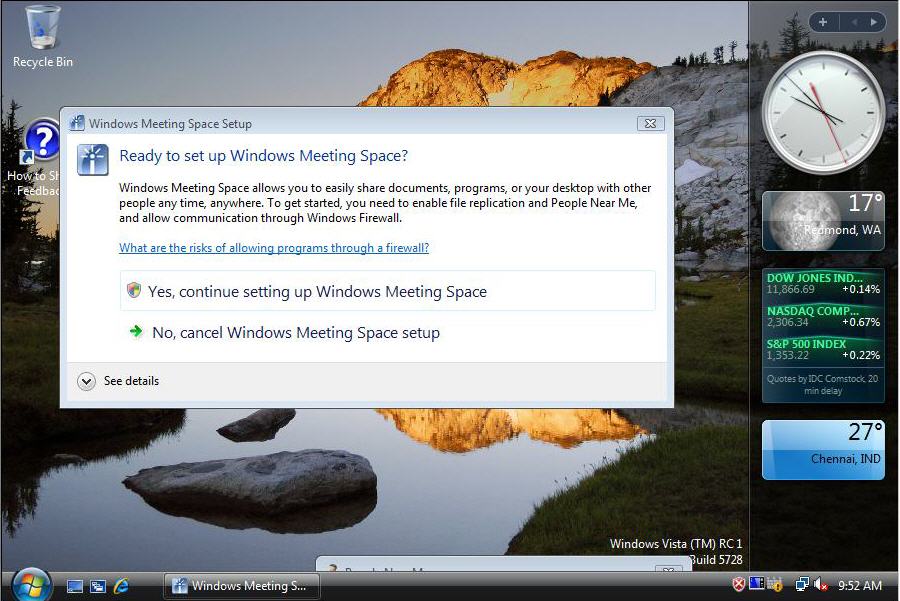
Figure 1: Setting up Windows Meeting Space
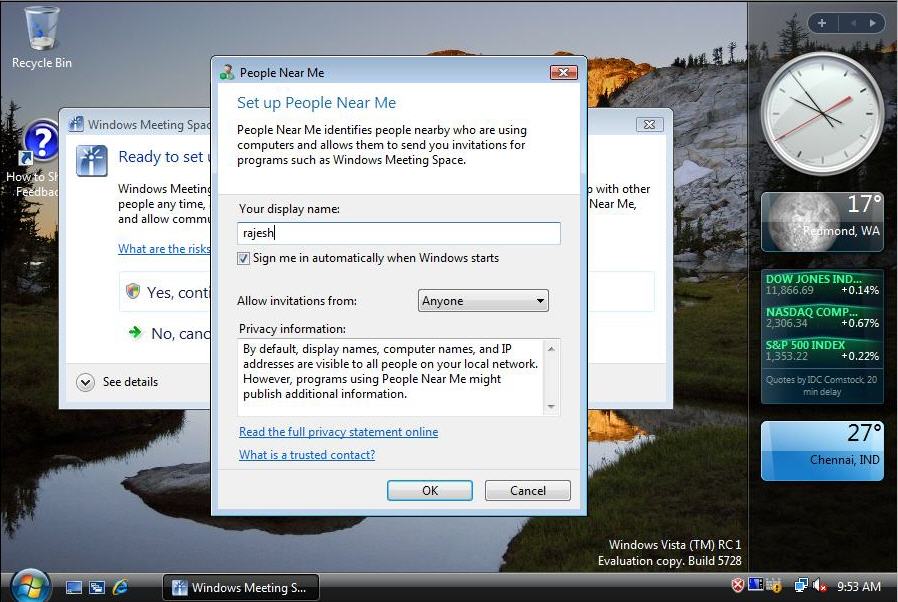
Figure 2: People Near Me Identification
After the initial information is entered and configured, the home page of Meeting Space is seen, as shown in Figure 3.
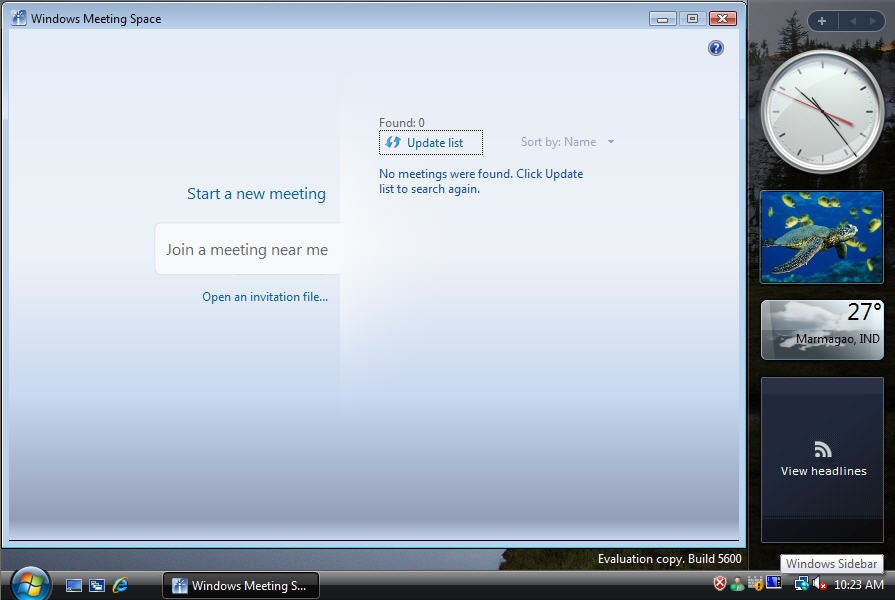
Figure 3: Windows Meeting Space Home Page
The available options are to start a new meeting or open an invitation to join an existing meeting. Because there are no meetings available for joining, you can create a new meeting and invite other users to join the meeting.
Click on Start a new meeting and you will see the screen as seen in Figure 4. Enter the name of the meeting and choose a password for security reasons. This is the password that the other users will have to enter if they want to enter the meeting. Now, the options available are to allow this meeting to be visible on the entire network as the host or not to allow the meeting to be visible on the entire network. This means that if the host allows the meeting to be visible on the network, the meeting information will appear on all the workstations running Windows Meeting Space. In some cases, the host might not want certain meetings to appear by default and would like to send out invitations to certain people for example the top management level of an organization.
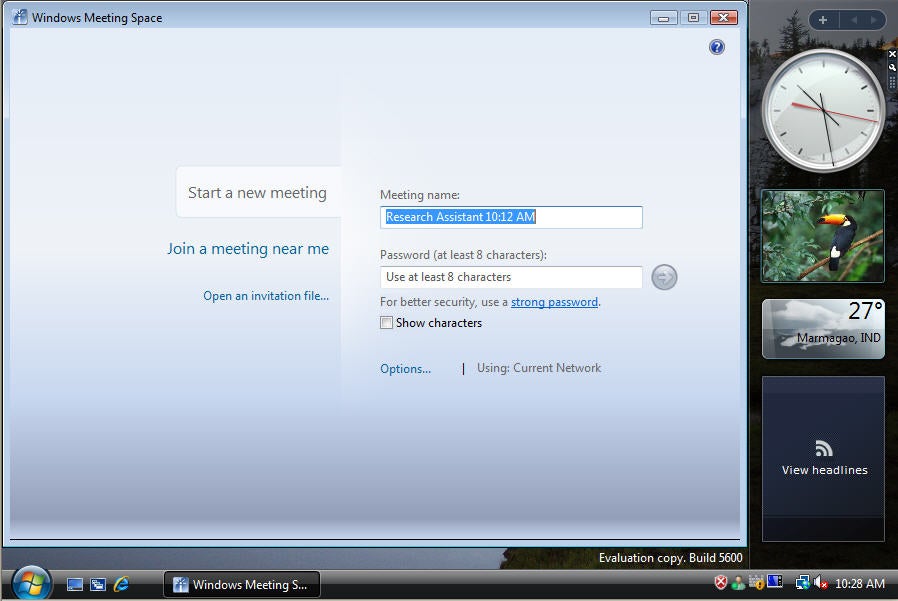
Figure 4: New Meeting Setup
Enter the name of the meeting as “Introduction to Meeting Space” and set a password. Once you are done, click on the green button; this will create the meeting. Once the meeting is created, the screen will change to that as seen in Figure 5.
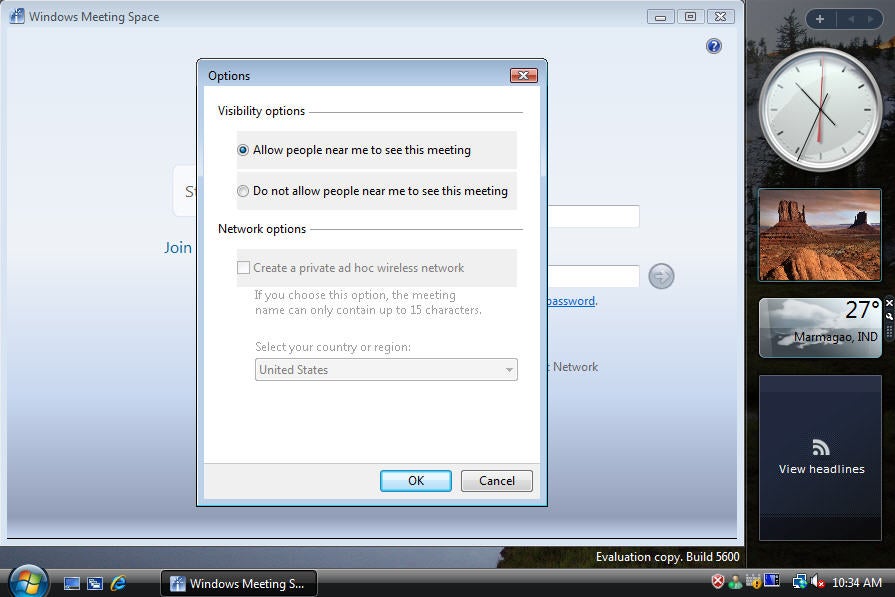
Figure 5: Setting Visibility Options
At the top, you will see the list of participants attending the meeting, a provision to invite other users, and also the option to distribute handouts to the attendees of the meeting. Think of this as how you would distribute pamphlets or notes during a meeting to all the attendees. Each attendee is free to scribble on the printout or modify the document and send it for review later. This is a digital format, so the host can distribute any type of file from his workstation and then retrieve it after the meeting. You will see more about this later.
Now, log in as another user on the network and see how to accept the invitation. Logging in from another workstation and starting Windows Meeting Space will show that the meeting is visible on his desktop. This is because the host has allowed the meeting to be visible on the entire network. The user will not be able to enter the meeting yet because it is password protected.
Assume that the host has instructed the user to attend the meeting and shared the password. When the user clicks on the link to the meeting, he is prompted for the password; this is seen in Figure 6.
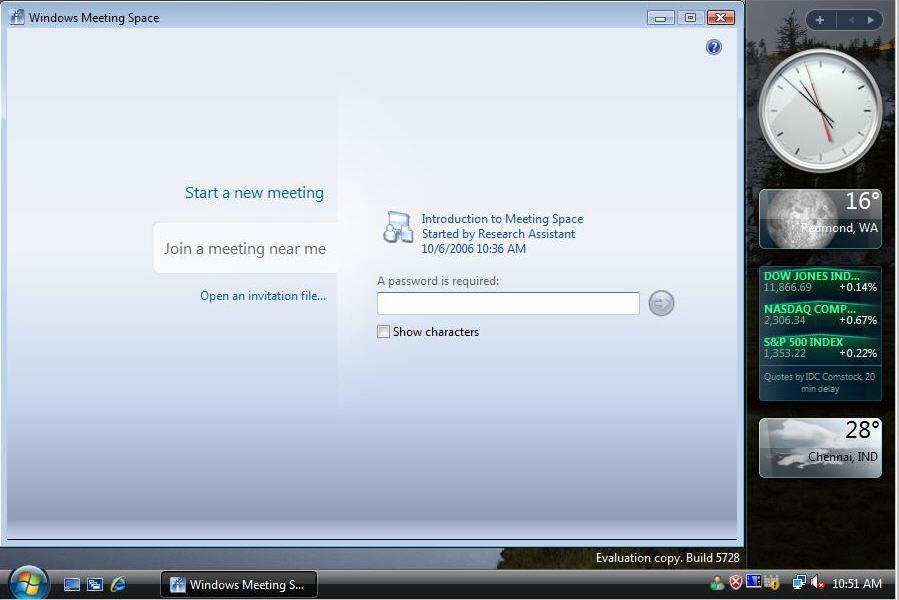
Figure 6: Meeting Home Page
Now, after the user joins the meeting, the host will be able to see the list of attendees who have joined the meeting and he is now ready to start the meeting. For the sake of simplicity, you will have this meeting as a peer-to-peer meeting between two users and use this meeting to discuss the new features of Windows Meeting Space.
Click on the icon of the white board and you will be prompted to share either the desktop or any particular application on your workstation. The prompts are seen in Figure 7 and 8.
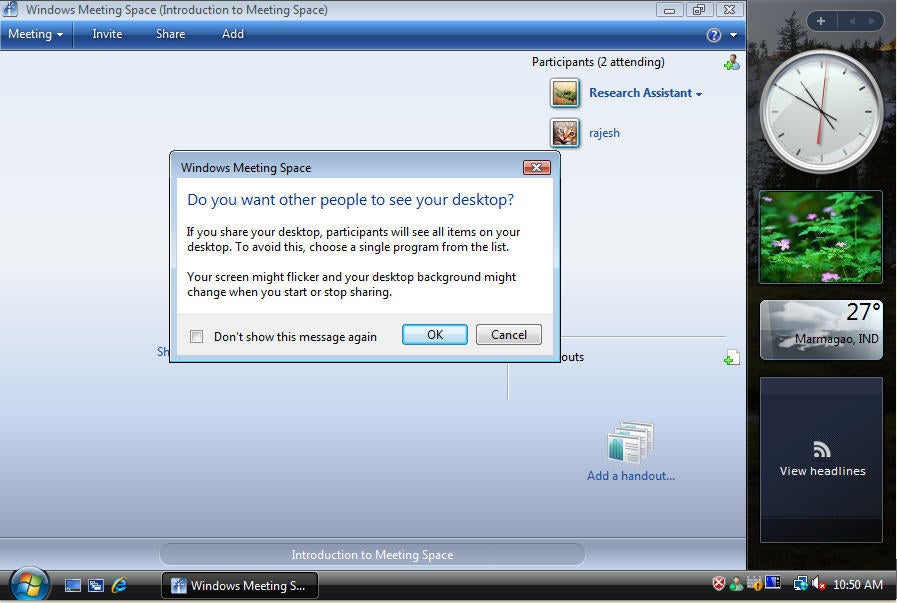
Figure 7: Joining a Meeting
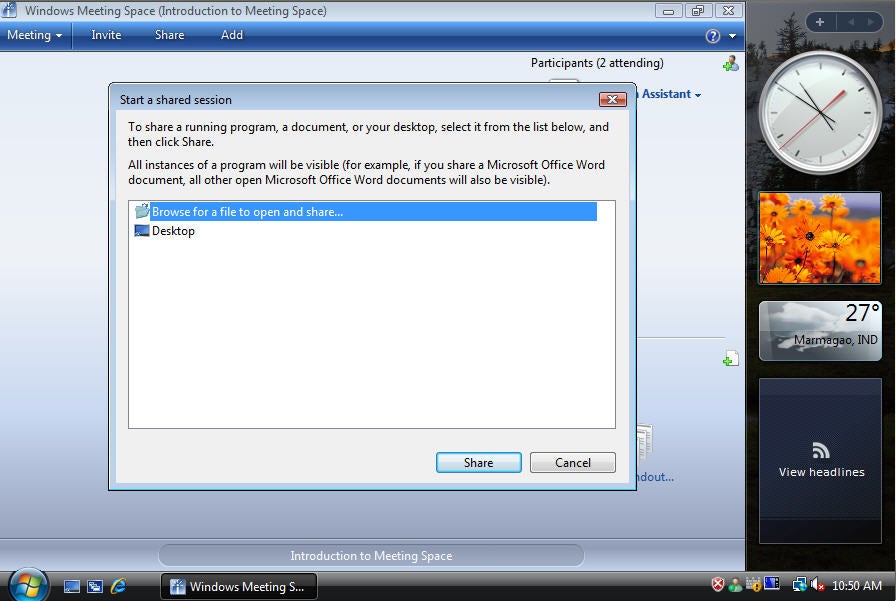
Figure 8: Desktop Visibility Options
Share the desktop so the host will be able to share his desktop with the other users. This will allow the other participants of the meeting to see his desktop and interact with each other. Now, when the host shares his desktop with others, this is how the screen will look on the other participants’ desktops. You can see this in Figure 9.
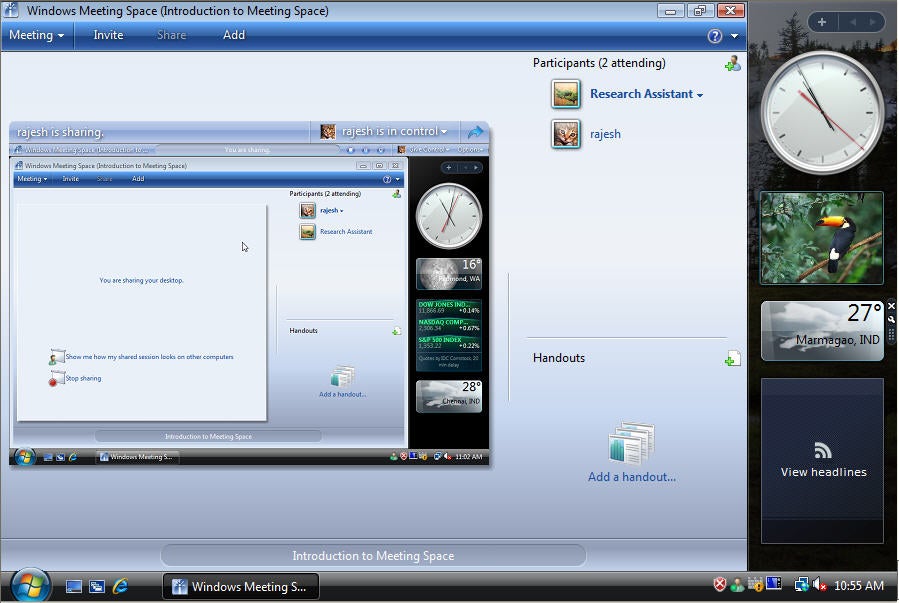
Figure 9: Starting a Shared Session
At the top of the window, you will see the name of the user to whom the application belongs to as well as the indicator of who is in control of the application. The blue arrow will allow the viewer to maximize the screen so that he can see more of the shared desktop. When the shared application is maximized, you will see that it covers the full screen and looks like the host’s own screen and feels as if you are working on your own desktop. But, the icons and indicators at the top of the screen allow the user to see that it is not his own desktop but it is the host’s shared desktop. By default, the wallpapers are not shared to conserve bandwidth.
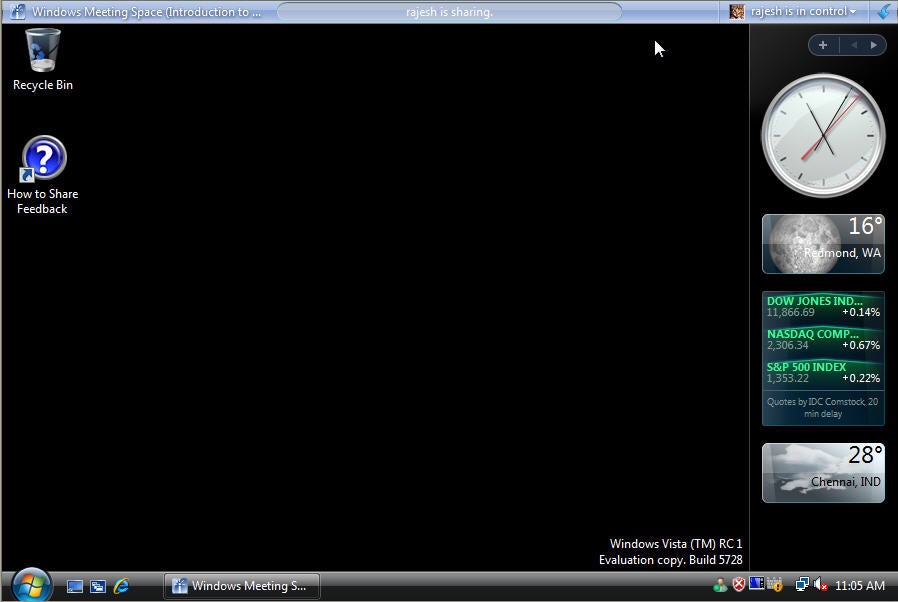
Figure 10: Sharing the Desktop
Conclusion
There are several other features that also can be implemented with Meeting Space; the possibilities are endless. I have just given an overview of what Meeting Space can do and how it helps eliminate the need for expensive collaboration software as well as reduce the complexity for training people using third-party software.
About the Author
M. Rajesh is from India and is a software developer working in a software firm in India. He received a Masters Degree in Mathematics and works on .NET development.
M. has received the Microsoft Most Valuable Professional Award from Microsoft for the past three years and was awarded in the following disciplines: .NET in 2003 and for Windows Shell in 2004 and 2005.