


How many times have you needed to create a backend service to support your latest web project? For many people, the answer to this is, quite a few! So how do you go about doing that then?
To build a new service, you can start a new windows service project in Visual Studio. Of course, you then get to try to make sense of the stubbed out code and instructions on MSDN. Or, you can forgo all of that and just do what everyone else is doing, create a WCF service. If you are feeling adventurous, you might decide to tackle “SOAP” and other heavyweight SOA based protocols head on. There’s at least ten ways that I can think of right now to create a backend service, and all of them require some degree of further learning.
Windows Communication Foundation (WCF) for example. While it can do a lot, it takes a huge learning curve to figure out all the options, and then what if your service not only has to provide an endpoint to web clients, but to desktop clients and apps too. What if this service has to run on a machine where no IIS or other web-server software is installed or even allowed? The only option you then have is a standard traditional win32 service application, but these things are not easy to write.
There are all sorts of hooks you have to implement, and logging that’s very important since a service app can’t interact with the desktop; oh and we mustn’t forget debugging either, you know. Install, start, Test, Fail, Examine logs, Uninstall, re-code then repeat, rinse and re-cycle!
Well all of that was before you discovered ‘Topshelf’
What’s Topshelf?
Isn’t the top shelf where all of the adult stuff is kept? Indeed it is, and Topshelf is a very grown up toolkit that makes your life so much easier when it comes to writing Windows services. Most of you will have by now written at least one ‘Hello World’ console app, the ones where everything is just white text on a black background with no windows, buttons or mice.
Topshelf makes writing a windows service as easy as writing one of those; nothing complicated at all. You can debug, single step, profile and all the usual stuff without ever having to install the service. You get an installer built into your app for when it’s ready to be installed, and ALL the messy stuff needed to interface with the ‘SCM’ (Service Control Manager) is taken care of for you. All you need to do is write a couple of classes, install a NuGet package and bob’s your uncle.
Getting Started with Topshelf
Fire up Visual Studio, and go File->New Project. Start a new ‘Console Application’ project. I’m using C# but you can use any language you want, it’s not important.
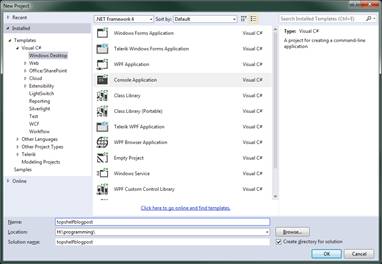
New Project
Once the project has been created, fire up your package manager UI or console (whichever you prefer) and look for and install the ‘Topshelf’ package.
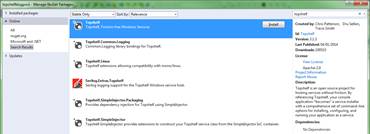
Install the Topshelf Package
You’ll likely see others too, but we’ll not be covering these in this post. Go ahead and hit the install button, and wait for NuGet to do its thing.
Building Your Backend Service
The first thing you need to do is to stub out the service entry point. To do this, you need to add a call to Topshelf to your normal ‘Main’ runtime entry point in your console app. For this demo, I used the following:
using System;
using System.Linq;
using Topshelf;

namespace topshelfblogpost
{
  class Program
  {
    static void Main(string[] args)
    {
      HostFactory.Run(x =>
      {
        x.SetDescription("Demonstration service for .NET nuts and bolts blog post.");
        x.SetDisplayName("Demo Service");
        x.SetServiceName("demoservice");
        x.RunAsLocalSystem();
        x.StartManually();
        x.Service<MyService>(c =>
        {
          c.ConstructUsing(() => new MyService());
          c.WhenStarted(d => d.StartService());
          c.WhenStopped(d => d.StopService());
        });
      });

    }
  }
}
Most of the code is the same as for a normal console app, the Topshelf specific part starts with ‘HostFactory.Run’, the ‘SetDescription’ call is used to set the services description, and the ‘SetDisplayName’ sets the name to be displayed in the SCM control panel applet.
The ‘SetServiceName’ sets the actual service call sign, normally used when doing ‘net start xxx’ and ‘net stop xxx’ from the command line.
The other options ‘RunAsLocalSystem’, sets the authenticated user name to ‘System’ (there are also others, such as ‘NetworkService’ here) and ‘StartManually,’ which means the service is installed in a manual starting mode (that is you will have to go into the SCM control panel and click start, or use net start, to start it).
The ‘Service’ portion of the object is where you set the interface to your actual service object. This will be the part of your app that actually does the work. The ‘Start’ routine is called when the service is started by the SCM, the ‘Stop’ routine is called when your service is stopped.
Again, like above there are others too such as ‘AfterStarting’, ‘WhenPaused’, ‘WhenAborted,’ all which map to corresponding actions detailed in the MSDN Win32 service guide. For now, we’ll only be using Start & Stop as that’s all we are really interested in.
Continue by adding a new class to your project. Right click on your project name, and add->new item, then select a class, we’ll call this class ‘MyService’.
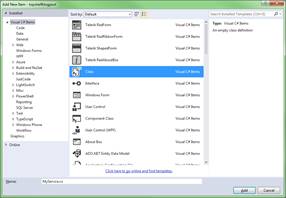
Add New Item
To this new class, stub out a ‘StartService’ and a ‘StopService’ method call, so that the class looks like the following:
using System;
using System.Linq;

namespace topshelfblogpost
{
  class MyService
  {
    public void StartService()
    {
    }

    public void StopService()
    {
    }

  }
}
At this point, your service is actually now ready to run; if you press F5 to start debugging, you’ll see that it’ll fire up into a state ready to interact with the SCM. If you put break points at your start and stop methods you’ll also see that when you run, they get called at the appropriate times.
When you’re done, press ‘ctrl+c’ to abort the running of your service.
Making Your Service Useful
At this point, you’re likely saying that this is cool, but it is not very useful. You’re absolutely correct. It’s not very useful.
The thing now is that you have a skeleton app that can run any regular .NET code you wish, in the background, which can be made to start-up when the computer is restarted and all manner of things.
You can use one of the huge number of network toolkits out there and add socket capabilities to your app, you can make it talk to a database or create and fire up a timer, which then performs a function on a schedule, you can also trap system events such as ‘Hardware Added’ & ‘Hardware Removed’ and create a monitor that watched for USB key drives and such like; the list is endless.
To wrap things up however, I’m quickly going to add a restful end point using the ‘NancyFX’ toolkit; if you need to put together JsonWeb services in a mega quick amount of time, then these two guys are simply the best.
Head back to NuGet and install ‘Nancy’ and ‘Nancy.Hosting.Self’

Install Nancy
![]()
Install Nancy.Hosting.Self
Once you have the two extra NuGet packages installed, go to the new class you created with your ‘Start’ and ‘Stop’ methods, and update your class file so that it looks like the following code:
using System;
using System.Linq;
using Nancy.Hosting.Self;

namespace topshelfblogpost
{
  class MyService
  {
    private NancyHost _thisHost;

    public void StartService()
    {
      string myUri = "http://localhost:8888/";

      _thisHost = new NancyHost(new Uri(myUri));
      _thisHost.Start();
    }

    public void StopService()
    {
      _thisHost.Stop();
    }

  }
}
This code will fire up a Nancy self hosting instance, listening on port 8888 of your localhost , even on servers that are opening this port to the outside world; I’ve never needed to change this to anything other than ‘localhost’ . You may however get a security error when you try to run the app, this is nothing to do with you doing anything wrong, but it’s to do with the built in server security under Windows.
It’s simple to solve though, just click on run, fire up an administrator enabled command console (usually by right clicking on cmd in start->accessories and running as administrator) , then type the following into the command prompt and press return:
netsh http add urlacl url=http://+:80/MyUri user=DOMAIN\user
Make sure you replace DOMAIN\User with the computer name and domain the service will be running on, and the +:80 with the correct port number (+:8888) for our example.
Once you’ve done the above, all you then need to add are your route modules that provide your restful end points, for example, add a new class to your project and add the following:
using System;
using Nancy;
using System.Linq;

namespace topshelfblogpost
{
  public class Root: NancyModule
  {
    public Root()
    {
      Get["/"] = _ => { return "Hello world"; };
    }

  }
}
When this is run, and you point your browser at ‘http://localhost:8888/’ you should get the string ‘Hello world’ returned to you. If you explore the documentation for Nancy, you’ll see that there’s much more you can do. You can return the output as Json/Xml or anything else. You can set web server headers, cookies and much, much more, which unfortunately we don’t have time to explore here now.
Going Forward
If you have any ideas for posts for this series, please reach out to me on twitter ‘@shawty_ds’ or come and find me in the Linked .NET users group (Lidnug) on the Linked-In social network that I help run, and I’ll do my best to include them.