

By Anna Dolbina
Introduction
When it comes to developing an application for a POS, information touchscreen, or self-help kiosk, the choice is often between using specialized kiosk development platforms or relying on a familiar technology stack, adding some customization to turn the app to kiosk mode.
Browser-based kiosk applications are a popular choice for a number of reasons. Here are a few:
- It is easy to make them look good with a modern UI, using HTM5/CSS3 and JavaScript.
- Such apps are faster and easier to maintain and update, thus reducing support costs.
- If the company already has a feature- and resource-rich corporate Web site, the cost of adapting it to kiosk mode is less than building a duplicate standalone kiosk application from scratch.
In this tutorial, I’ll describe how to create a C#/VB.NET kiosk application that runs on Windows and displays modern Web content using WPF or WinForms and the browser control based on the Chromium engine—DotNetBrowser.
Implementing a Simple Kiosk Application
1. Defining Requirements
The essential feature of the kiosk application is its ability to prevent users from switching to other applications running in the environment. Access to the desktop or file system should be limited to administrators only.
To achieve this, you need to display an undecorated full-screen window that will not allow end users to interact with other software installed and running in this environment.
To create a kiosk application using any UI toolkit, follow three simple steps:
- Create a window.
- Make it full screen/maximized, non-resizable, and topmost.
- Remove window decorations such as title, window borders, and so forth.
The functionality to complete these steps is available both in WPF and WinForms.
2a. Building a Kiosk Application with WinForms
First, create a Windows Forms application project as usual:
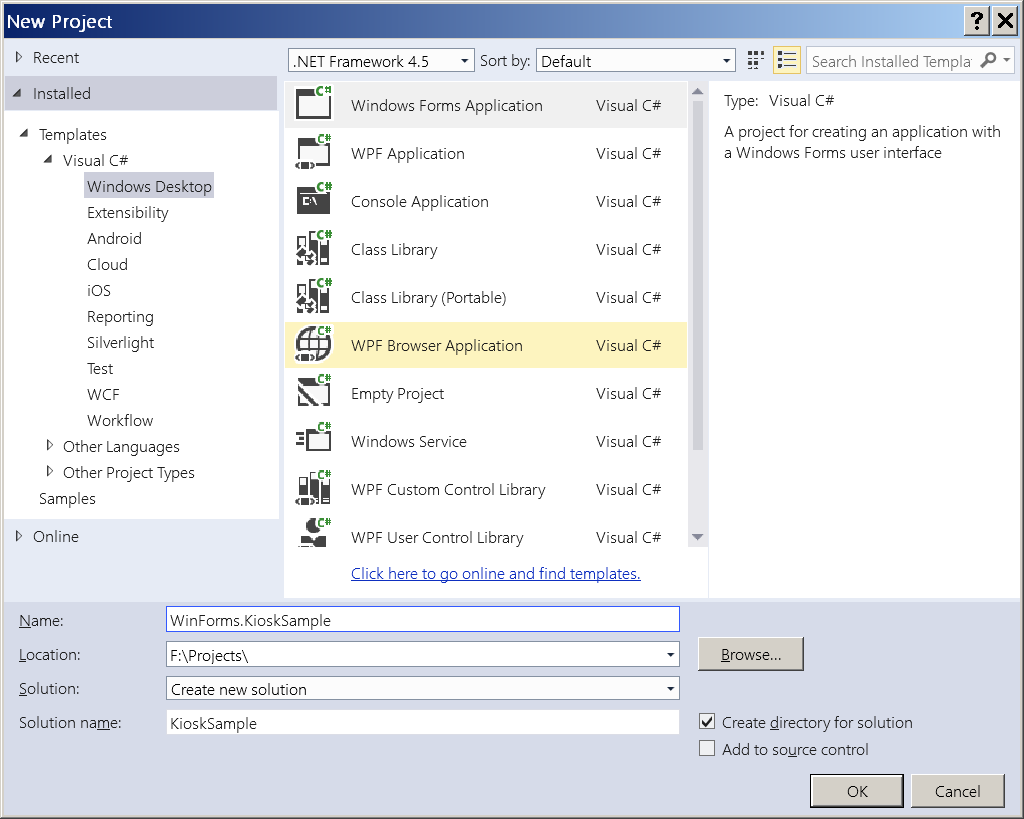
Figure 1: Creating a new Windows Forms application
A form named Form1 will be created automatically.
To make this form behave as a kiosk application, you can handle its Load event as shown in the following code:
      private void Form1_Load(object sender, EventArgs e)
      {
         this.TopMost = true;
         this.FormBorderStyle = FormBorderStyle.None;
         this.WindowState = FormWindowState.Maximized;
      }
To bring in the functionality that allows displaying Web content, we’ll make some modifications to the Form1 source code. In this example, we will add two buttons: Google and .NET. The Google search page and the .NET homepage will be displayed when the user presses the corresponding button.
In the following sample, a FlowLayoutPanel with two buttons is added to the form.
using System;
using System.Windows.Forms;

namespace WinForms.KioskSample
{
   public partial class Form1 : Form
   {
      private TableLayoutPanel tlp;
      private Button button2;
      private Button button1;

      public Form1()
      {
         InitializeComponent();
         tlp = new TableLayoutPanel();
         tlp.Dock = DockStyle.Fill;
         tlp.ColumnCount = 1;
         tlp.RowCount = 2;
         tlp.ColumnStyles.Add(new
            ColumnStyle(SizeType.Percent, 100));
         tlp.RowStyles.Add(new
            RowStyle(SizeType.AutoSize));
         tlp.RowStyles.Add(new
            RowStyle(SizeType.Percent, 100));
         Controls.Add(tlp);

         FlowLayoutPanel flp = new FlowLayoutPanel();
         flp.FlowDirection = FlowDirection.LeftToRight;
         flp.Dock = DockStyle.Fill;
         flp.AutoSize = true;

         button1 = new Button();
         button1.Text = "Google";
         button1.Click += button1_Click;
         flp.Controls.Add(button1);

         button2 = new Button();
         button2.Text = ".NET";
         button2.Click += button2_Click;
         flp.Controls.Add(button2);

         tlp.Controls.Add(flp, 0, 0);
      }

      private void button2_Click(object sender, EventArgs e)
      {

      }

      private void button1_Click(object sender, EventArgs e)
      {

      }

      private void Form1_Load(object sender, EventArgs e)
      {
         this.TopMost = true;
         this.FormBorderStyle = FormBorderStyle.None;
         this.WindowState = FormWindowState.Maximized;
      }
   }
}
These buttons will be used to load URLs into the Browser control. Although we can use a built-in WebBrowser control, its ability to render sophisticated Web pages is fairly limited due to restrictions of the underlying Internet Explorer engine. Instead, we can use a Chromium-based DotNetBrowser library. DotNetBrowser allows .NET developers to embed an advanced browser control into a .NET application to display Web pages built with HTML5, CSS3, JavaScript, Flash, Silverlight, and so on.
After you have added references to the DotNetBrowser assemblies and installed your licence, you can add a Browser control to your form. The modified sample will look like this:
using DotNetBrowser.WinForms;
using System;
using System.Windows.Forms;

namespace WinForms.KioskSample
{
   public partial class Form1 : Form
   {
      WinFormsBrowserView WebBrowser1;
      private TableLayoutPanel tlp;
      private Button button2;
      private Button button1;

      public Form1()
      {
         InitializeComponent();
         tlp = new TableLayoutPanel();
         tlp.Dock = DockStyle.Fill;
         tlp.ColumnCount = 1;
         tlp.RowCount = 2;
         tlp.ColumnStyles.Add(new
            ColumnStyle(SizeType.Percent, 100));
         tlp.RowStyles.Add(new
            RowStyle(SizeType.AutoSize));
         tlp.RowStyles.Add(new
            RowStyle(SizeType.Percent, 100));
         Controls.Add(tlp);

         FlowLayoutPanel flp = new FlowLayoutPanel();
         flp.FlowDirection = FlowDirection.LeftToRight;
         flp.Dock = DockStyle.Fill;
         flp.AutoSize = true;

         button1 = new Button();
         button1.Text = "Google";
         button1.Click += button1_Click;
         flp.Controls.Add(button1);

         button2 = new Button();
         button2.Text = ".NET";
         button2.Click += button2_Click;
         flp.Controls.Add(button2);

         tlp.Controls.Add(flp, 0, 0);
         WebBrowser1 = new WinFormsBrowserView();
         WebBrowser1.Dock = DockStyle.Fill;
         tlp.Controls.Add(WebBrowser1, 0, 1);
      }

      private void button2_Click(object sender,
         EventArgs e)
      {
         WebBrowser1.Browser.LoadURL("http://dot.net");
      }

      private void button1_Click(object sender,
         EventArgs e)
      {
         WebBrowser1.Browser.LoadURL("https://www.google.com");
      }

      private void Form1_Load(object sender, EventArgs e)
      {
         this.TopMost = true;
         this.FormBorderStyle = FormBorderStyle.None;
         this.WindowState = FormWindowState.Maximized;
      }
   }
}
As you can see, pressing the buttons will lead to loading URLs into the Browser control.
The sample kiosk application is ready to be run! Let’s try it out:

Figure 2: Checking the sample kiosk
Figure 2 demonstrates how the application looks right after loading is finished.
Upon pressing the “Google” button, you’ll get the following page displayed:
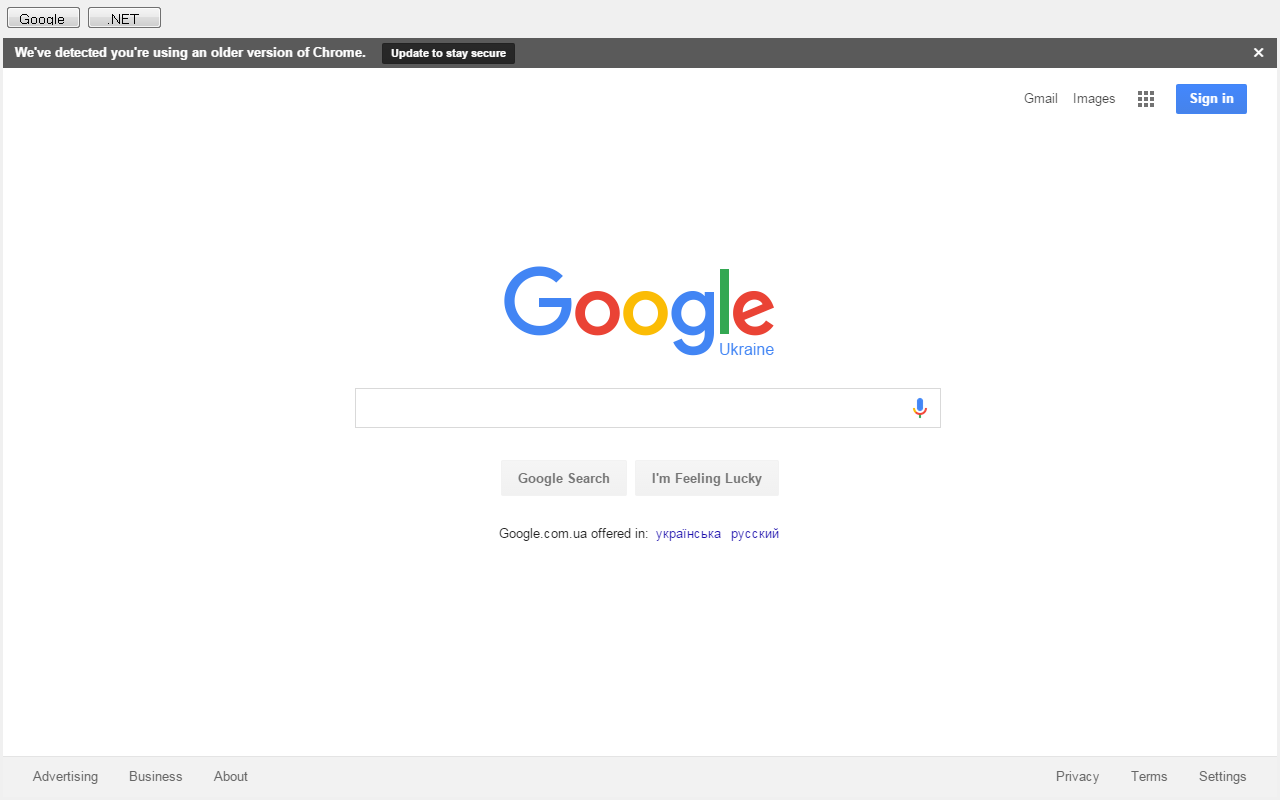
Figure 3: After pressing the “Google” button
If we press the “.NET” button, the following Web site will be loaded:
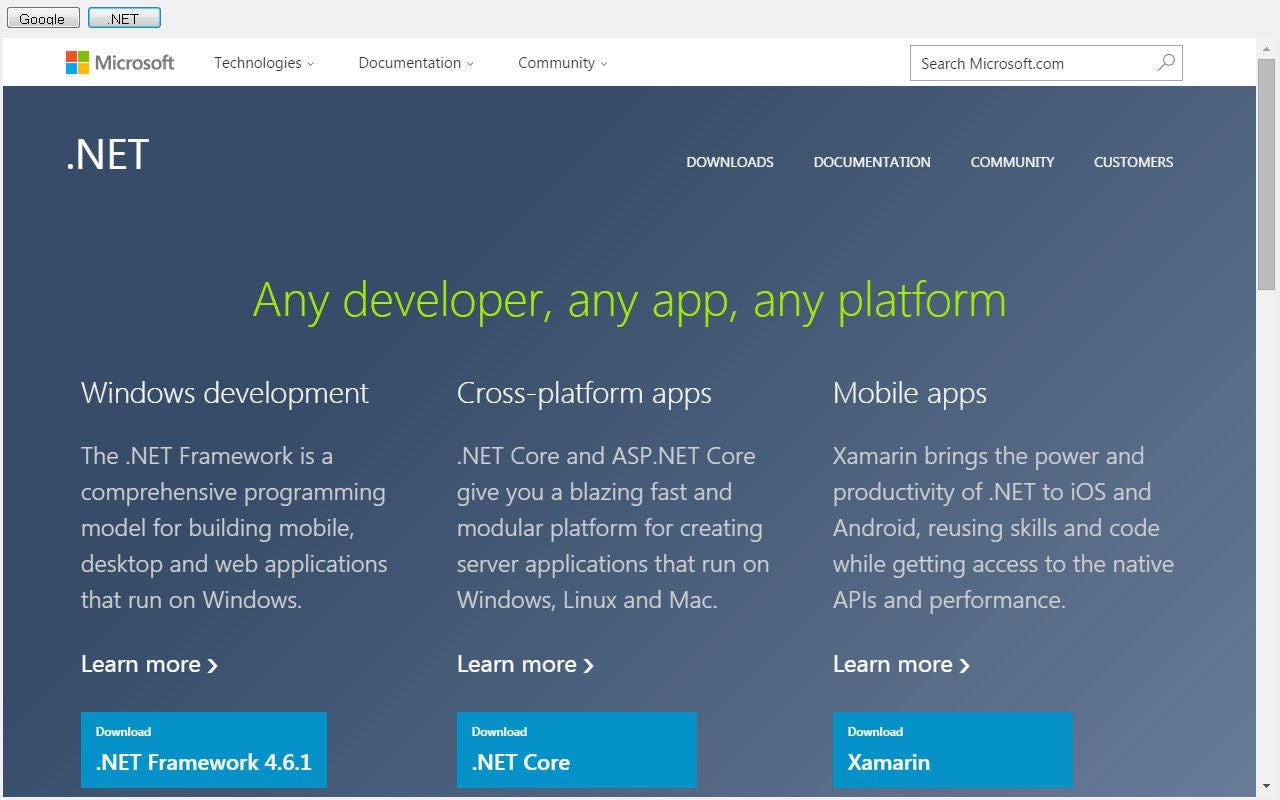
Figure 4: After pressing the “.NET” button
As you can see, DotNetBrowser easily can be used to build a simple kiosk application. Now you can load your own Web page, add event handlers to the Browser control,, and modify its default behavior to meet your requirements.
Now, let’s take a look at another popular .NET UI framework—WPF.
2b. Building a Kiosk Application with the WPF Framework
The steps to create a kiosk application in WPF will be similar to the ones described for WinForms. First of all, we’ll create a simple WPF window that behaves as a kiosk application:
<Window x_Class="WPF.KioskSample.MainWindow"

   xmlns_x="http://schemas.microsoft.com/winfx/
      2006/xaml"
   Title="MainWindow" WindowStyle="None"
      WindowState="Maximized"
      Topmost="True" ResizeMode="NoResize"
      ShowInTaskbar="False">
   <Grid Name="mainLayout">
      <wpf:WPFBrowserView Name="WebBrowser1"/>
   </Grid>
</Window>
Now that we have a base, let’s add to it the ability to display Web content. In this sample, we’ll add the same two buttons as in the WinForms example:
Sample XAML
<Window x_Class="WPF.KioskSample.MainWindow"

   xmlns_x="http://schemas.microsoft.com/winfx/2006/
      xaml"
   xmlns_wpf="clr-namespace:DotNetBrowser.WPF;
      assembly=DotNetBrowser"
   Title="MainWindow" WindowStyle="None"
      WindowState="Maximized"
      Topmost="True" ResizeMode="NoResize"
      ShowInTaskbar="False">
   <Grid Name="mainLayout" Background="#FFCCCCCC"
          AllowDrop="True">
      <Grid.RowDefinitions>
         <RowDefinition Height="58*"/>
         <RowDefinition Height="477*"/>
      </Grid.RowDefinitions>
      <wpf:WPFBrowserView Name="WebBrowser1"
         Grid.Row="1"/>
      <Button Content="Google"
         HorizontalAlignment="Left"
         Margin="100,22,0,0" VerticalAlignment="Top"
         Width="138"
         Height="27" Click="Button_Click_1"/>
      <Button Content=".NET" HorizontalAlignment="Left"
         Margin="261,21,0,0" VerticalAlignment="Top"
         Width="138"
         Height="27" Click="Button_Click"/>
   </Grid>
</Window>
C# Code
using System.Windows;

namespace WPF.KioskSample
{
   /// <summary>
      /// Interaction logic for MainWindow.xaml
   /// </summary>
   public partial class MainWindow : Window
   {
      public MainWindow()
      {
         InitializeComponent();
      }

      private void Button_Click(object sender,
         RoutedEventArgs e)
      {
         WebBrowser1.Browser.LoadURL("http://dot.net");
      }

      private void Button_Click_1(object sender,
         RoutedEventArgs e)
      {
         WebBrowser1.Browser.LoadURL("https://www.google.com");
      }

   }
}
When you run this application and press the .NET button, you will get the following output:
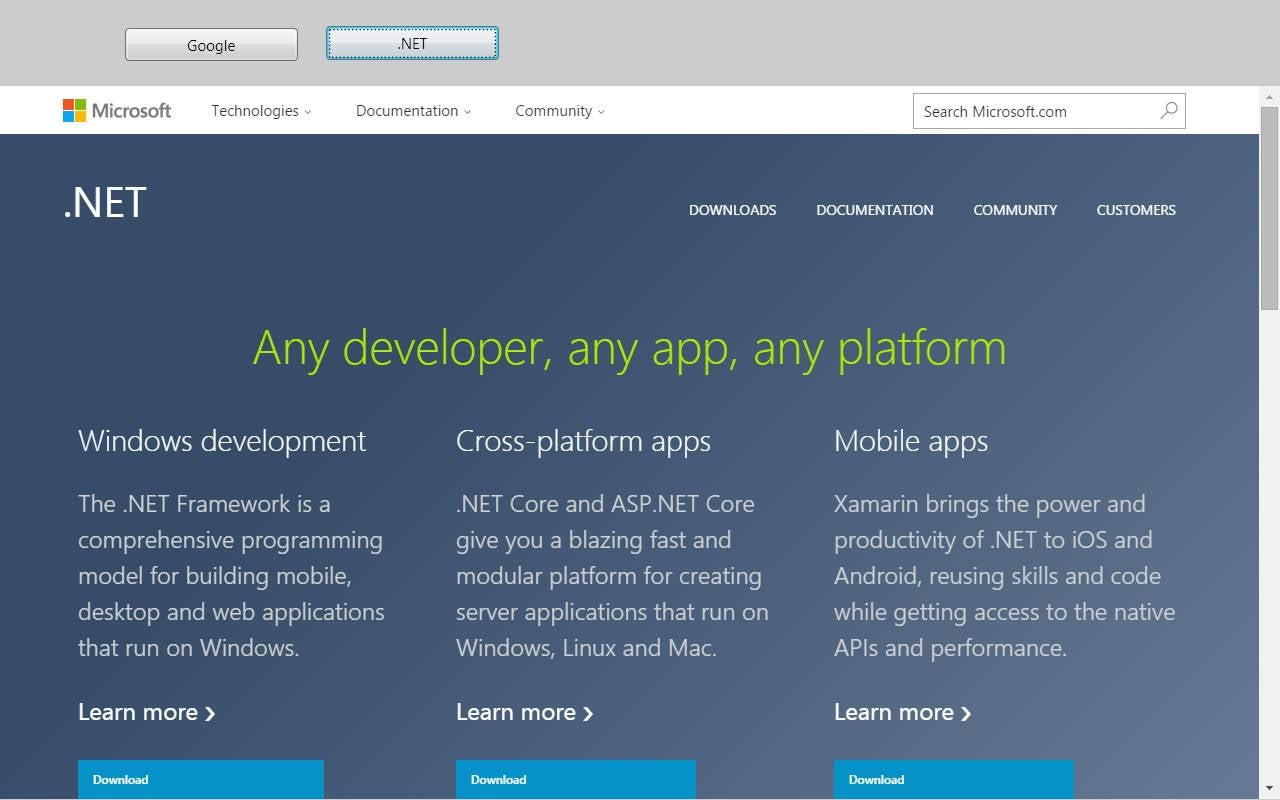
Figure 5: After pressing the “.NET” button a second time
WPF, WinForms, and DotNetBrowser support touch screens; therefore, your kiosk application can be deployed in the environment with touch screen support as well as on locked-down desktop stations.
Key Takeaways
With this approach, based on WinForms or the WPF framework plus DotNetBrowser, you can build kiosk applications that allow end users to interact with the Web based content. You can display different Web sites, Web portals, online help systems, and the like. This method will be especially helpful if your kiosk application must satisfy the following conditions:
- Must run on the Windows platform.
- Must be built with WPF or WinForms frameworks.
- Must display HTML5/CSS/JavaScript Web content and Web pages online/offline.
- Must support touch screens.