

Microsoft teamed up with MXChip to build a brand new IoT development board with a ton of features. This tiny device comes with WiFi, a 128X64 OLED display, an on-board microphone plus infrared, and pressure, motion, humidity, and temperature sensors. This little board even includes a magnetometer and gyroscope for sensing orientation. All you add is a micro-USB power cord and you’re in business. Best of all, you can get one from three different distributors for $39.00 US plus shipping. It’s even available on Amazon!
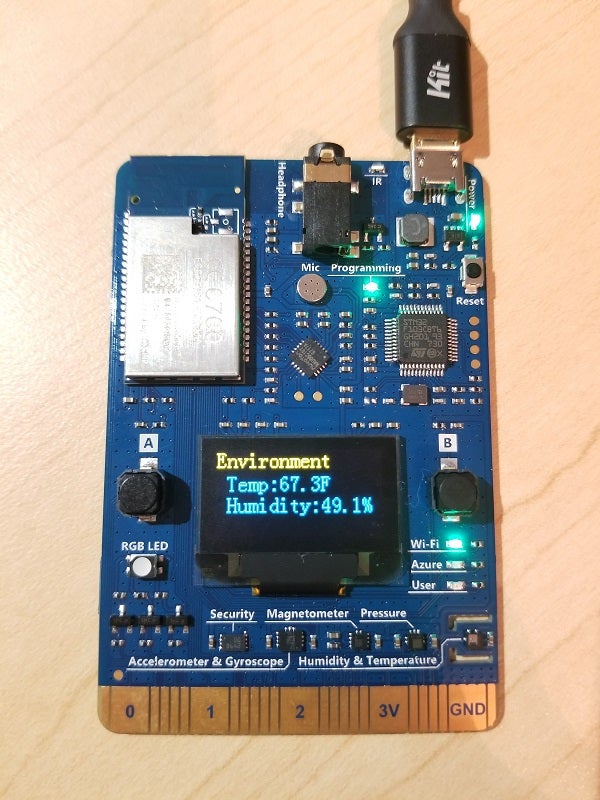
Figure 1: The MXChip device
The primary objective driving the IoT Dev Kit was to provide an inexpensive piece of hardware with a wide range of sensors to allow developers to quickly get up to speed with the Internet of Things. A key piece of the puzzle is the Azure platform and the wide range of services available to support IoT devices. Microsoft has incorporated an IoT Hub to act as the central focus point for all things IoT.
Setup and Configuration
When you initially power up the device, you have to put it in AP mode to configure the WiFi. Microsoft has a complete getting started document to lead you through the process, so we won’t repeat that here. Once you have the device connected to a WiFi access point, you’re ready to start developing. Two decent-sized buttons, labeled A and B, on either side of the display change the display mode. Pressing the B button will cycle through all of the sensors and display the current readings.
All of Microsoft’s sample code uses Visual Studio Code as the development environment. The Getting Started document provides a step-by-step process to install VS Code and all other required tools. One of those tools is the Arduino IDE, which now is available from the Microsoft Store. You also need to install USB drivers for the board; they automatically recognize the device when you connect it to your computer. Once you have the Arduino IDE app available to run, you must configure support for the MXChip AZ3166 board. We had to refer to the FAQ to fix one issue where the board support package was not automatically loaded.
Get Coding
Microsoft has provided a number of sample applications to help you quickly get started with the MXChip Dev Kit board. We chose the Remote Monitoring project, which sends temperature and humidity information from the IoT Dev Kit device to an Azure IoT Hub solution. Figure 2 shows the Create solution page where you specify a unique name for your project and then connect to an existing Azure subscription account and region. Once that has been created you’re ready to build and upload your code to the device.
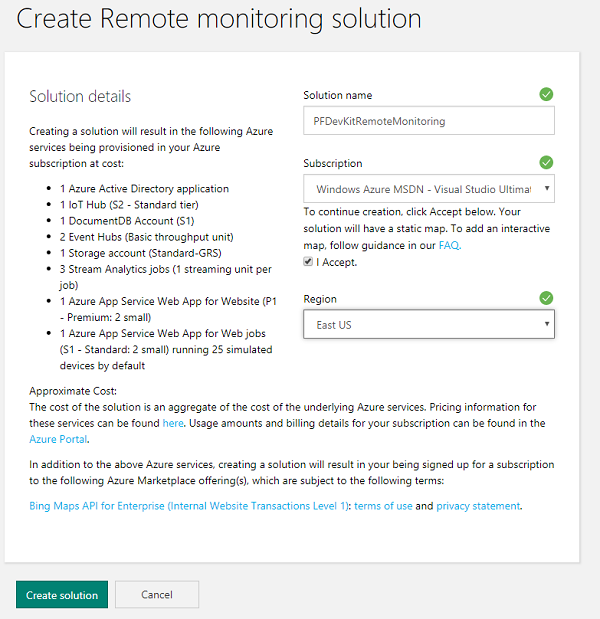
Figure 2: The Create solution page
Figure 3 shows the VS Code screen with the Remote Monitoring solution loaded. VS Code uses the Arduino IDE behind the scenes to compile and upload the code, and it supports the .ino file format for Arduino projects. The entire project is available on Microsoft’s GitHub Web page, including the step-by-step instructions.

Figure 3: The VS Code screen with the Remote Monitoring solution loaded
Figure 4 shows the terminal window of VS Code with the results of running the task device-upload command. This will compile the code and upload it to the IoT Dev Kit over USB. Make sure to put the device in configuration mode before starting the upload process by holding down the A key and pressing the reset button. Assuming everything works, you should start seeing values reported to your Azure IoT Hub solution pretty quickly. The Arduino C code blinks the blue Azure LED on the IoT Dev Kit board every time it sends data up to Azure. Figure 5 shows what the solution looks like displaying some of the sample data.
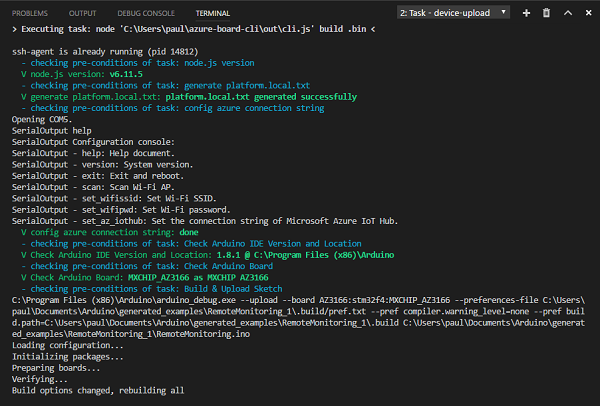
Figure 4: The terminal window of VS Code
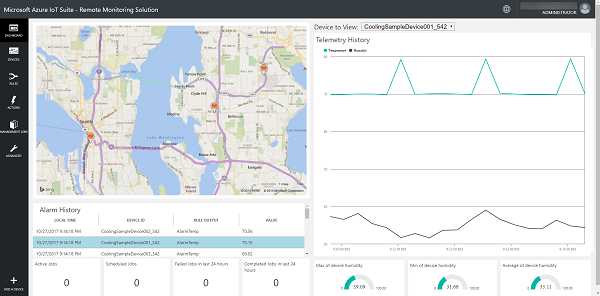
Figure 5: The finished solution, with sample data
Final Thoughts
This project provides a great way to get started with coding at both the IoT device level and the consumption and presentation layer in Azure. Microsoft offers other samples if you want to simply monitor and display data from your device. If you go to your Azure subscription portal and view all resources with the name of your project, you’ll see something like Figure 6.
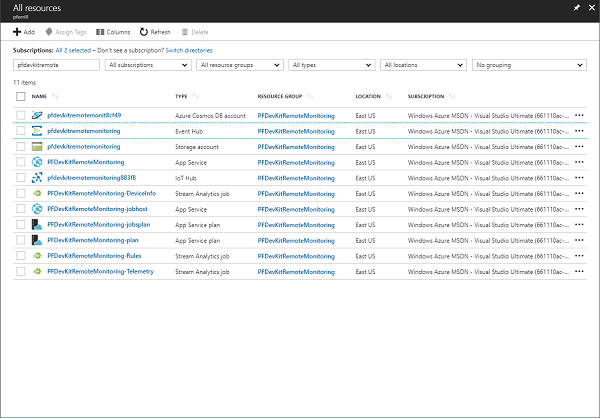
Figure 6: Project resources
You really can’t go wrong if you’re looking for an inexpensive way to get started with IoT development. For less than fifty bucks and a free Azure subscription, you can be on your way!