Introduction
Nowadays, you can’t escape the fact that mobile apps are here to stay and mobile apps are slowly but surely surpassing ordinary technology. I mean that, sooner or later, in any developer environment you will encounter mobile apps and the environments surrounding it. Today, I will demonstrate how to create a very basic mobile app using Devextreme and Visual Studio.
DevExpress
In case you have missed my earlier article about Devexpress, you can read it here: http://www.codeguru.com/cplusplus/devexpress-controls-in-visual-basic/.
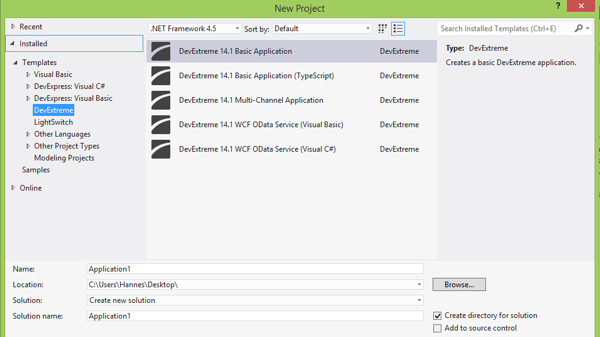
DevExtreme
Add a dxNumberBox to your page. If necessary, edit your code to resemble the next piece of code:
<div class="numberBox" data-bind="dxNumberBox: {
   min: 0,
   max: 100,
   showSpinButtons: true,
   step: 5,
   value: number
   }">
</div>
This adds a numberbox to your page. The properties I have set allow you set the number box’s limits: Minimum number is 0 and highest number is 100. It shows the up and down buttons, and steps 5. This means that every time the up or down button has been pressed, it will either increase or decrease the number with 5. The last property is the most interesting. Now, you have to realize that you put an object such as the numberbox on your page to obtain information from the user; you need some way to store and keep track of the selected number. This gets done with the number variable you will create now inside the js file:
number = ko.observable(0);
ko stands for knockout. Basically, you create a variable named number and with the use of the knockout engine it keeps track of the variable.
Add the following code to your design page to create a drop down list:
<div class="dx-fieldset">
   <div class="dx-field">
      <div class="dx-field-label">Employee</div>
      <div class="dx-field-value" data-bind="dxSelectBox: {
         dataSource: employees,
         displayExpr: 'name',
         valueExpr: 'id',
         value: id
      }"></div>
   </div>
   <div class="dx-field">
      <div class="dx-field-label">Employee ID</div>
      <div class="dx-field-value" data-bind="text: id"></div>
   </div>
</div>
And, to communicate with the Drop down, add the following to your js file:
id = ko.observable('1');
employees = [
   { id: 1, name: "Bob", hired: 2005 },
   { id: 2, name: "John", hired: 2007 },
   { id: 3, name: "Frank", hired: 2001 },
   { id: 4, name: "Robert", hired: 2007 },
   { id: 5, name: "Paul", hired: 2011 },
   { id: 6, name: "Elizabeth", hired: 2000 },
   { id: 7, name: "Mary", hired: 2002 },
   { id: 8, name: "Michael", hired: 2003 },
   { id: 9, name: "George", hired: 2002 },
   { id: 10, name: "Deborah", hired: 2000 },
   { id: 11, name: "Lisa", hired: 1999 },
   { id: 12, name: "Mark", hired: 2011 }
];
In the preceding two-step process, I first created the physical drop-down in code. I made use of the Field object so that it looks nicer as well as be a separate programmable entity. I set its datasource; this means where the data will come from. In our case, it is from the Employees JSON object I created in the bottom code segment. I specify its display member, which is the data that will be shown, and then its value member meaning once a value has been selected, which data should be sent for further processing; in this case, it is the id. So, when I click on Mark, I will in fact store the value 12.
Add the next code to your view:
<div class="dx-fieldset">
   <div class="dx-field">
      <div class="dx-field-label">Switch</div>
      <div class="dx-field-value" data-bind="dxSwitch:
         { value: switchState }"></div>
   </div>
   <div class="dx-field">
      <div class="dx-field-label">Value</div>
      <div class="dx-field-value" data-bind="text:
         switchState"></div>
   </div>
</div>
Add the following to your js file:
switchState = ko.observable(false);
With the previous two code segments, you create an object known as a Switch. It functions like a light switch (on/off). In the design, I set its value to the switchState object that gets created in the js file. I went a bit overboard here, and included a field that displays the current value of the switch component, and it basically just displays On or Off, whereas the physical component’s properties get set to On and Off as well.
The last two objects I want to mention are the Popup as well as the Button. Let’s add their code now:
<div class="button" data-bind="dxButton:{text:'Show popup',
   clickAction:showPopup}"></div>
<div data-bind="dxPopup:{ visible:popupVisible,
   fullScreen:true }">
   <div data-options="dxTemplate:{name: 'title'}">
      <p>Popup title is <b data-bind="text:
         popupTitle"></b></p>
      <p><span data-bind="dxCheckBox:
         { checked: buttonVisible }"></span>
         Show "Hide popup" button</p>
   </div>
   <div data-options="dxTemplate:{name: 'content'}">
      <div class="button" data-bind="dxButton:
         { text: 'Hide popup', clickAction: hidePopup,
         visible: buttonVisible }"></div>
      <p>The popup contents.</p>
   </div>
</div>
Before I add the last code segment making the above work, let me first explain what is happening here. I first created a button object with the caption of “Show Popup”. Once clicked, an event (that we still need to create) called showPopup will fire. The next line of code sets up the Popup window. It indicates that the Popup window should be visible and fill the screen; its title gets set depending on the checkbox inside of it. Lastly, another button is created that will eventually hide the popup window. Let’s add the necessary events now:
popupTitle = "My popup";
buttonVisible = ko.observable(true);
popupVisible = ko.observable(false);
showPopup = function () {
   popupVisible(true);
};
hidePopup = function () {
   popupVisible(false);
};
The popup window’s title gets defined, as well as the Boolean flags for showing and hiding the buttons and popup window. The showPopup method gets created and the hidePopup function gets created. Both of them simply toggle the Boolean values of the popupvisible object.
Conclusion
This was fun, hey? Yes, it is always nice having a little break from VB. I hope you have enjoyed today’s article and learned a great deal from it. Until next time, cheers!