

.NET Serialization to SQLite Database
Most non-enterprise applications need the capability to store data locally. Some need only simple storage for things such as settings, whereas others need a full SQL database capability for various needs. I have written many such applications over the years. Until I found SQLite, I had to use MS Access. On older computers, that meant installing MDAC (all of the ODBC/OLEDB drivers)—quite a large installer footprint. A happy day it was that I found out about SQLite. In case you don’t know about SQLite, it’s a complete SQL database in a single file, and it is very fast and efficient. But, it’s all written in C and therefore is not suitable to use from .NET. I therefore need a COM wrapper for it so to use it from the .NET languages. Fortunately, there is SQLitePlus from EzTools Software (www.eztools-software.com), an excellent choice for a SQLite wrapper; it has exceptional features for handling BLOB data and COM data types, and even encryption and compression.
This article explains three ways to serialize .NET objects to a SQLite database using SQLitePlus. They are:
- Whole object serialization
- Custom object serialization
- Normal database column/field level saving
The first two ways use a single binary database field (BLOB) to persist objects. The other way is to use customary database columns (such as FirstName, Age, and the like).
First, a bit of background on SQLitePlus. It consists of two DLLs. The first is the COM DLL, which provides the COM classes you use in your programs. They are the SqliteDb, Dataset, Columns, and Column classes. Using these COM class objects we can create new database files, execute SQL commands and get back result datasets. The other DLL is a “version DLL” that is a plain DLL (not COM) that encapsulates the SQLite database engine C code. The reason it is split into two DLLs is so that newer versions of the version DLL can be swapped in without changing the COM DLL. For example, when a new version of the SQLite engine is released, you only need to update the version DLL rather than both. Also, you can make custom builds of the version DLL, for example, to add your own User-Defined Functions. It’s quite a nifty system.
These DLLs are included in the source code Zip file, but you must register the COM DLL to run the projects (using RegSvr32.exe). A .cmd file is included that does this for you (click on runme.cmd).
Note: You also can download the SQLitePlus Database Manager from the EzTools web site. It is very useful for visualizing your data as you experiment with the SQLitePlus COM DLL in your code. Here is the download link: www.eztools-software.com/downloads/sqliteplus.exe.
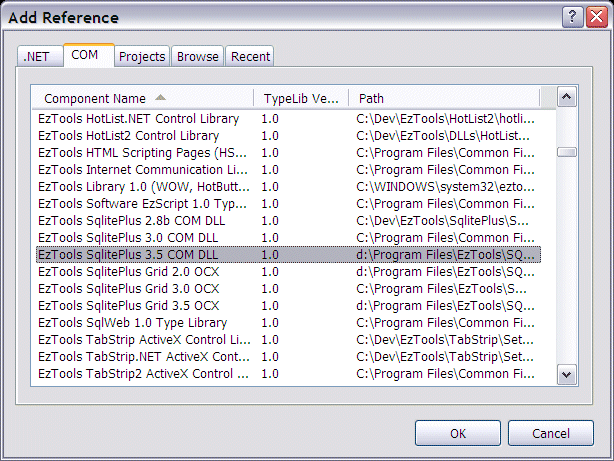
After you register the SQLitePlus COM DLL, you are ready to start by adding a reference to the SQLitePlus COM DLL in your project. In the “Add Reference” dialog, scroll down and find “EzTools SqlitePus 3.5 COM DLL”, as shown here:
Now, in MainFrm.cs, add this “using” statement near the top of the file:
using SQLITEPLUS35;
Now, you’re ready to add a SqliteDb member variable that you can use for your serialization functions. Add this line near the top of the class definition:
SqliteDb mDB = new SqliteDb();
Scroll down to the form’s Load event handler. Here, you find the SqliteDb initialization and database opening:
String sErr;
ErrorCodeEnum eErr;

mDB.Init( "sqlt3317.dll", "demo", null );
mDB.Open( Application.StartupPath + @"\sqlite.db", -1, false );
Notice that I have specified the version DLL name in the Init method call. If the version DLL is not in the same folder as the COM DLL, you also must specify its path. The second parameter is for the license key. Just use “demo” (you can use SQLitePlus with no license, but with a 10-row limit for dataset results).
The next line is the Open method call. This actually creates or opens the database file. The first time you run the project, the database file (sqlite.db) will be created. Thereafter, it will be opened.
Next, you create your database tables. I have created a helper function, TableExists, that checks the sqlite_master table for the table name. If it’s not there, you create the table.
Table Products1 is for BLOB serialization, so it has only the ID and BLOB Data column. Here is the table definition for Products1:
CREATE TABLE Products1(ID INTEGER PRIMARY KEY NOT NULL, Data BLOB)
Products2 is for field serialization, so it has individual fields for each data member. Here is the table definition:
CREATE TABLE Products2(ID INTEGER PRIMARY KEY NOT NULL,
                       Name TEXT NOT NULL,
                       QtyPerUnit TEXT NOT NULL,
                       Price FLOAT NOT NULL,
                       LastOrderDate DATE NOT NULL)
This sort of table definition will look familiar to most programmers. Its a one-to-one mapping of the Product object fields to the table columns (see below).
Now that you have your database connection and the tables created, you can create your example class named Product. You must give it the Serializable Attribute so that you can use .NET Serialization. You then declare the data members. You’ll add the serialization methods as you go. Here is the class definition with only the data members declared:
[System.Serializable]
public class Product
{
   public int mnID;
   public string msName,
                 msQtyPerUnit;
   public float mPrice;
   public DateTime mLastOrderDate;
}
I have deliberately declared members that use a few different data types to demonstrate how to use them with SQLitePlus. The members are public to simplify access, and consequently, code readability.
I create two Product objects in the code for your serialization purposes in CreateProducts.
void CreateProducts()
{
   mProduct1 = new Product();
   mProduct1.mnID = PROD_ID_1;
   mProduct1.mPrice = 97F;
   mProduct1.msName = "Mishi Kobe Niku";
   mProduct1.msQtyPerUnit = "18 - 500 g pkgs.";
   mProduct1.mLastOrderDate = DateTime.Today.AddDays( 90 );

   mProduct2 = new Product();
   mProduct2.mnID = PROD_ID_2;
   mProduct2.mPrice = 18F;
   mProduct2.msName = "Queso Cabrales";
   mProduct2.msQtyPerUnit = "1 kg pkg.";
   mProduct1.mLastOrderDate = DateTime.Today.AddDays( 120 );
}
Now, you are ready to serialize your data.
Serializing Whole Objects Using .NET Serialization
Your first serialization method is to use .NET serialization to persist whole objects to the database. Your table has only the ID and Data columns, the latter of which is defined as BLOB. You now will see how to save entire objects to this single column. Here is the code.
private void lnkSerializeWholeObject_LinkClicked( object sender,
   LinkLabelLinkClickedEventArgs e )
{
   // ensure we have an object
   CreateProducts();

   byte[] arData;

   using(MemoryStream stream = new MemoryStream())
   {
      BinaryFormatter formatter = new BinaryFormatter();
      formatter.Serialize( stream, mProduct1 );
      arData = stream.ToArray();
      stream.Close();
   }

   String sErr, sSql;
   ErrorCodeEnum eErr;
   SQLITEPLUS35.Dataset ds;
   object oKey = null;

   SQLITEPLUS35.VariantCollection paramsCol =
      new SQLITEPLUS35.VariantCollection();
   paramsCol.Add( arData, oKey );

   ds = mDB.Exec( "SELECT ID FROM Products1 WHERE ID=" + PROD_ID_1,
      null, out eErr, out sErr );

   if(ds.eof)
      sSql = String.Format( "INSERT INTO Products1 (ID, Data)
         VALUES({0}, ?)", PROD_ID_1);
   else
      sSql = String.Format( "UPDATE Products1 SET Data=?
         WHERE ID={0}", PROD_ID_1);

   mDB.Exec( sSql, paramsCol, out eErr, out sErr );
}
The first things you need are a MemoryStream and BinaryFormatter object. The latter is used to serialize your Product object into the former by using built-in .NET serialization. Then, you get the stream’s contents as a byte array with the arData = stream.ToArray() call.
So far, so good. You now are ready to save the byte array as a BLOB into the SQLite Products1 table. To do this, you need a SQLitePlus VariantCollection object, which is used to hold BLOB parameters. You call the Add method, giving a null key because we don’t care about ordering the collection in any way. It’s not obvious, but what happens here is that the byte array is converted to a COM SAFEARRAY by the COM InterOp runtime, which is exactly what you need to happen to insert or update a BLOB field.
Then, you must determine whether this is a new product or if it already exists in the database so that you can build the appropriate SQL statement. To do this, you attempt to retrieve just the ID column for the Product ID of interest. You then check the Dataset to see if it’s empty (eof). If it is, you build an INSERT statement. If not, you build an UPDATE statement.
Notice here the ? in the SQL statements. This is the parameter substitution mechanism for SQLite. The BLOB data will be substituted deep within the SQLite engine as the Data column value. SQLitePlus provides the high-level objects that give you the ability to store and retrieve binary data.
And of course, the last thing to do is execute the SQL statement with the SqliteDb.Exec method. You will note that the size of the byte array is 255 bytes.
Okay. you have successfully created a SQLite database and table, and serialized a .NET class object into a BLOB field. Now, look at how to re-create the same class object using .NET deserialization.