

Introduction to Silverlight 3.0
Microsoft’s Silverlight has already replaced Adobe’s Flash and become the technology of choice for designing and implementing the next generation of cross-browser, cross-platform Rich Internet Applications (RIAs). Formerly known as Windows Presentation Foundation / Everywhere (WPF/E), the Silverlight SDK provides a framework that you can use to develop rich media content and helps you to implement awesome graphics and animation seamlessly. This article takes a look at the new features in Silverlight 3.0 with special focus on its 3-D capabilities.
Pre-requisites
To execute the code examples shown in this article, you should have the following installed in your system:
Microsoft Visual Studio 2008 with Microsoft Visual Studio 2008 Beta 1 and Silverlight 3.0 SDK
Or
Microsoft Visual Studio 2010 RC
Silverlight 3.0 – What’s New?
What is Silverlight? Well, Silverlight is a cross-browser, cross-platform technology that you can use to create visually stunning user interfaces. Silverlight runs on top of the managed environment of Microsoft’s CLR and Silverlight applications can be hosted in the context of IIS or Apache web servers. Microsoft’s official Silverlight web site states, “Silverlight is a cross-browser, cross-platform and cross-device browser plug-in that helps companies design, develop and deliver applications and experiences on the Web. A free download that installs in seconds, Silverlight enables a new class of rich, secure and scalable cross-platform experiences”.
Reference: http://www.microsoft.com/silverlight/overview/default.aspx
Silverlight 3.0 was released in mid 2009 and provides a lot of new features and controls that can be used to improve developer productivity. It also includes 3-D and hardware graphics acceleration. You can now use Silverlight with Expression Blend to design and implement applications that have awesome user interfaces with ease. You can download a copy of Silverlight 3 here. If you have already installed a previous version of Silverlight in your system, you may be automatically upgraded to Silverlight 3.0.
Before we delve deep into programming 3-D with Silverlight, let’s have a quick tour of what’s new in Silverlight 3.0. The new features in Silverlight 3.0 include the following:
- Support for high quality video and audio
- Support for high quality 3-D graphics
- Enhanced Data Binding Support
- Improved Performance
- Improved support for designing RIAs
- Support for Out of Browser Experiences
To create a new Silverlight application in Microsoft Visual Studio 2010, you need to follow these steps:
- Open Microsoft Visual Studio 2010
- Click on File->New->Project
- Select Silverlight Application from the list of the project templates displayed
- Provide a name for the application and click OK
The following window would appear next.
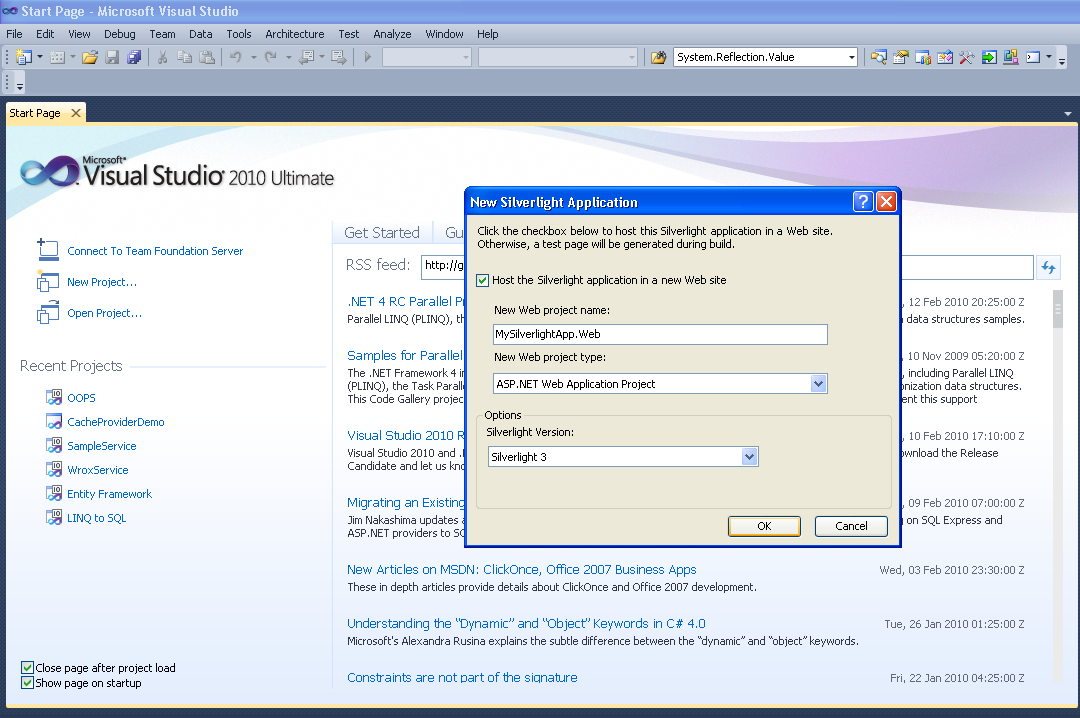
Figure 1
Refer to figure 1. You can now provide the web project name, web project type and choose the Silverlight version you would like to use. If the default values seem fine, click OK. And, you are done!
Working with 3-D Projections in Silverlight 3.0
Silverlight 3.0 provides an excellent support for using projections. You can use the Projection property in Silverlight 3.0 to set 3D projections for the Silverlight controls. The PlaneProjection property in Silverlight 3.0 can now be used to apply perspective 3D transformations. In essence, you can use this property to rotate a 2D control in a 3D plane. Here is an example:
<Image Source=”Joydip Kanjilal.JPG”>
        <Image.Projection>
            <PlaneProjection RotationZ=”45″></PlaneProjection>
        </Image.Projection>
</Image>
When you execute the above code, the output is as shown in the figure given below:
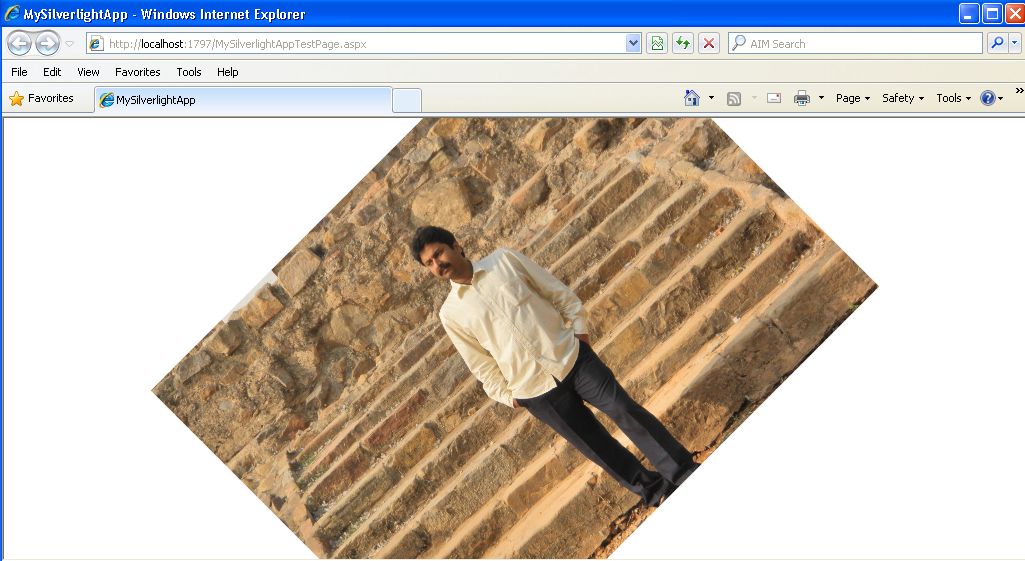
Figure 2
The following code snippet illustrates how you can rotate a line of text on a 3-D plane:
<Grid x_Name=”LayoutRoot” Height=”224″ Width=”558″>
        <Grid.ColumnDefinitions>
            <ColumnDefinition Width=”558*” />
            <ColumnDefinition Width=”0*” />
        </Grid.ColumnDefinitions>
        <StackPanel Margin=”60,60,60,60″
               Background=”BlanchedAlmond”>
            <StackPanel.Projection>
                <PlaneProjection RotationX=”-35″
                          RotationY=”-30″
                          RotationZ=”15″ />
            </StackPanel.Projection>
            <TextBlock Margin=”10″ FontFamily=”Arial” FontSize=”20″ Width=”370″ Height=”80″>This is a sample text to illustrate rotation</TextBlock>
        </StackPanel>
</Grid>
Here is how the output looks when the above code snippet is executed:
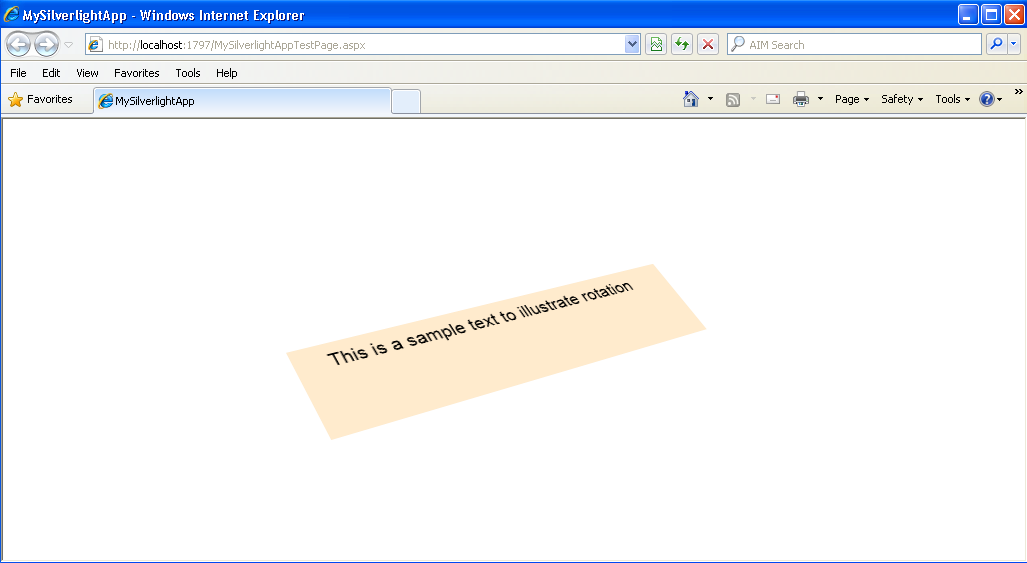
Figure 3
The following code snippet illustrates how you can set 3D projection for a StackPanel control in Silverlight:
<StackPanel Margin=”20″>
            <StackPanel.Projection>
                <PlaneProjection RotationX=”-30″ RotationZ=”20″/>
            </StackPanel.Projection>
            <TextBlock Text=”First Name:”/>
            <TextBox />
            <TextBlock Text=”Last Name:”/>
            <TextBox />
            <TextBlock Text=”Address:”/>
            <TextBox />
            <TextBlock Text=”Phone:”/>
            <TextBox />
</StackPanel>
The figure given below shows what the output looks like:
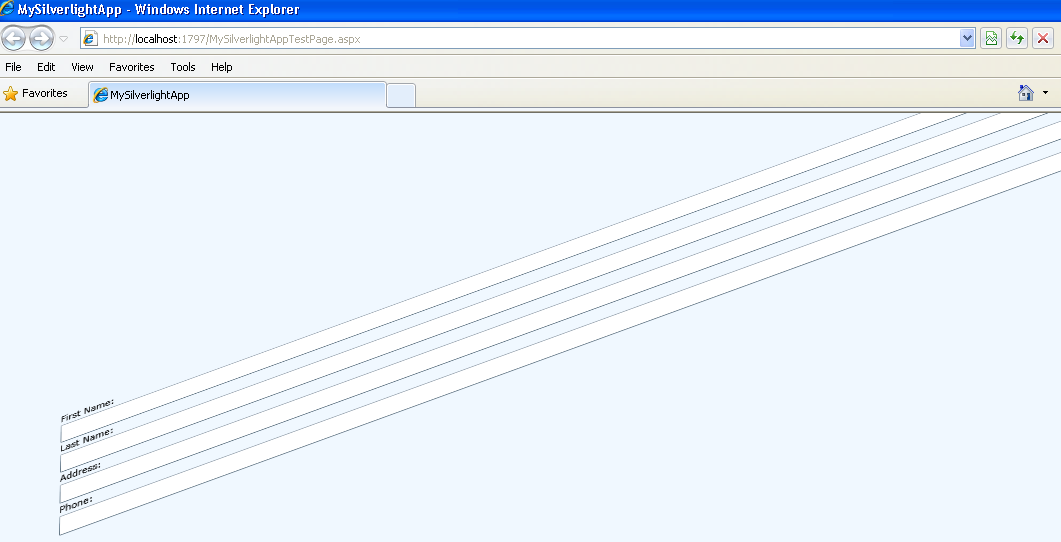
Figure 4
Notice the usage of the RotationX and RotationZ attributes. While the former is used to rotate the StackPanel control based on the X axis, the later is used to rotate the StackPanel control based on the Z axis.
Similarly, you can use projections to rotate a Button control as shown in the code snippet below:
<Grid x_Name=”LayoutRoot” Background=”AliceBlue”>
        <Button Content=”This is a sample button control” Height=”50″ Width=”200″>
            <Button.Projection>
                <PlaneProjection RotationY=”30″
             RotationZ=”30″/>
            </Button.Projection>
        </Button>
</Grid>
The following figure illustrates what the output looks like when the above code snippet is executed:
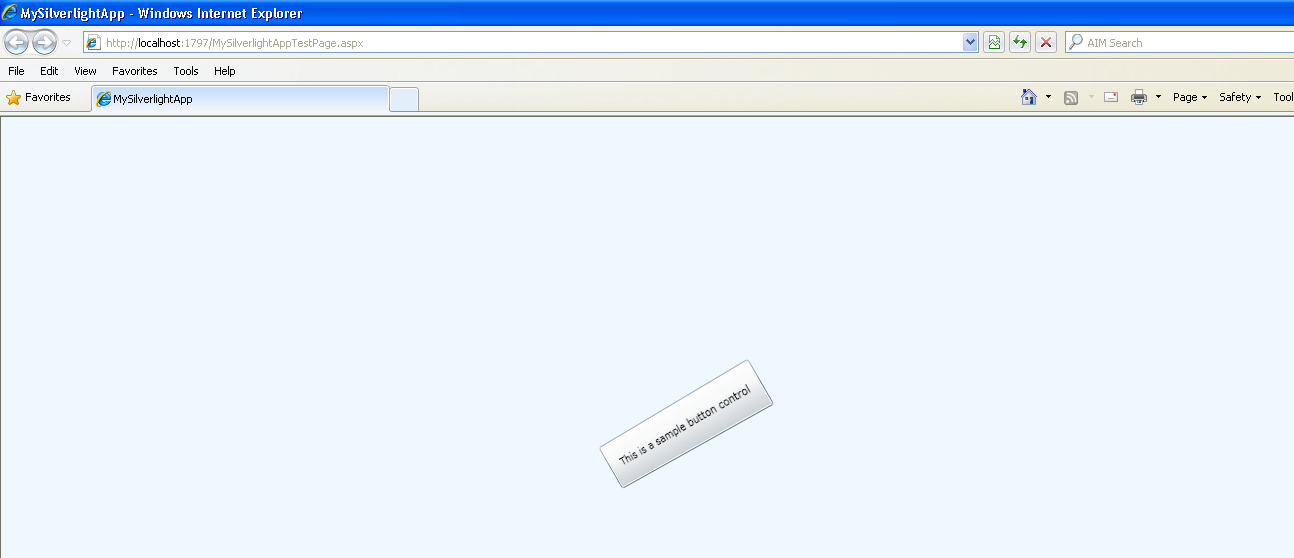
Figure 5
The following code snippet illustrates how you can rotate a Canvas and the controls contained inside it using projections:
<Canvas x_Name=”MyCanvas” Width=”500″ Height=”300″ Canvas.Left=”146″ Canvas.Top=”140″ Margin=”0,0,0,0″ Background=”Bisque”>
        <Canvas.Projection>
            <PlaneProjection RotationX=”45″/>
        </Canvas.Projection>
        <TextBox Canvas.Left=”119″ Canvas.Top=”43″ Width=”195″ />
        <TextBox Canvas.Left=”119″ Canvas.Top=”79″ Width=”194″ />
        <TextBox Canvas.Left=”119″ Canvas.Top=”117″ Width=”329″ />
        <TextBox Canvas.Left=”119″ Canvas.Top=”152″ Width=”147″ />
        <TextBlock Text=”Phone:” Canvas.Left=”39″ Canvas.Top=”159″ />
        <TextBlock Text=”Address:” Canvas.Left=”39″ Canvas.Top=”119″ />
        <TextBlock Text=”Last Name:” Canvas.Left=”39″ Canvas.Top=”80″ />
        <TextBlock Text=”First Name:” Canvas.Left=”39″ Canvas.Top=”42″ />
        <Button Content=”Submit” Height=”20″ Width=”80″ Canvas.Left=”120″ Canvas.Top=”192″>
        </Button>
</Canvas>
When you execute the above code, here’s what the output looks like:
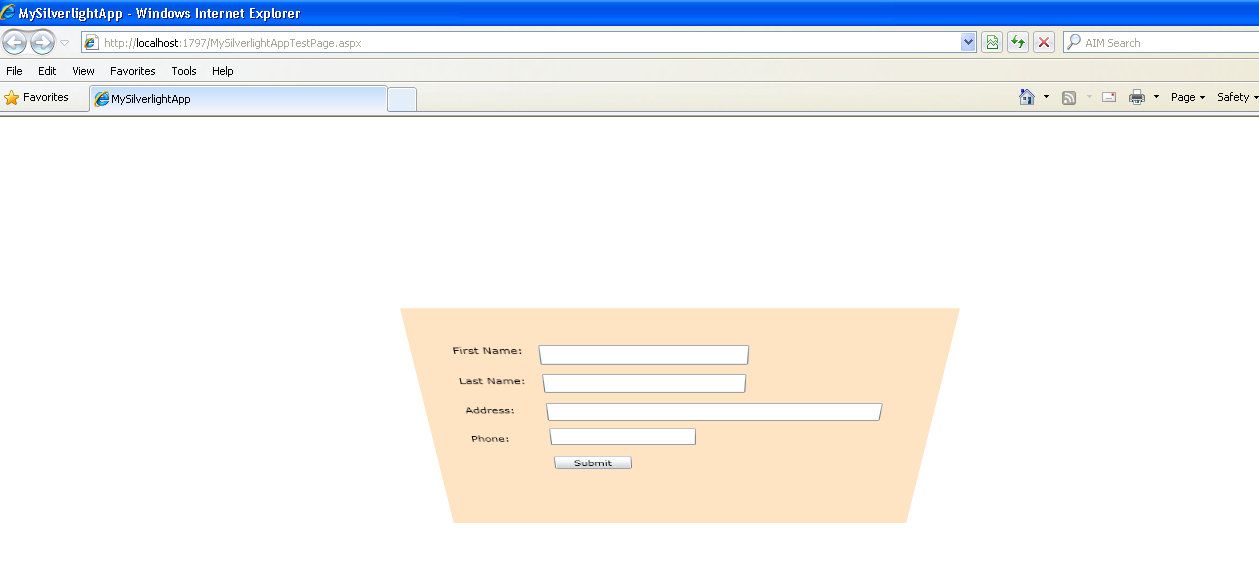
Figure 6
To rotate the Canvas in the Z-axis, you can use this code:
 <Canvas x_Name=”MyCanvas” Width=”500″ Height=”300″ Canvas.Left=”146″ Canvas.Top=”140″ Margin=”0,0,0,0″ Background=”Bisque”>
        <Canvas.Projection>
            <PlaneProjection RotationZ=”-30″/>
        </Canvas.Projection>
        <TextBox Canvas.Left=”119″ Canvas.Top=”43″ Width=”195″ />
        <TextBox Canvas.Left=”119″ Canvas.Top=”79″ Width=”194″ />
        <TextBox Canvas.Left=”119″ Canvas.Top=”117″ Width=”329″ />
        <TextBox Canvas.Left=”119″ Canvas.Top=”152″ Width=”147″ />
        <TextBlock Text=”Phone:” Canvas.Left=”39″ Canvas.Top=”159″ />
        <TextBlock Text=”Address:” Canvas.Left=”39″ Canvas.Top=”119″ />
        <TextBlock Text=”Last Name:” Canvas.Left=”39″ Canvas.Top=”80″ />
        <TextBlock Text=”First Name:” Canvas.Left=”39″ Canvas.Top=”42″ />
        <Button Content=”Submit” Height=”20″ Width=”80″ Canvas.Left=”120″ Canvas.Top=”192″>
        </Button>
</Canvas>
Working with Animations in Silverlight 3.0
Silverlight 3.0 provides excellent support for animating controls and texts. You can use the PlaneProjection object to create animations in Silverlight. Then you can easily animate any of the properties of this object. The following code listing illustrates how you can animate a text block in Silverlight 3.0:
<UserControl x_Class=”MySilverlightApp.MainPage”

    xmlns:x=”http://schemas.microsoft.com/winfx/2006/xaml”
    xmlns:d=”http://schemas.microsoft.com/expression/blend/2008″
    xmlns:mc=”http://schemas.openxmlformats.org/markup-compatibility/2006″
    mc:Ignorable=”d”>
    <Grid x_Name=”LayoutRoot” Width=”845″>
        <Grid.ColumnDefinitions>
            <ColumnDefinition Width=”*” />
            <ColumnDefinition Width=”*” />
        </Grid.ColumnDefinitions>
        <Canvas Height=”100″
                VerticalAlignment=”Center” Grid.ColumnSpan=”2″ Margin=”45,14,-341,-10″>
            <TextBlock Text=”Text Animation in Silverlight” Foreground=”Chocolate”
                       FontFamily=”Lucida Sans Unicode”
                       FontSize=”48″ Canvas.Left=”25″ Canvas.Top=”15″ Width=”765″ Height=”64″>
                <TextBlock.Projection>
                    <PlaneProjection
                        x:Name=”xProjection”
                        CenterOfRotationX=”0″ />
                </TextBlock.Projection>
            </TextBlock>
        </Canvas>
    </Grid>
    <UserControl.Triggers>
        <EventTrigger>
            <BeginStoryboard>
                <Storyboard>
                    <DoubleAnimation
                        Storyboard.TargetName=”xProjection”
                        Storyboard.TargetProperty=”RotationY”
                        From=”-90″ To=”270″
                        Duration=”0:0:45″
                        RepeatBehavior=”Forever” />
                </Storyboard>
            </BeginStoryboard>
        </EventTrigger>
    </UserControl.Triggers>
</UserControl>
When you execute the code listing shown above, the output is similar to what is illustrated in the figure below:
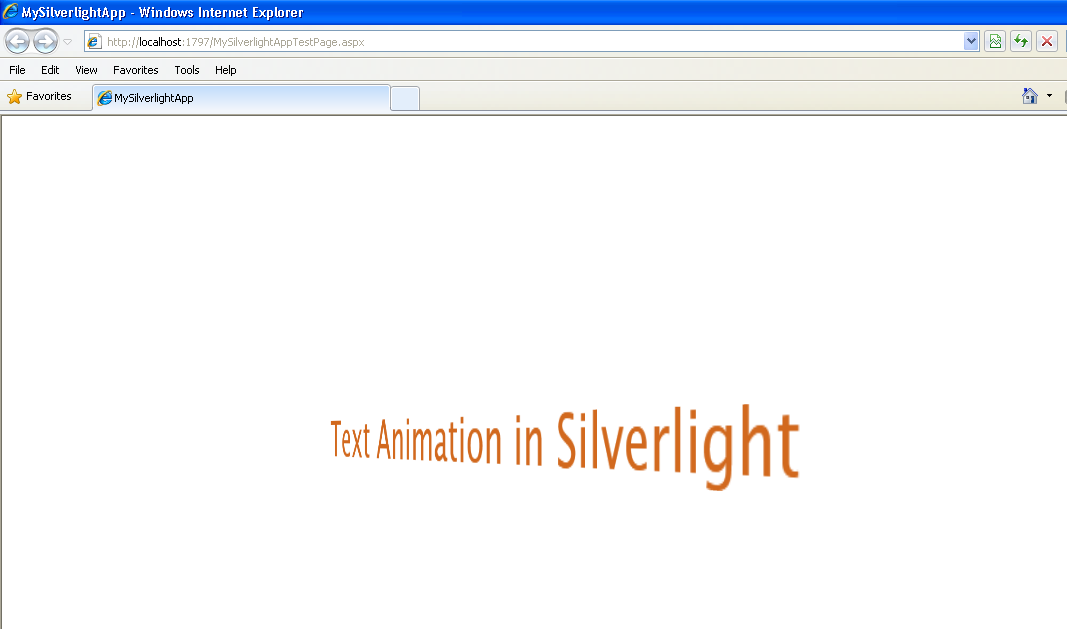
Figure 7
Summary
The Wikipedia states: “Microsoft Silverlight is a web application framework that provides functionalities similar to those in Adobe Flash, integrating multimedia, graphics, animations and interactivity into a single runtime environment. Initially released as a video streaming plug-in, later versions brought additional interactivity features and support for .NET languages and development tools. The current version, 3.0, was released on July 9, 2009.” Reference: http://en.wikipedia.org/wiki/Microsoft_Silverlight
This article presented the new features in Silverlight 3.0 and its 3-D capabilities and how to make use of them in applications. Happy reading!
Resources
Here are a few good resources on this topic for further study
http://silverlight.net/getstarted/silverlight3/
http://en.wikipedia.org/wiki/Microsoft_Silverlight
http://www.smashingmagazine.com/2009/05/09/flash-vs-silverlight-what-suits-your-needs-best/
http://blogs.silverlight.net/blogs/msnow/